9 best hobby train tracks
Hobby train tracks, often referred to as model railroad or model railway tracks, are an integral part of a popular hobby that involves creating miniature replicas of real train systems. These hobby train tracks are used for various scales and purposes, and enthusiasts can build intricate layouts to mimic real-world railroads, landscapes, and settings.Here is some information about hobby train tracks:
Scales: Model train tracks come in various scales, which represent the ratio of the model to the real-world train. Some common scales include HO (1:87.1), N (1:160), O (1:48), and G (1:22.5). The choice of scale depends on personal preference, available space, and the level of detail desired.
Track Types: There are different track types, including:
- Straight Tracks: Used for creating the mainline and straight sections of the layout.
- Curved Tracks: Essential for making turns and curves in the layout.
- Switches (Turnouts): These allow trains to switch between multiple tracks, providing flexibility in designing the layout.
- Flex Tracks: These can be bent to create custom curves and shapes.
- Specialty Tracks: Such as inclines, bridges, and tunnels, add realism and diversity to the layout.
Materials: Hobby train tracks are usually made of metal or plastic. Metal tracks, often nickel-silver, are known for their durability and conductivity, while plastic tracks are more affordable and come in a variety of colors.
Power and Control: Electric model trains are typically powered through the tracks. The power is supplied through the tracks, and control systems such as Digital Command Control (DCC) enable enthusiasts to control multiple trains independently on the same layout.
Accessories: Model train enthusiasts often incorporate various accessories to enhance the realism of their layouts, including:
- Scenery: Miniature trees, buildings, roads, and landscapes to create lifelike settings.
- Signals and Signs: For indicating train movement and providing a realistic touch.
- Lighting: To illuminate the layout and simulate day and night scenes.
- Figures: Tiny figurines and vehicles to populate the scene.
Hobby Communities: Hobbyists often join local clubs or online communities to share ideas, learn new techniques, and showcase their layouts. These communities are valuable for connecting with like-minded individuals.
Collecting and Customization: Some model railroaders enjoy collecting rare or vintage trains and accessories, while others take pleasure in customizing their trains and scenery to create unique layouts.
Historical Accuracy: Many enthusiasts strive for historical accuracy, modeling specific eras or locations to depict realistic scenes from the past.
Maintenance: Hobbyists need to maintain their tracks, clean the rails regularly, and ensure proper electrical connections to keep their trains running smoothly.
Hobby train tracks provide a creative and rewarding way to explore the world of railroads and express one's passion for trains, engineering, and craftsmanship. Whether you're a novice or an experienced model railroader, the possibilities are endless for creating your dream miniature railroad world.
Below you can find our editor's choice of the best hobby train tracks on the market
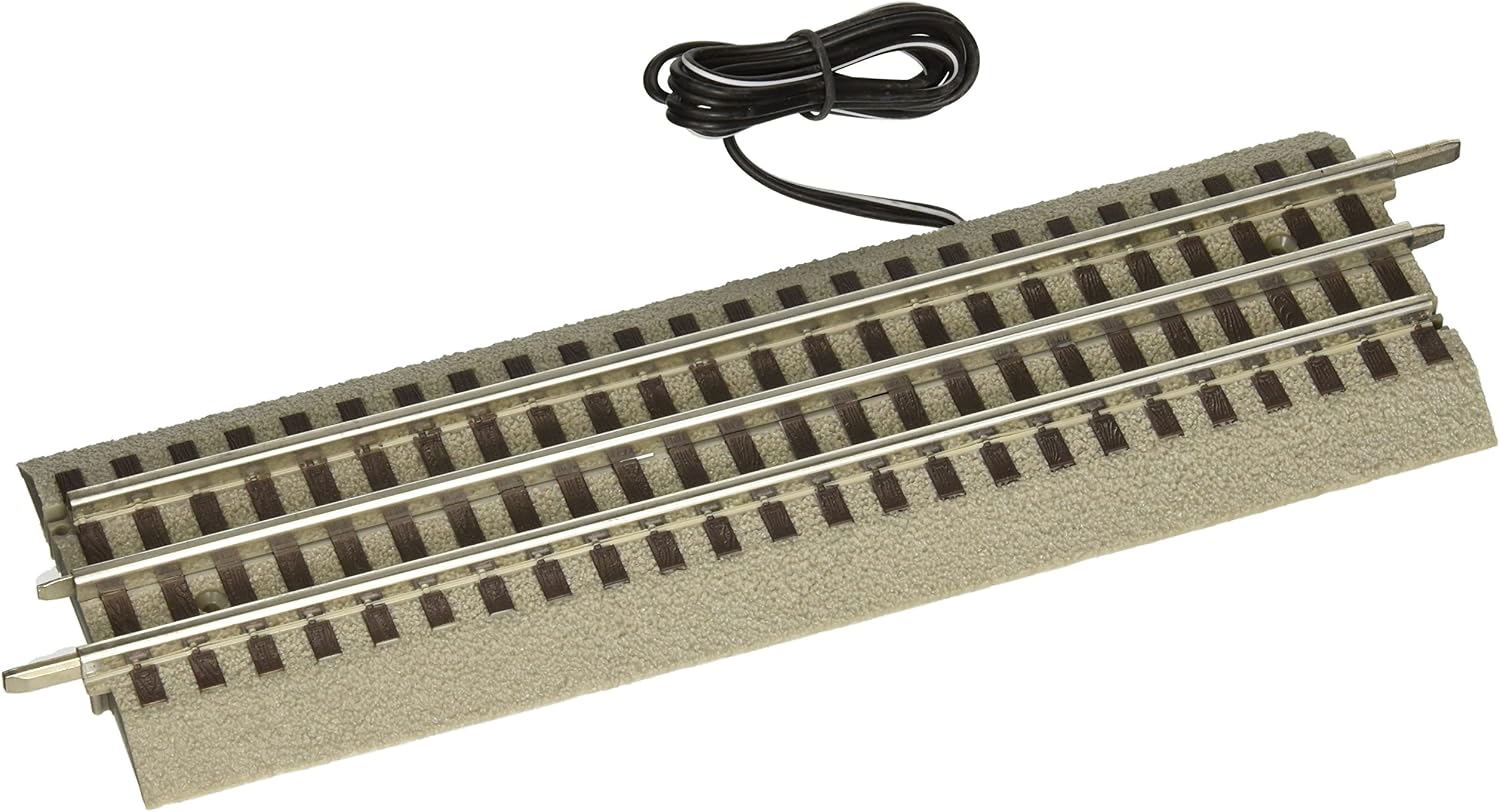
Bachmann Trains - Snap-Fit E-Z TRACK 9" POWER TERMINAL w/INSULATED GAP (2/card) - NICKEL SILVER Rail With Gray Roadbed - HO Scale
Bachmann Trains
Product description
Snap-Fit E-Z TRACK 9" POWER TERMINAL w/INSULATED GAP (2/card) - NICKEL SILVER Rail With Gray Roadbed - HO Scale. Bachmann's exclusive E-Z Track system makes set-up quick, easy and fun. E-Z Track is designed to Snap Together and Stay Together on Floors, Tables and Carpets. This product features Nickel Silver Rail with Gray Roadbed.
From the Manufacturer
Bachmann's exclusive E-Z Track system makes set-up quick, easy and fun. Nickel Silver Rail. Gray Roadbed. E-Z Track System --Snaps Together, Stays Together on Floors, Tables and Carpets.
- E-Z Track System - Snaps Together, Stays Together on Floors, Tables & Carpets
- Set Up is Quick, Easy and Fun - No Nails, Screws, or Special Tools Needed
- Nickel Silver Rail with Gray Roadbed, Designed to Provide Excellent Conductivity and Durability
- HO Scale 1:87 - Modeled From AAR Track Engineering Dimensions
- Easy to Use For Both Temporary and Permanent Train Layouts
User questions & answers
| Question: | What do i need for a simple point to point reverse track? Anything in addition to two of these track pieces |
| Answer: | That’s all you need |
| Question: | Can you use these to connect track feeder wire on a DCC layout |
| Answer: | I bought these three years ago, before deciding to go prototype, and use On30 track for On30 narrow gauge. Looking at this Snap-Fit track, I can see something they should have shown you in the offering - that there are electrical connections on the bottom (as opposed to other Bachmann Snap-Fit track that have visible terminals) that fit the Bachmann terminal connections. You can isolate sections of track using these sections, allowing reversing loops. All this explains the high price for two sections of track. I seem to remember these came with terminal wires. With 4 "No"s and 1 "Yes" I would order one or two Bachmann feeder wires to fit. |
| Question: | Is this all I need to put in a frog or would I need the reverse loop module as well |
| Answer: | Yes. 10 pieces of 36" track. |
| Question: | Does this idem come with wire |
| Answer: | Took a few weeks to get it this time because of COVID, but the first time we got it, it came fast |
| Question: | Is this 10 sections of |
| Answer: | There is some rebound. It does not flex back into its original straight form. It also does not stay molded to the desired position. You have to use track nails to hold it in place. |
| Question: | How long does it take to get the product |
| Answer: | It's very simple. After unpacking, take out the arena, install the top on the gun, pull the rope, and launch it. If your child is younger than 8 years old, you need to accompany you to play. |
| Question: | Does your flex track stay in place when it is flexed or does it rebound |
| Answer: | No, it 's not there name, but you can name it. |
Product features
Discover Everything Bachmann Trains Offers to Get Started in Model Railroading
Since 1833, Bachmann has been known for providing innovative design at a good value. We are now one of the world's largest distributor, by volume, of ready-to-run train sets, locomotives, track, and accessories. Bachmann is also the only train company to offer products in all five of the most popular scales: N, HO, On30, O, and Large Scale.
As a distributor of beloved Thomas & Friends products, Bachmann brings the adventures of Thomas the Tank Engine to life with a growing line of complete train sets, separate sale items, and accessories for children from 8 to 80-just add your imagination. Thomas & Friends is available in both HO and Large Scale.
Bachmann's exclusive snap-together E-Z Track System makes track setup quick, easy, and fun. Plasticville U.S.A. and SceneScapes buildings and accessories let you add the finishing touches for the perfect layout.
If You Are Purchasing a Train Set, It Will Include
- Locomotive
- Cars (Rolling Stock)
- E-Z Track – available in either black roadbed with steel alloy rail or gray roadbed with nickel silver rail
- Terminal/Rerailer
- Terminal Wire
- Speed Controller
- Power Supply
- List of Components
Track Assembly
- Decide where to set up your train – a dry, firm, flat surface works best!
- To make sure you have enough working room, make a test track layout by loosely placing track in desired configuration.
- The terminal/rerailer section will later be connected to a power pack and power supply, so place it near an outlet or power strip.
- Install under-track magnet, if your set comes with one. If your set does not come with one, magnets are available separately (HO Item No. 78999; N Scale Item No. 78998).
- Assemble the track by pushing together. Make sure the rail and joiners are seated properly. Be careful that the rail joiners do not slip under the rail without properly connecting. This can cause train derailments and electrical circuit interruptions.
- After track is assembled, double-check for joint connection and fit by lightly running your fingers over the top of the rails in both directions.
- If you detect bumps or distortion on the track surface, recheck the rail joiner fit.
Power Connections
- Power supply and speed control are plug and play; no tools are needed.
- Power is supplied to the track and the locomotive by the power supply, speed controller, terminal wire, and E-Z Track terminal/rerailer.
- First – turn knob on the speed controller counterclockwise until it stops (all the way to the left).
- Next – attach terminal wire to the speed controller by plugging it in where it says 'To Track'.
- Then – plug terminal wire into the E-Z Track terminal rerailer. Firmly push connector onto the track terminals.
- Finally – plug the connecting wire from the power supply into jack on the speed controller labeled 'IN'. Then plug power supply into a live wall outlet.
- Some sets may come with a speed controller with two push button connectors. These are used to supply AC power to accessories.
- To make positive and secure connections to these, push in buttons and insert each of the bare ends of the connection wire from your accessory.
- The speed controller is capable of powering one accessory at a time.
Putting the Train on the Track
- Put the locomotive on the track and run the wheels back and forth over the terminal rerailer track.
- When the wheels glide smoothly over the track, you know the wheels are all on the track. If your set comes with a tender, attach it to the locomotive.
- Add the rest of the cars that come with your set by placing them on the track and running them back and forth over the terminal rerailer until they glide smoothly. Then gently push the cars together – they will engage automatically.
- Do not try to connect cars when positioned over an under-track magnet.
How to Use E-Z Mate Couplers (HO and On30 Scale)
- Your set may be equipped with E-Z Mate magnetically operated knuckle couplers that let you perform real railroad switching and yard operations.
- Coupling two cars with E-Z Mate couplers is as easy as pushing them together when they are not over an under-track magnet.
- Uncoupling occurs only when over an under-track magnet and when there is no tension between the cars.
- To uncouple E-Z Mate couplers, stop two couplers directly over the under-track magnet. With no tension between the cars, the couplers will open automatically.
- If cars will not couple, check to be sure cars are not positioned over the uncoupling magnet or parked on a curve.
- If cars will not uncouple, check to be sure the couplers are positioned directly adjacent to the magnet position indicator and that the indicator is placed in line with the center line of the under-track magnet.
- Check that the magnet is secured to the underside of the track and fitted with the steel plate provided.
How to Run Your Train
- Turn the knob on the speed controller clockwise until it stops (all the way to the left).
- Plug in the power supply.
- Begin feeding power to the track by slowly turning the knob on the speed controller clockwise.
- Observe the direction of your train.
- If it moves backwards when the controls indicate forward, stop the train.
- Then simply disconnect, flip, and reconnect the terminal wire to the terminal rerailer track.
- Remember – never leave your train running unattended!
Action Checklist (Troubleshooting If Your Train Doesn’t Run or Stops Running)
- Is the power supply plugged in to a live receptacle?
- Are the wheels on the track?
- Is the wiring secure?
- Is the track properly assembled?
- Is the track properly seated in the rail joiner?
- If your train stops or fails to start, a short circuit may be indicated. If this is the case, Unplug the power Supply immediately.
- Common reasons for a short circuit: derailed wheels may cause a short. Check to make sure all wheels are on the track. Also check all connections and make sure there is no metal of any sort across the rails.
- After checking everything carefully, resume operation.
- Please note, your power supply is protected by a circuit breaker that automatically resets after a short circuit is corrected.
- Allow up to 5 minutes for the circuit breaker to reset before resuming operation.
Keep Your Train in Top Operating Condition
- Works better after couple hours of break-in time.
- Train performs best under clean operating conditions.
- Clean wheels and a clean track ensure good electrical contact.
- After about every 8 hours of operation, wipe the track rails and exposed wheels with a soft, lint-free cloth.
- Removal of black residue is normal.
- Do Not Use Steel Wool To Clean Your Track.
- Do not use common solvents, they may damage plastics - use track cleaner.
- After 24 hours of use, light lubrication is required to keep train in top operating condition.
- Do Not Use Common Household Lubricants As They May Damage Your Trains. Bachmann E-Z Lube or other hobby-grade lubricants are recommended.
Bachmann hopes you enjoy your train for many years to come!
Lionel FasTrack Electric O Gauge, Accessory Activator Pack
Lionel
Product description
Offering innovation, variety, ease-of-use, and a fantastic prototypical look, the FasTrack track system brings your Lionel layout to life like never before. Its flawless performance and endless flexibility make it appealing to first-timers and seasoned pros alike.
- Includes one 10 Insulated section and two 5 Isolated sections
- Offers greater flexibility in designing your layout
- Easy, snap-together locking mechanism for sure connections
- Patented center half-pin allows for track orientation in either direction without the need for moving pins from one end to the next
- Two terminal sections under each piece of straight track for transformer and/or accessory power connections no Lockons required
User questions & answers
| Question: | Does this power the train? What kind of connectors does it have on wires? Picture doesn’t show. I need the forked end connectors for transformer |
| Answer: | It’s always the obvious; check connections under track, look for kinks or damage to wire, follow to transformer and check connections, and last - double check the 5” track (with little break in the line) that is on each side of your signal crossing for debree or anything that is making the track power an accessory power (all 3 rails) constant hot. if you have access to a digital meter tool, it will help you pinpoint the short quickly. Hope this helps!!! |
| Question: | Will this work with mth crossings or will i need something else |
| Answer: | It’s O gauge track for sure. I believe just the center 10” track has the wires to power the accessory, and the two 5” sections that come with it don’t have wire (just regular track sections). |
| Question: | I purchased one of these to operate a single crossing gate and worked OK, but now a short devoloped which kills the layout. any ideas |
| Answer: | I only purchased this because I was having power problems on a large set up and thought this would be the answer. I figured it out not needing this item although I tried it. I couldn’t figure it out tbh. I think it comes with all you need but if I recall the wiring was tricky. Just didn’t think it was a great item unless you absolutely are very good at DIY |
| Question: | Does each piece come with wires attached? Is this O gauge track? Thanks |
| Answer: | Yes you can connect feeder wires, there’s two sets of terminal connectors underneath at the gap if you’re installing a reversing circuit movable connectors to bridge the gaps if you’re installing feeders |
Product features
Lionel FasTrack Electric O Gauge, Accessory Activator Pack
Fastrack Accessory Activator Pack. Includes one Insulated section and two Isolated Sections.
- Pack includes:
- One 10" Insulated Section
- Two 5" Isolated Sections
Product Specifications:
- Gauge: O Gauge

Bachmann Trains - Snap-Fit E-Z TRACK 11.25” RADIUS CURVED TRACK (6/card) - NICKEL SILVER Rail With Grey Roadbed - N Scale
Bachmann Trains
Product description
Bachmann's exclusive E-Z Track system makes set-up quick, easy and fun.
- Nickel silver rail with Gray roadbed
- Customize your layout
- Our highest quality rail
- Simple assembly
- Highly detailed
User questions & answers
| Question: | Are they the same curves in the stallion set |
| Answer: | The answer of 8 pieces was wrong. These are 30 degree curve sections. In other words, it takes three of these to change your train's direction 90 degrees, six to go 180, and 12 to make a full circle, 360 degrees. To make an oval, you would need 12 of these curve pieces, plus 2 or 4 or 6 (whatever) straight pieces, so it is inded an oval and not a perfect circle. Hope this helps. |
| Question: | Is it compatible with Kato |
| Answer: | It is possible, but not recommended. |
| Question: | how many needed to make an oval |
| Answer: | it had no end on the wire i just bared the end of the wire and tightened the nuts.if u need forked ends u can get them and crimp them on |
| Question: | Do the tracks come off the plastic underneath |
| Answer: | No it will not connect directly to MTH track. |
Product features
Discover Everything Bachmann Trains Offers to Get Started in Model Railroading
Since 1833, Bachmann has been known for providing innovative design at a good value. We are now one of the world's largest distributor, by volume, of ready-to-run train sets, locomotives, track, and accessories. Bachmann is also the only train company to offer products in all five of the most popular scales: N, HO, On30, O, and Large Scale.
As a distributor of beloved Thomas & Friends products, Bachmann brings the adventures of Thomas the Tank Engine to life with a growing line of complete train sets, separate sale items, and accessories for children from 8 to 80-just add your imagination. Thomas & Friends is available in both HO and Large Scale.
Bachmann's exclusive snap-together E-Z Track System makes track setup quick, easy, and fun. Plasticville U.S.A. and SceneScapes buildings and accessories let you add the finishing touches for the perfect layout.
If You Are Purchasing a Train Set, It Will Include
- Locomotive
- Cars (Rolling Stock)
- E-Z Track – available in either black roadbed with steel alloy rail or gray roadbed with nickel silver rail
- Terminal/Rerailer
- Terminal Wire
- Speed Controller
- Power Supply
- List of Components
Track Assembly
- Decide where to set up your train – a dry, firm, flat surface works best!
- To make sure you have enough working room, make a test track layout by loosely placing track in desired configuration.
- The terminal/rerailer section will later be connected to a power pack and power supply, so place it near an outlet or power strip.
- Install under-track magnet, if your set comes with one. If your set does not come with one, magnets are available separately (HO Item No. 78999; N Scale Item No. 78998).
- Assemble the track by pushing together. Make sure the rail and joiners are seated properly. Be careful that the rail joiners do not slip under the rail without properly connecting. This can cause train derailments and electrical circuit interruptions.
- After track is assembled, double-check for joint connection and fit by lightly running your fingers over the top of the rails in both directions.
- If you detect bumps or distortion on the track surface, recheck the rail joiner fit.
Power Connections
- Power supply and speed control are plug and play; no tools are needed.
- Power is supplied to the track and the locomotive by the power supply, speed controller, terminal wire, and E-Z Track terminal/rerailer.
- First – turn knob on the speed controller counterclockwise until it stops (all the way to the left).
- Next – attach terminal wire to the speed controller by plugging it in where it says 'To Track'.
- Then – plug terminal wire into the E-Z Track terminal rerailer. Firmly push connector onto the track terminals.
- Finally – plug the connecting wire from the power supply into jack on the speed controller labeled 'In'. Then plug power supply into a live wall outlet.
- Some sets may come with a speed controller with two push button connectors. These are used to supply AC power to accessories.
- To make positive and secure connections to these, push in buttons and insert each of the bare ends of the connection wire from your accessory.
- The speed controller is capable of powering one accessory at a time.
Putting the Train on the Track
- Put the locomotive on the track and run the wheels back and forth over the terminal rerailer track.
- When the wheels glide smoothly over the track, you know the wheels are all on the track. If your set comes with a tender, attach it to the locomotive.
- Add the rest of the cars that come with your set by placing them on the track and running them back and forth over the terminal rerailer until they glide smoothly. Then gently push the cars together – they will engage automatically.
- Do not try to connect cars when positioned over an under-track magnet.
How to Use E-Z Mate Couplers (HO and On30 Scale)
- Your set may be equipped with E-Z Mate magnetically operated knuckle couplers that let you perform real railroad switching and yard operations.
- Coupling two cars with E-Z Mate couplers is as easy as pushing them together when they are not over an under-track magnet.
- Uncoupling occurs only when over an under-track magnet and when there is no tension between the cars.
- To uncouple E-Z Mate couplers, stop two couplers directly over the under-track magnet. With no tension between the cars, the couplers will open automatically.
- If cars will not couple, check to be sure cars are not positioned over the uncoupling magnet or parked on a curve.
- If cars will not uncouple, check to be sure the couplers are positioned directly adjacent to the magnet position indicator and that the indicator is placed in line with the center line of the under-track magnet.
- Check that the magnet is secured to the underside of the track and fitted with the steel plate provided.
How to Run Your Train
- Turn the knob on the speed controller clockwise until it stops (all the way to the left).
- Plug in the power supply.
- Begin feeding power to the track by slowly turning the knob on the speed controller clockwise.
- Observe the direction of your train.
- If it moves backwards when the controls indicate forward, stop the train.
- Then simply disconnect, flip, and reconnect the terminal wire to the terminal rerailer track.
- Remember – never leave your train running unattended!
Action Checklist (Troubleshooting If Your Train Doesn’t Run or Stops Running)
- Is the power supply plugged in to a live receptacle?
- Are the wheels on the track?
- Is the wiring secure?
- Is the track properly assembled?
- Is the track properly seated in the rail joiner?
- If your train stops or fails to start, a short circuit may be indicated. If this is the case, Unplug The Power Supply Immediately.
- Common reasons for a short circuit: derailed wheels may cause a short. Check to make sure all wheels are on the track. Also check all connections and make sure there is no metal of any sort across the rails.
- After checking everything carefully, resume operation.
- Please note, your power supply is protected by a circuit breaker that automatically resets after a short circuit is corrected.
- Allow up to 5 minutes for the circuit breaker to reset before resuming operation.
Keep Your Train in Top Operating Condition
- Works better after couple hours of break-in time.
- Train performs best under clean operating conditions.
- Clean wheels and a clean track ensure good electrical contact.
- After about every 8 hours of operation, wipe the track rails and exposed wheels with a soft, lint-free cloth.
- Removal of black residue is normal.
- Do Not Use Steel Wool To Clean Your Track.
- Do not use common solvents, they may damage plastics - use track cleaner.
- After 24 hours of use, light lubrication is required to keep train in top operating condition. Bachmann E-Z Lube or other hobby-grade lubricants are recommended.
Bachmann hopes you enjoy your train for many years to come!

HO Scale Bachmann Steel Alloy EZ Track Double Oval for Model Railroad Trains
Product description
Each section combines track and roadbed into a single unit, with snap-fit assembly and plug-in wiring to provide instant railroad fun. A hidden locking feature holds sections securely together until you're ready to take them apart. Easy to set up on any surface, including floors and rugs: no special tools, nails or boards are needed. A great system for Christmas, displays or permanent layouts. Twelve sections of curved 18" radius track make a full circle; 16 sections of curved 22" radius track make a full circle
- Enough track for a 91 X 47 outer and 83 X 38 inner oval
- Can be operated on floors, carpet or table top
- 16 22" rad curves, 12 18" rad curves, 18 9" straight & 2 terminals
- Steel Alloy rails with black roadbed
- Perfect for any HO Scale railroad
User questions & answers
| Question: | Will this track corrode or rust with moisture |
| Answer: | Yes it is |
| Question: | Do i need a power pack for this or is it included? if i need to also buy a power pack, can you please describe what i need? thank you |
| Answer: | I have bought 3 Bachman sets and many "track packs" and they were the same size. I'm using N scale and three of them make a 90 degree turn, not sure if that helps. The only time I received a different degree turn is when I bought the wrong scale. |
| Question: | Does this include the special track with connections to the power supply? I don't see it listed in the description |
| Answer: | No, not without some serious modification. Kato makes an adapter that connects to conventional track, but not for EZ track |

Bachmann Trains - Snap-Fit E-Z TRACK 18” RADIUS CURVED TRACK (4/card) - NICKEL SILVER Rail With Gray Roadbed - HO Scale
Bachmann Trains
Product description
Snap-Fit E-Z TRACK 18” RADIUS CURVED TRACK (4/card) - NICKEL SILVER Rail With Gray Roadbed - HO Scale. Bachmann's exclusive E-Z Track system makes set-up quick, easy and fun. E-Z Track is designed to Snap Together and Stay Together on Floors, Tables and Carpets. This product features Nickel Silver Rail with Gray Roadbed. 18” Radius Curved Track is the basic curve of the E-Z Track system. It can also be placed on the inside of 22” radius curved E-Z Track for double-track mainline realism. Four pieces of track make up one-third (120 degrees) of a 36” diameter circle.
From the Manufacturer
Bachmann's exclusive E-Z Track system makes set-up quick, easy and fun. Nickel Silver Rail. Gray Roadbed. E-Z Track System --Snaps Together, Stays Together on Floors, Tables and Carpets.
- E-Z Track System - Snaps Together, Stays Together on Floors, Tables & Carpets
- Set Up is Quick, Easy and Fun - No Nails, Screws, or Special Tools Needed
- Nickel Silver Rail with Gray Roadbed, Designed to Provide Excellent Conductivity and Durability
- HO Scale 1:87 - Modeled From AAR Track Engineering Dimensions
- Four Pieces of Track Make up one-third (120 degrees) of a 36” Diameter Circle.
- Easy to Use For Both Temporary and Permanent Train Layouts
User questions & answers
| Question: | Can trains/freight cars, etc., other than ho gauge run on these e - z tracks |
| Answer: | All I run is snap fit track. All my engines and switches are DCC |
| Question: | How many are needed for a circle |
| Answer: | 36 inch circle requires 12 pieces of 18" radius track. I do not have any circles smaller than 36" because longer wheel base cars do not work well on smaller circles. |
| Question: | Will these tracks work with HO dcc controller and dcc locomotive |
| Answer: | I don't think so. I have a cot sized blow ground mat I sleep on. Between my gear, and my sleeping arrangement there isn't enough room for much else. |
| Question: | how many sets do i need for a 32 inch circle |
| Answer: | Good price, but seems heavy for long distance backpacking. There are tents that weigh half as much, but cost 3=5 times as much (see Big Agnes, Nemo, REI, etc). On long walks the weight means a lot more than the price. |
Product features
Discover Everything Bachmann Trains Offers to Get Started in Model Railroading
Since 1833, Bachmann has been known for providing innovative design at a good value. We are now one of the world's largest distributor, by volume, of ready-to-run train sets, locomotives, track, and accessories. Bachmann is also the only train company to offer products in all five of the most popular scales: N, HO, On30, O, and Large Scale.
As a distributor of beloved Thomas & Friends products, Bachmann brings the adventures of Thomas the Tank Engine to life with a growing line of complete train sets, separate sale items, and accessories for children from 8 to 80-just add your imagination. Thomas & Friends is available in both HO and Large Scale.
Bachmann's exclusive snap-together E-Z Track System makes track setup quick, easy, and fun. Plasticville U.S.A. and SceneScapes buildings and accessories let you add the finishing touches for the perfect layout.
If You Are Purchasing a Train Set, It Will Include
- Locomotive
- Cars (Rolling Stock)
- E-Z Track – available in either black roadbed with steel alloy rail or gray roadbed with nickel silver rail
- Terminal/Rerailer
- Terminal Wire
- Speed Controller
- Power Supply
- List of Components
Track Assembly
- Decide where to set up your train – a dry, firm, flat surface works best!
- To make sure you have enough working room, make a test track layout by loosely placing track in desired configuration.
- The terminal/rerailer section will later be connected to a power pack and power supply, so place it near an outlet or power strip.
- Install under-track magnet, if your set comes with one. If your set does not come with one, magnets are available separately (HO Item No. 78999; N Scale Item No. 78998).
- Assemble the track by pushing together. Make sure the rail and joiners are seated properly. Be careful that the rail joiners do not slip under the rail without properly connecting. This can cause train derailments and electrical circuit interruptions.
- After track is assembled, double-check for joint connection and fit by lightly running your fingers over the top of the rails in both directions.
- If you detect bumps or distortion on the track surface, recheck the rail joiner fit.
Power Connections
- Power supply and speed control are plug and play; no tools are needed.
- Power is supplied to the track and the locomotive by the power supply, speed controller, terminal wire, and E-Z Track terminal/rerailer.
- First – turn knob on the speed controller counterclockwise until it stops (all the way to the left).
- Next – attach terminal wire to the speed controller by plugging it in where it says 'To Track'.
- Then – plug terminal wire into the E-Z Track terminal rerailer. Firmly push connector onto the track terminals.
- Finally – plug the connecting wire from the power supply into jack on the speed controller labeled 'In'. Then plug power supply into a live wall outlet.
- Some sets may come with a speed controller with two push button connectors. These are used to supply AC power to accessories.
- To make positive and secure connections to these, push in buttons and insert each of the bare ends of the connection wire from your accessory.
- The speed controller is capable of powering one accessory at a time.
Putting the Train on the Track
- Put the locomotive on the track and run the wheels back and forth over the terminal rerailer track.
- When the wheels glide smoothly over the track, you know the wheels are all on the track. If your set comes with a tender, attach it to the locomotive.
- Add the rest of the cars that come with your set by placing them on the track and running them back and forth over the terminal rerailer until they glide smoothly. Then gently push the cars together – they will engage automatically.
- Do not try to connect cars when positioned over an under-track magnet.
How to Use E-Z Mate Couplers (HO and On30 Scale)
- Your set may be equipped with E-Z Mate magnetically operated knuckle couplers that let you perform real railroad switching and yard operations.
- Coupling two cars with E-Z Mate couplers is as easy as pushing them together when they are not over an under-track magnet.
- Uncoupling occurs only when over an under-track magnet and when there is no tension between the cars.
- To uncouple E-Z Mate couplers, stop two couplers directly over the under-track magnet. With no tension between the cars, the couplers will open automatically.
- If cars will not couple, check to be sure cars are not positioned over the uncoupling magnet or parked on a curve.
- If cars will not uncouple, check to be sure the couplers are positioned directly adjacent to the magnet position indicator and that the indicator is placed in line with the center line of the under-track magnet.
- Check that the magnet is secured to the underside of the track and fitted with the steel plate provided.
How to Run Your Train
- Turn the knob on the speed controller clockwise until it stops (all the way to the left).
- Plug in the power supply.
- Begin feeding power to the track by slowly turning the knob on the speed controller clockwise.
- Observe the direction of your train.
- If it moves backwards when the controls indicate forward, stop the train.
- Then simply disconnect, flip, and reconnect the terminal wire to the terminal rerailer track.
- Remember – never leave your train running unattended!
Action Checklist (Troubleshooting If Your Train Doesn’t Run or Stops Running)
- Is the power supply plugged in to a live receptacle?
- Are the wheels on the track?
- Is the wiring secure?
- Is the track properly assembled?
- Is the track properly seated in the rail joiner?
- If your train stops or fails to start, a short circuit may be indicated. If this is the case, Unplug The Power Supply Immediately.
- Common reasons for a short circuit: derailed wheels may cause a short. Check to make sure all wheels are on the track. Also check all connections and make sure there is no metal of any sort across the rails.
- After checking everything carefully, resume operation.
- Please note, your power supply is protected by a circuit breaker that automatically resets after a short circuit is corrected.
- Allow up to 5 minutes for the circuit breaker to reset before resuming operation.
Keep Your Train in Top Operating Condition
- Works better after couple hours of break-in time.
- Train performs best under clean operating conditions.
- Clean wheels and a clean track ensure good electrical contact.
- After about every 8 hours of operation, wipe the track rails and exposed wheels with a soft, lint-free cloth.
- Removal of black residue is normal.
- Do Not Use Steel Wool To Clean Your Track.
- Do not use common solvents, they may damage plastics - use track cleaner.
- After 24 hours of use, light lubrication is required to keep train in top operating condition. Bachmann E-Z Lube or other hobby-grade lubricants are recommended.
Bachmann hopes you enjoy your train for many years to come!

Bachmann Trains - Snap-Fit E-Z TRACK REMOTE TURNOUT - RIGHT (1/card) - STEEL ALLOY Rail With Black Roadbed - HO Scale
Bachmann Trains
Product description
Snap-Fit E-Z TRACK REMOTE TURNOUT - RIGHT (1/card) - STEEL ALLOY Rail With Black Roadbed - HO Scale. Bachmann's exclusive E-Z Track system makes set-up quick, easy and fun. E-Z Track is designed to Snap Together and Stay Together on Floors, Tables and Carpets. This product features Steel Alloy Rail with Black Roadbed. This is the basic turnout of the E-Z Track system with a turnout radius matching 18” Radius Curved Track. If you have enough room, you may consider purchasing larger E-Z Track turnouts to allow for smoother transitions between tracks during switching operations, and to accommodate locomotives and rolling stock with longer wheel bases. Note: For Powered Operation All analog turnouts (non-DCC) require 16V AC or DC accessory power supply.
From the Manufacturer
Bachmann's exclusive E-Z Track system makes set-up quick, easy and fun. Steel Alloy rail. Black roadbed. E-Z Track System - Snaps Together, Stays Together on Floors, Tables and Carpets.
- E-Z Track System - Snaps Together, Stays Together on Floors, Tables & Carpets
- Set Up is Quick, Easy and Fun - No Nails, Screws, or Special Tools Needed
- Steel Alloy Rail with Black Roadbed
- HO Scale 1:87 - Modeled From AAR Track Engineering Dimensions
- Basic Turnout With A Turnout Radius Matching 18” Radius Curved Track.
- Easy to Use For Both Temporary and Permanent Train Layouts
User questions & answers
| Question: | How can this turnout be power routed to cut power on spur. Which jumper to remove |
| Answer: | These are remote switches, but they can also be operated manually. |
| Question: | Is the curved part of the items the same radius as the track included in the bachmann ho scale rail chief ready to run electric train set |
| Answer: | It is RH or right hand turnout. This is determined by whether the switch turns the train to the right or left as it goes down the track. |
| Question: | are these manual or remote switches |
| Answer: | I haven't owned it long enough to be sure. However I expect it will be robust to corrosion be not immune. Even stainless will corrode. You will still need to use track cleaner which will remove corrosion and other contaminants. Both Bachman's track and Kato's seem to be very resistant to corrosion in my basement setups. |
| Question: | Is this rh turnout ho\\ho |
| Answer: | This pack is just the track. You will need to purchase a power pack separately. |
Product features
Discover Everything Bachmann Trains Offers to Get Started in Model Railroading
Since 1833, Bachmann has been known for providing innovative design at a good value. We are now one of the world's largest distributor, by volume, of ready-to-run train sets, locomotives, track, and accessories. Bachmann is also the only train company to offer products in all five of the most popular scales: N, HO, On30, O, and Large Scale.
As a distributor of beloved Thomas & Friends products, Bachmann brings the adventures of Thomas the Tank Engine to life with a growing line of complete train sets, separate sale items, and accessories for children from 8 to 80-just add your imagination. Thomas & Friends is available in both HO and Large Scale.
Bachmann's exclusive snap-together E-Z Track System makes track setup quick, easy, and fun. Plasticville U.S.A. and SceneScapes buildings and accessories let you add the finishing touches for the perfect layout.
If You Are Purchasing a Train Set, It Will Include
- Locomotive
- Cars (Rolling Stock)
- E-Z Track – available in either black roadbed with steel alloy rail or gray roadbed with nickel silver rail
- Terminal/Rerailer
- Terminal Wire
- Speed Controller
- Power Supply
- List of Components
Track Assembly
- Decide where to set up your train – a dry, firm, flat surface works best!
- To make sure you have enough working room, make a test track layout by loosely placing track in desired configuration.
- The terminal/rerailer section will later be connected to a power pack and power supply, so place it near an outlet or power strip.
- Install under-track magnet, if your set comes with one. If your set does not come with one, magnets are available separately (HO Item No. 78999; N Scale Item No. 78998).
- Assemble the track by pushing together. Make sure the rail and joiners are seated properly. Be careful that the rail joiners do not slip under the rail without properly connecting. This can cause train derailments and electrical circuit interruptions.
- After track is assembled, double-check for joint connection and fit by lightly running your fingers over the top of the rails in both directions.
- If you detect bumps or distortion on the track surface, recheck the rail joiner fit.
Power Connections
- Power supply and speed control are plug and play; no tools are needed.
- Power is supplied to the track and the locomotive by the power supply, speed controller, terminal wire, and E-Z Track terminal/rerailer.
- First – turn knob on the speed controller counterclockwise until it stops (all the way to the left).
- Next – attach terminal wire to the speed controller by plugging it in where it says 'To Track'.
- Then – plug terminal wire into the E-Z Track terminal rerailer. Firmly push connector onto the track terminals.
- Finally – plug the connecting wire from the power supply into jack on the speed controller labeled 'In'. Then plug power supply into a live wall outlet.
- Some sets may come with a speed controller with two push button connectors. These are used to supply AC power to accessories.
- To make positive and secure connections to these, push in buttons and insert each of the bare ends of the connection wire from your accessory.
- The speed controller is capable of powering one accessory at a time.
Putting the Train on the Track
- Put the locomotive on the track and run the wheels back and forth over the terminal rerailer track.
- When the wheels glide smoothly over the track, you know the wheels are all on the track. If your set comes with a tender, attach it to the locomotive.
- Add the rest of the cars that come with your set by placing them on the track and running them back and forth over the terminal rerailer until they glide smoothly. Then gently push the cars together – they will engage automatically.
- Do not try to connect cars when positioned over an under-track magnet.
How to Use E-Z Mate Couplers (HO and On30 Scale)
- Your set may be equipped with E-Z Mate magnetically operated knuckle couplers that let you perform real railroad switching and yard operations.
- Coupling two cars with E-Z Mate couplers is as easy as pushing them together when they are not over an under-track magnet.
- Uncoupling occurs only when over an under-track magnet and when there is no tension between the cars.
- To uncouple E-Z Mate couplers, stop two couplers directly over the under-track magnet. With no tension between the cars, the couplers will open automatically.
- If cars will not couple, check to be sure cars are not positioned over the uncoupling magnet or parked on a curve.
- If cars will not uncouple, check to be sure the couplers are positioned directly adjacent to the magnet position indicator and that the indicator is placed in line with the center line of the under-track magnet.
- Check that the magnet is secured to the underside of the track and fitted with the steel plate provided.
How to Run Your Train
- Turn the knob on the speed controller clockwise until it stops (all the way to the left).
- Plug in the power supply.
- Begin feeding power to the track by slowly turning the knob on the speed controller clockwise.
- Observe the direction of your train.
- If it moves backwards when the controls indicate forward, stop the train.
- Then simply disconnect, flip, and reconnect the terminal wire to the terminal rerailer track.
- Remember – never leave your train running unattended!
Action Checklist (Troubleshooting If Your Train Doesn’t Run or Stops Running)
- Is the power supply plugged in to a live receptacle?
- Are the wheels on the track?
- Is the wiring secure?
- Is the track properly assembled?
- Is the track properly seated in the rail joiner?
- If your train stops or fails to start, a short circuit may be indicated. If this is the case, Unplug The Power Supply Immediately.
- Common reasons for a short circuit: derailed wheels may cause a short. Check to make sure all wheels are on the track. Also check all connections and make sure there is no metal of any sort across the rails.
- After checking everything carefully, resume operation.
- Please note, your power supply is protected by a circuit breaker that automatically resets after a short circuit is corrected.
- Allow up to 5 minutes for the circuit breaker to reset before resuming operation.
Keep Your Train in Top Operating Condition
- Works better after couple hours of break-in time.
- Train performs best under clean operating conditions.
- Clean wheels and a clean track ensure good electrical contact.
- After about every 8 hours of operation, wipe the track rails and exposed wheels with a soft, lint-free cloth.
- Removal of black residue is normal.
- Do Not Use Steel Wool To Clean Your Track.
- Do not use common solvents, they may damage plastics - use track cleaner.
- After 24 hours of use, light lubrication is required to keep train in top operating condition. Bachmann E-Z Lube or other hobby-grade lubricants are recommended.
Bachmann hopes you enjoy your train for many years to come!

Bachmann Trains - Snap-Fit E-Z Track 18” Radius Curved Track (4/card) - Steel Alloy Rail With Black Roadbed - HO Scale
Bachmann Trains
Product description
Snap-Fit E-Z Track 18” Radius Curved Track (4/card) - Steel Alloy Rail With Black Roadbed - HO Scale. Bachmann's exclusive E-Z Track system makes set-up quick, easy and fun. E-Z Track is designed to Snap Together and Stay Together on Floors, Tables and Carpets. This product features Steel Alloy Rail with Black Roadbed. 18” Radius Curved Track is the basic curve of the E-Z Track system. It can also be placed on the inside of 22” radius curved E-Z Track for double-track mainline realism. Four pieces of track make up one-third (120 degrees) of a 36” diameter circle.
From the Manufacturer
Bachmann's exclusive E-Z Track system makes set-up quick, easy and fun. Steel Alloy rail. Black roadbed. E-Z Track System - Snaps Together, Stays Together on Floors, Tables and Carpets.
- E-Z Track System - Snaps Together, Stays Together on Floors, Tables & Carpets
- Set Up is Quick, Easy and Fun - No Nails, Screws, or Special Tools Needed
- Steel Alloy Rail with Black Roadbed
- Easy to Use For Both Temporary and Permanent Train Layouts
- HO Scale 1:87 - Modeled From AAR Track Engineering Dimensions
User questions & answers
| Question: | How pieces of 18 inch radius track do I need to make a circle with a 48 inch diameter? Thanks |
| Answer: | It depends on the radius of the turn. I prefer to use 11.25 radius turns on my track layouts to avoid problems that come with tighter radius turns. A 11.25 inch radius turn reguires six pieces to make 180 degrees or a half circle. |
| Question: | How do you connect power to the 18” curve piece |
| Answer: | If this is 18inch radius track it takes 12 pieces of track or 3 packs of 4, 22inch radius takes 16 pieces of track or 4 packs of 4 you will have 2 extra. |
| Question: | Does it take 4 pieces to make a half circle |
| Answer: | No the train will not stay on the track in a vertical position |
| Question: | How many do you need to make a complete circle |
| Answer: | The Bachmann easy track snaps together without the use of any tools, if you want to add EZ track to an existing oval track and it is ez track then they are compatable and can be added. If you need pliers then you are trying to mix track pieces that are not compatible. |
Product features
Discover Everything Bachmann Trains Offers to Get Started in Model Railroading
Since 1833, Bachmann has been known for providing innovative design at a good value. We are now one of the world's largest distributor, by volume, of ready-to-run train sets, locomotives, track, and accessories. Bachmann is also the only train company to offer products in all five of the most popular scales: N, HO, On30, O, and Large Scale.
As a distributor of beloved Thomas & Friends products, Bachmann brings the adventures of Thomas the Tank Engine to life with a growing line of complete train sets, separate sale items, and accessories for children from 8 to 80-just add your imagination. Thomas & Friends is available in both HO and Large Scale.
Bachmann's exclusive snap-together E-Z Track System makes track setup quick, easy, and fun. Plasticville U.S.A. and SceneScapes buildings and accessories let you add the finishing touches for the perfect layout.
If You Are Purchasing a Train Set, It Will Include
- Locomotive
- Cars (Rolling Stock)
- E-Z Track – available in either black roadbed with steel alloy rail or gray roadbed with nickel silver rail
- Terminal/Rerailer
- Terminal Wire
- Speed Controller
- Power Supply
- List of Components
Track Assembly
- Decide where to set up your train – a dry, firm, flat surface works best!
- To make sure you have enough working room, make a test track layout by loosely placing track in desired configuration.
- The terminal/rerailer section will later be connected to a power pack and power supply, so place it near an outlet or power strip.
- Install under-track magnet, if your set comes with one. If your set does not come with one, magnets are available separately (HO Item No. 78999; N Scale Item No. 78998).
- Assemble the track by pushing together. Make sure the rail and joiners are seated properly. Be careful that the rail joiners do not slip under the rail without properly connecting. This can cause train derailments and electrical circuit interruptions.
- After track is assembled, double-check for joint connection and fit by lightly running your fingers over the top of the rails in both directions.
- If you detect bumps or distortion on the track surface, recheck the rail joiner fit.
Power Connections
- Power supply and speed control are plug and play; no tools are needed.
- Power is supplied to the track and the locomotive by the power supply, speed controller, terminal wire, and E-Z Track terminal/rerailer.
- First – turn knob on the speed controller counterclockwise until it stops (all the way to the left).
- Next – attach terminal wire to the speed controller by plugging it in where it says 'To Track'.
- Then – plug terminal wire into the E-Z Track terminal rerailer. Firmly push connector onto the track terminals.
- Finally – plug the connecting wire from the power supply into jack on the speed controller labeled 'In'. Then plug power supply into a live wall outlet.
- Some sets may come with a speed controller with two push button connectors. These are used to supply AC power to accessories.
- To make positive and secure connections to these, push in buttons and insert each of the bare ends of the connection wire from your accessory.
- The speed controller is capable of powering one accessory at a time.
Putting the Train on the Track
- Put the locomotive on the track and run the wheels back and forth over the terminal rerailer track.
- When the wheels glide smoothly over the track, you know the wheels are all on the track. If your set comes with a tender, attach it to the locomotive.
- Add the rest of the cars that come with your set by placing them on the track and running them back and forth over the terminal rerailer until they glide smoothly. Then gently push the cars together – they will engage automatically.
- Do not try to connect cars when positioned over an under-track magnet.
How to Use E-Z Mate Couplers (HO and On30 Scale)
- Your set may be equipped with E-Z Mate magnetically operated knuckle couplers that let you perform real railroad switching and yard operations.
- Coupling two cars with E-Z Mate couplers is as easy as pushing them together when they are not over an under-track magnet.
- Uncoupling occurs only when over an under-track magnet and when there is no tension between the cars.
- To uncouple E-Z Mate couplers, stop two couplers directly over the under-track magnet. With no tension between the cars, the couplers will open automatically.
- If cars will not couple, check to be sure cars are not positioned over the uncoupling magnet or parked on a curve.
- If cars will not uncouple, check to be sure the couplers are positioned directly adjacent to the magnet position indicator and that the indicator is placed in line with the center line of the under-track magnet.
- Check that the magnet is secured to the underside of the track and fitted with the steel plate provided.
How to Run Your Train
- Turn the knob on the speed controller clockwise until it stops (all the way to the left).
- Plug in the power supply.
- Begin feeding power to the track by slowly turning the knob on the speed controller clockwise.
- Observe the direction of your train.
- If it moves backwards when the controls indicate forward, stop the train.
- Then simply disconnect, flip, and reconnect the terminal wire to the terminal rerailer track.
- Remember – never leave your train running unattended!
Action Checklist (Troubleshooting If Your Train Doesn’t Run or Stops Running)
- Is the power supply plugged in to a live receptacle?
- Are the wheels on the track?
- Is the wiring secure?
- Is the track properly assembled?
- Is the track properly seated in the rail joiner?
- If your train stops or fails to start, a short circuit may be indicated. If this is the case, Unplug The Power Supply Immediately.
- Common reasons for a short circuit: derailed wheels may cause a short. Check to make sure all wheels are on the track. Also check all connections and make sure there is no metal of any sort across the rails.
- After checking everything carefully, resume operation.
- Please note, your power supply is protected by a circuit breaker that automatically resets after a short circuit is corrected.
- Allow up to 5 minutes for the circuit breaker to reset before resuming operation.
Keep Your Train in Top Operating Condition
- Works better after couple hours of break-in time.
- Train performs best under clean operating conditions.
- Clean wheels and a clean track ensure good electrical contact.
- After about every 8 hours of operation, wipe the track rails and exposed wheels with a soft, lint-free cloth.
- Removal of black residue is normal.
- Do Not Use Steel Wool To Clean Your Track.
- Do not use common solvents, they may damage plastics - use track cleaner.
- After 24 hours of use, light lubrication is required to keep train in top operating condition. Bachmann E-Z Lube or other hobby-grade lubricants are recommended.
Bachmann hopes you enjoy your train for many years to come!

Bachmann Trains Snap-Fit E-Z TRACK WORLD’S GREATEST HOBBY FIRST RAILROAD TRACK PACK - NICKEL SILVER Rail With Grey Roadbed - HO Scale
Bachmann Trains
Product description
Bachmann Trains Snap-Fit E-Z TRACK WORLD’S GREATEST HOBBY FIRST RAILROAD TRACK PACK - NICKEL SILVER Rail With Grey Roadbed - HO Scale. It's never been easier to get started in model railroading! Bachmann's Your First Railroad Track Pack contains all the track you need to build the layout featured in the included DVD, Building Your First Model Railroad. Hosted by actor and model railroad enthusiast Michael Gross, the easy-to-follow video will quickly get you on track for fun with the World's Greatest Hobby! 45-piece Track Pack includes: World's Greatest Hobby Building Your First Model Railroad DVD, hosted by actor/model railroader Michael Gross, nine 9" straights, one 9" terminal/rerailer, one 9" rerailer, twenty 18" radius curves, two 3" straights, two switches – left, two switches – right, two Hayes bumpers, four switch wires (green), one terminal wire (red), Bachmann HO scale E-Z Track features: clear tie spacing, low-profile spike heads, modeled from AAR track engineering dimensions
From the Manufacturer
It's never been easier to get started in model railroading! Bachmann's Your First Railroad Track Pack contains all the track you need to build the layout featured in the included DVD, Building Your First Model Railroad. Hosted by actor and model railroad enthusiast Michael Gross, the easy-to-follow video will quickly get you on track for fun with the World's Greatest Hobby!. 45-piece Track Pack includes:. World's Greatest Hobby Building Your First Model Railroad DVD, hosted by actor/model railroader Michael Gross. Nine 9" straights. One 9" terminal/rerailer. One 9" rerailer. Twenty 18" radius curves. Two 3" straights. Two remote turnouts - left. Two remote turnouts - right. Two Hayes bumpers. Four switch wires (green). Two terminal wire (red). Bachmann HO scale E-Z Track features:. Clear tie spacing. Low-profile spike heads. Modeled from AAR track engineering dimensions.
- Complete Track Pack Allows You to Build a 4’ X 8’ Train Layout
- E-Z Track System - Snaps Together, Stays Together on Floors, Tables & Carpets
- Set Up is Quick, Easy and Fun - No Nails, Screws, or Special Tools Needed
- Nickel Silver Rail with Gray Roadbed, Designed to Provide Excellent Conductivity and Durability
- HO Scale 1:87 - Modeled From AAR Track Engineering Dimensions
- Easy to Use For Both Temporary and Permanent Train Layouts
User questions & answers
| Question: | is the kit n scale |
| Answer: | HO vs N is something you really have to answer for yourself, but here are some things to consider. How much space do you have? a 4 by 8 foot layout is barely enough for a single oval in HO, while N will allow you to be much more creative with the track layout. You can have a train pulling a dozen cars with N in the space of half that many cars in HO. You can fit four times as much scenery in the same space in N as in HO (twice as much lengthwise by twice as much width-wise). On the other hand, the detail on individual HO items tends to be more realistic, there is somewhat more variety of almost everything in HO, and N items often costs as much as or more than the same thing in HO. Also, N can be harder to keep running. Those tiny wheels are more finicky about having track aligned just right than HO to avoid derailments and stalls. So in general I recommend HO, all the time looking at my HO layout and wishing I could fit more stuff into that space, which I could if I had N instead. |
| Question: | Is this an N scale track set |
| Answer: | It is HO scale,comes with 2 Left and 2 Right Remote control Switches and enough wire to reach a 5x8 layout .Gray road bed ( i prefer over Black ) had no problems with any of the Track or switches and includes a under track Maganet (bonus) for uncoupleing cars. |
| Question: | would you recommend the HO or N scale |
| Answer: | Just replace one of the metal track connectors with a plastic insulator, which you can get a t any hobby shop. This isolates the spur from the main line. |
| Question: | whatgaugeisit |
| Answer: | Yes, they are. |
Product features
Discover Everything Bachmann Trains Offers to Get Started in Model Railroading
Since 1833, Bachmann has been known for providing innovative design at a good value. We are now one of the world's largest distributor, by volume, of ready-to-run train sets, locomotives, track, and accessories. Bachmann is also the only train company to offer products in all five of the most popular scales: N, HO, On30, O, and Large Scale.
As a distributor of beloved Thomas & Friends products, Bachmann brings the adventures of Thomas the Tank Engine to life with a growing line of complete train sets, separate sale items, and accessories for children from 8 to 80-just add your imagination. Thomas & Friends is available in both HO and Large Scale.
Bachmann's exclusive snap-together E-Z Track System makes track setup quick, easy, and fun. Plasticville U.S.A. and SceneScapes buildings and accessories let you add the finishing touches for the perfect layout.
If You Are Purchasing a Train Set, It Will Include
- Locomotive
- Cars (Rolling Stock)
- E-Z Track – available in either black roadbed with steel alloy rail or gray roadbed with nickel silver rail
- Terminal/Rerailer
- Terminal Wire
- Speed Controller
- Power Supply
- List of Components
Track Assembly
- Decide where to set up your train – a dry, firm, flat surface works best!
- To make sure you have enough working room, make a test track layout by loosely placing track in desired configuration.
- The terminal/rerailer section will later be connected to a power pack and power supply, so place it near an outlet or power strip.
- Install under-track magnet, if your set comes with one. If your set does not come with one, magnets are available separately (HO Item No. 78999; N Scale Item No. 78998).
- Assemble the track by pushing together. Make sure the rail and joiners are seated properly. Be careful that the rail joiners do not slip under the rail without properly connecting. This can cause train derailments and electrical circuit interruptions.
- After track is assembled, double-check for joint connection and fit by lightly running your fingers over the top of the rails in both directions.
- If you detect bumps or distortion on the track surface, recheck the rail joiner fit.
Power Connections
- Power supply and speed control are plug and play; no tools are needed.
- Power is supplied to the track and the locomotive by the power supply, speed controller, terminal wire, and E-Z Track terminal/rerailer.
- First – turn knob on the speed controller counterclockwise until it stops (all the way to the left).
- Next – attach terminal wire to the speed controller by plugging it in where it says 'To Track'.
- Then – plug terminal wire into the E-Z Track terminal rerailer. Firmly push connector onto the track terminals.
- Finally – plug the connecting wire from the power supply into jack on the speed controller labeled 'IN'. Then plug power supply into a live wall outlet.
- Some sets may come with a speed controller with two push button connectors. These are used to supply AC power to accessories.
- To make positive and secure connections to these, push in buttons and insert each of the bare ends of the connection wire from your accessory.
- The speed controller is capable of powering one accessory at a time.
Putting the Train on the Track
- Put the locomotive on the track and run the wheels back and forth over the terminal rerailer track.
- When the wheels glide smoothly over the track, you know the wheels are all on the track. If your set comes with a tender, attach it to the locomotive.
- Add the rest of the cars that come with your set by placing them on the track and running them back and forth over the terminal rerailer until they glide smoothly. Then gently push the cars together – they will engage automatically.
- Do not try to connect cars when positioned over an under-track magnet.
How to Use E-Z Mate Couplers (HO and On30 Scale)
- Your set may be equipped with E-Z Mate magnetically operated knuckle couplers that let you perform real railroad switching and yard operations.
- Coupling two cars with E-Z Mate couplers is as easy as pushing them together when they are not over an under-track magnet.
- Uncoupling occurs only when over an under-track magnet and when there is no tension between the cars.
- To uncouple E-Z Mate couplers, stop two couplers directly over the under-track magnet. With no tension between the cars, the couplers will open automatically.
- If cars will not couple, check to be sure cars are not positioned over the uncoupling magnet or parked on a curve.
- If cars will not uncouple, check to be sure the couplers are positioned directly adjacent to the magnet position indicator and that the indicator is placed in line with the center line of the under-track magnet.
- Check that the magnet is secured to the underside of the track and fitted with the steel plate provided.
How to Run Your Train
- Turn the knob on the speed controller clockwise until it stops (all the way to the left).
- Plug in the power supply.
- Begin feeding power to the track by slowly turning the knob on the speed controller clockwise.
- Observe the direction of your train.
- If it moves backwards when the controls indicate forward, stop the train.
- Then simply disconnect, flip, and reconnect the terminal wire to the terminal rerailer track.
- Remember – never leave your train running unattended!
Action Checklist (Troubleshooting If Your Train Doesn’t Run or Stops Running)
- Is the power supply plugged in to a live receptacle?
- Are the wheels on the track?
- Is the wiring secure?
- Is the track properly assembled?
- Is the track properly seated in the rail joiner?
- If your train stops or fails to start, a short circuit may be indicated. If this is the case, Unplug the power Supply immediately.
- Common reasons for a short circuit: derailed wheels may cause a short. Check to make sure all wheels are on the track. Also check all connections and make sure there is no metal of any sort across the rails.
- After checking everything carefully, resume operation.
- Please note, your power supply is protected by a circuit breaker that automatically resets after a short circuit is corrected.
- Allow up to 5 minutes for the circuit breaker to reset before resuming operation.
Keep Your Train in Top Operating Condition
- Works better after couple hours of break-in time.
- Train performs best under clean operating conditions.
- Clean wheels and a clean track ensure good electrical contact.
- After about every 8 hours of operation, wipe the track rails and exposed wheels with a soft, lint-free cloth.
- Removal of black residue is normal.
- Do Not Use Steel Wool To Clean Your Track.
- Do not use common solvents, they may damage plastics - use track cleaner.
- After 24 hours of use, light lubrication is required to keep train in top operating condition.
- Do Not Use Common Household Lubricants As They May Damage Your Trains. Bachmann E-Z Lube or other hobby-grade lubricants are recommended.
Bachmann hopes you enjoy your train for many years to come!

Lionel FasTrack Straight Track
Lionel
Product description
Offering innovation, variety, ease-of-use, and fantastic prototypical look, the FasTrack? track system brings your Lionel layout to life like never before. Its flawless performance and endless flexibility make it appealing to first-timers and seasoned pros alike.
- Length 1 3/4 Inches
- Offers greater flexibility in designing your layout
- Easy, snap-together locking mechanism for sure connections
- Patented center half-pin allows for track orientation in either direction without the need for moving pins from one end to the next
- Flawless performance
User questions & answers
| Question: | How long is this piece |
| Answer: | HO Scale |
| Question: | Is this for O gauge |
| Answer: | It is HO scale, but a very similar set is available in N scale - http://www.amazon.com/Bachmann-Worlds-Greatest-Hobby-Track/dp/B0038LJSJ2 |
Product features
Lionel FasTrack Straight Track
- Gauge: O Gauge
- Brand: Lionel
- Power: Electric
- Product Length: 12.13"
- Product Width: 5.31"
- Product Height: 6.50"
- Dimensions: Length: 1 3/4"
About Us
When Lionel founder Joshua Lionel Cowen's immigrant family arrived in New York after the Civil War, the railroads were literally America's engines of progress. The "Golden Spike" meeting of the Union Pacific and Central Pacific lines in 1869 unified the continent and signaled the birth of a world power. Cowen was born in 1877, just before Edison's first electric light. He grew up with real trains, amid dizzying change. Around the time he founded Lionel in 1900, passenger lines like the peerless Twentieth Century Limited symbolized American technology and sophistication.
Cowen was already a successful inventor when he created his first toy train. But The Electric Express and its offspring soon became a sacred mission, and Cowen would spend a lifetime stoking America's imagination with the romance of the rails. He told boys that Lionels would prepare them for adulthood. Soon Dads too were encouraged to join Youngsters in model train enthusiasm, to future father-son bonding. With growing prosperity, Lionel's layouts cropped up in more living rooms, especially at Christmas. Before mid-century, railroads were our economic lifeblood, as well as cultural icons -- but it was not to last.
And when Americans started driving to suburbia and flying cross-country, they stopped buying Lionel trains. By the 1960s, freight lines were being scrapped, and fathers and sons were on opposite sides of the "generation gap." That decade saw the tragic demise of New York's Pennsylvania Station, the retirement of The Twentieth Century Limited, and the passing of Joshua Lionel Cowen.
But now the Lionel dream is back and better than ever. As Lionel looks to the future, it strives to ignite the imaginations and hearts of today’s children and adults through continued success with branded and licensed products, an increased presence in the digital space and recapturing its rightful place “under the tree.” Through partnerships with evergreen brands such as NASCAR, Warner Bros., Crayola, Coca-Cola, John Deere and many others, Lionel has lined itself up for success for many years to come. With innovative products such as the LCS, iCab, Battle Trains, Lionel Tracks and a revamped, more user-friendly Lionel, the 115-year-old company has made sure it stays on the cutting-edge of technology. The Lionel name has always been synonymous with Christmas and a train set under every Christmas tree, and now more than ever the company’s ensuring that they are a major player in any holiday plans. For Lionel, the future is indeed bright.
Latest Reviews
View all
Dorman Washer Hoses
- Updated: 16.07.2023
- Read reviews

Ashley Bathing Suits
- Updated: 11.01.2023
- Read reviews

Unknown Cat Foods
- Updated: 04.07.2023
- Read reviews

Pocket Bikes
- Updated: 23.06.2023
- Read reviews

Racquetball Bags
- Updated: 14.05.2023
- Read reviews