10 best clear coat for kitchen cabinets
Clear coat for kitchen cabinets is a protective and finishing product applied on top of painted or stained cabinets to enhance their durability, appearance, and longevity. Here's some information about clear coat for kitchen cabinets:
Protection and Durability: A clear coat provides a protective layer that helps shield the kitchen cabinets from scratches, stains, moisture, and general wear and tear. It enhances the life of the cabinets and maintains their look over time.
Finish Options: Clear coats come in various finishes, including gloss, semi-gloss, satin, and matte. The choice of finish depends on personal preference and the desired aesthetic for the cabinets.
Application: Applying clear coat to kitchen cabinets involves proper surface preparation, such as cleaning and sanding, to ensure a smooth base. The clear coat is then applied evenly using a brush, roller, or sprayer, following the manufacturer's instructions.
Types of Clear Coat: Clear coats can be oil-based or water-based. Water-based clear coats are popular due to their low odor, easy cleanup, and environmentally friendly properties. Oil-based clear coats may provide a slightly warmer finish but may have a longer drying time and strong odor.
Drying and Curing: Clear coat products have specific drying and curing times, typically mentioned on the product label. It's important to allow adequate drying and curing time before using the cabinets to ensure a strong and long-lasting finish.
Compatibility and Compatibility Testing: It's crucial to choose a clear coat that is compatible with the type of paint or stain used on the cabinets. Performing a compatibility test on a small, inconspicuous area before full application is recommended.
Maintenance: Proper maintenance is essential to preserve the clear coat's appearance and functionality. Regular cleaning with mild soap and water and avoiding harsh chemicals can help maintain the clear coat's integrity.
Aesthetic Enhancement: Clear coats enhance the visual appeal of kitchen cabinets by giving them a smooth, polished finish.They bring out the natural grain and color of the wood, showcasing its beauty.
DIY vs. Professional Application: While some homeowners opt for a DIY application, others prefer hiring professionals to ensure a flawless and even finish. Professional application may result in a more uniform and expertly applied clear coat.
In summary, clear coat for kitchen cabinets is a protective and aesthetically enhancing finishing product that plays a crucial role in maintaining and beautifying the appearance of cabinets in the kitchen. It adds durability and a polished finish, helping to preserve the cabinets' integrity for a longer period.
Below you can find our editor's choice of the best clear coat for kitchen cabinets on the market
Nuvo Cabinet Paint Topcoat, 31 Fl. Oz, Quart
Nuvo
Product description
This semi-gloss topcoat is designed to protect your cabinets. If you do not want a semi-gloss finish, do not use this topcoat. For a high-gloss finish, use Gianni's high-gloss topcoat. Do not allow standing water to sit on your cabinets for an Extended period, even after the topcoat application. Wait 4 hours after applying your final coat of Novo Cabinet Paint before applying Novo semi-gloss topcoat, and in between thin coats of topcoat. Use a maximum of 2 coats. You may use your kitchen a few hours after your final coat.
- Protect and seal your Nuvo Cabinet Paint finish with our optional Semi-Gloss topcoat
- One 31 oz can of Nuvo Cabinet Paint - covers approximately - 50 sq. Ft. - or 20 linear feet of cabinets
- Low VOC, low odor, water-based Acrylic paint
- Semi-gloss finish** (note: Nuvo standard finish is a Satin finish.)
User questions & answers
| Question: | Is this semi gloss |
| Answer: | I would not recommend it have a nice day |
| Question: | I already finished painting can I still add this topcoat |
| Answer: | Hello, The flash sale has expired. Those words were mistakenly left on the listing. If you have ordered and paid $51.00 plus shipping, we will refund the difference to you. If you want to place an order pay the listed price, then send the name the order will be under and a refund will be issued for the difference. Thank you. |
| Question: | Is it better to use a brush or a roller for the topcoat |
| Answer: | A little does go a long way, but you will need to apply two coats. If I wanted to paint a cabinet, I would buy two jars of the paint to be sure I had enough. |
| Question: | Can you use a spray gun |
| Answer: | This is a thick liquid...but spreads well...it says it can be applied to unfinished wood...But, I used it over chalk paint, did go on a bit darker than I liked, so next time I will use the minwax antique paste wax, when I want a lighter antique finish. Instructions.. did recommend, if using over chalk paint and want a lighter antique look...use clear wax first. Hope this helps. |
Rust-Oleum 287722 Ultra Matte Interior Chalked Paint, 30 oz, Matte Clear Topcoat
Rust-Oleum
Product description
Rust-Oleum Ultra Matte Chalked Paint Clear enhances any Ultra Matte Chalked Paint finish giving any project an unique look with a vintage feel along with adding protection to the surface. Rejuvenates furniture and home decor with timeless elegance.
- Use on a variety of interior surfaces like wood, metal, ceramic, canvas and easily distress to create a vintage look
- Low-odor/VOC formula allows for easy clean up with soap and water
- Dries to the touch in just 30 minutes and covers up to 150 sq. ft.; one-coat coverage allows projects to be completed easily
- Excellent adhesion and easy application with minimal prep
- Protective topcoat that dries to an ultra-matte velvety, smooth finish
User questions & answers
| Question: | Is linen white a true, bright white? Or does it have a cream tone |
| Answer: | If you want a glossy finish use seal polyurethane, but a matte just clear wax, I do use the seal just because it protects from water (I have kids ☺️) |
| Question: | Can I paint faux leather fabric |
| Answer: | We suggest the Adorondak if you're looking for a purer white. |
| Question: | Rust-oleum says to use synthetic brushes or foam. on amazon site for chalked paint brushes they are natural boar. so what should i use |
| Answer: | You can apply it over your dried paint. Doesn’t have to be freshly painted. I waited about 2 days to put the clear coat on. Make sure there is no dust or dirt on it a easy wipe down with a tack or just damp clothe. I have a dog and cat, so I wanted to make sure I wouldn’t paint any fur into it. I did two coats of the clear because of missed spots. Did them 1-3 days apart. |
| Question: | is 'linen white' white white or what |
| Answer: | This is an all over protection product I use gator hide on tabletops or items that need waterproofing |
Product features
Refresh Your Decor With Chalked Paints
Rejuvenate your decor with a soft, matte chalky finish on wood, metal, ceramic, glass, canvas and more. For added customization and style, distress item following application for an aged, chippy look and vintage appearance. Available in a variety of trending colors, Rust-Oleum Chalked Brush Paints may be layered over one another to create a unique, one of a kind look. For added protection following application, use Rust-Oleum Chalked Clear Protective Topcoat brush-on.
Also available in a spray version and Chalked Decorative Glaze for antiquing.
Soft Warm Colors
Simple Yet Elegant
Distress by Lightly Sanding
Glaze for an Antique Look
Clean & Prep
Remove any hardware, wash surface with soap and water and let dry. Remove any loose paint or rust and lightly sand glossy surfaces for better adhesion. Primer is not required for most surfaces, but recommended for bare wood or wood high in tannins such as redwood, mahogany and fir.
Brush On
If primer is used, wait 2 hours before applying finish. Stir thoroughly to re-disperse any settled pigment. Use a high quality synthetic brush to apply light even brush strokes. For each coat applied, allow 2 hours before next coat.
Top Coat
Once last coat dries for at least 8 hours, apply topcoat for extra protection. Apply 1-2 light even coats, waiting 2 hours between coats.
Tips & Techniques for a Fabulous Finish!

INSL-X CC560109A-01 Cabinet Coat Enamel, Semi-Gloss Paint, 1 Gallon, White
Product description
INSL-X Cabinet Coat is the ultimate semi gloss enamel paint finish for cabinet refinishing and refurbishing dingy kitchen and bathroom cabinets, shelving, furniture, trim & crown molding and other interior applications that require an ultra-smooth, factory like finish with long lasting beauty. Its superior adhesion allows painting difficult surfaces, even polyurethane and varnish, without using a primer. This cabinet enamel offers excellent flow and leveling, superior stain resistance and an extremely durable satin finish that will look like new for years.
- The ultimate “factory-like” finish for refurbishing kitchen and bathroom cabinets, shelving, furniture, trim, and crown molding
- Delivers an ultra smooth, durable urethane acrylic cabinet and trim paint finish
- Super adhesion to hard-to-coat surfaces without primer
- Durable semi-gloss finish that resists chipping, scuffing, food stains, grease & water
- 350 - 450 square foot coverage per gallon; VOC Level: < 50 g/L
- Do not apply when air, product or surface temperature is below 50 °F (10 °C) and above 90 °F (32 °C)
- Not for surfaces that will be immersed in liquids (sinks or tubs) or the surface of stoves or ovens
User questions & answers
| Question: | Are there any other colors |
| Answer: | Thanks for your question. INSL-X Cabinet Coat Paint Enamel resists chipping, scuffing, food stains, grease & water, while providing an ultra-smooth “factory-like” finish and can be tinted with up to 2 ounces of universal colorant. |
| Question: | If applying over previously latex painted cabinets, is the primer recomended and if it is, what kind? Thank you |
| Answer: | Hi, thanks for your question. INSL-X Cabinet Coat employs an acrylic-urethane resin that achieves superior adhesion on most surfaces. Any previously painted surface that is properly prepared requires no priming. A prepared surface should be cleaned and lightly sanded with 220 grit sandpaper to dull any gloss that remains on the surface. |
| Question: | What tip size is recommended for this primer when applying it using an airless sprayer like the greco x5 which is 0.27 gpm |
| Answer: | Hello, we recommend a tip range between .013 and .017. The total fluid output pressure at the tip should not be less than 2200 PSI. |
| Question: | can this be painted over polyurethane coated (wood) cabinets |
| Answer: | Hello, Cabinet Coat can be applied over properly prepared polyurethane coated cabinets. We recommend to thoroughly clean and sand the surface first. After cleaning and sanding we recommend to apply a coat of primer. You can use our Prime Lock (oil-based) or Stix (water-based) primers. |
Product features
INSL-X DIY Painting Tip
Remove cabinet hardware before painting.
Application: Smooth short nap roller, brush or sprayer.
INSL-X DIY Painting Tip
Rough the surface with 220-grit sandpaper.
Application: Smooth short nap roller, brush or sprayer.
INSL-X DIY Painting Tip
Use an all-purpose cleaner to remove any grease residue before painting.
Application: Smooth short nap roller, brush or sprayer.

Minwax 63333444 Polycrylic Protective Finish Water Based,1 quart, Satin
Minwax
Product description
Minwax Polycrylic Protective Finish is a durable, water-based, crystal clear, protective finish that is ultra-fast drying.
From the Manufacturer
Minwax is America's leading brand of wood finishing and wood care products. From staining and protection, to preparation, maintenance, cleaning and repair, Minwax makes and keeps wood beautiful.
- Protects and adds beauty to interior wood surfaces including woodwork, furniture, doors and cabinets
- Crystal clear finish is ideal for use over light woods like maple, ash and birch as well as over Minwax Water-Based Wood Stains
- Ultra fast-drying formula allows for quick recoats in 2 hours
- Water-based formula allows for easy soap and water clean up
- Available in gloss, semi gloss, satin, matte and ultra flat
- Water clean-up
- Low odor, non-yellowing
User questions & answers
| Question: | Can this be applied over oil based polyurethane? I have an oak dining room table that needs just a little freshning up. The current finish is intact |
| Answer: | It's a good question to ask before you use a varnish. Every time I've applied polycrylic it's been over old varnish -- all oil based. They haven't usually been polyurethane -- they're older than that. But I would not have reservations about it. I've done it on tough floors -- a wood floor in a preschool dining room, a wood porch floor, natural finish, that got heavy traffic. Living room and dining room floors that got heavy teenage traffic, etc. So the adhesion is good if you prep it well (obviously you can't just put a new varnish over an old one without light sanding to knock down the gloss a bit, and get any dirt out. With your specific question -- how would the table look? I did a desk this way, and an old window sill, and that porch floor. All spar varnish first for its UV protection, and then polycrylic because it holds up so well to wear (and gives better traction than spar varnish). They looked very good, but a table top can demand more from the eyes. So I would look for a sample project, something you don't care as much about, and see how that works out. |
| Question: | can you safely use this over a latex painted finish |
| Answer: | I use it all the time over 100% acrylic latex paint as a protective overcoat. I works great and after a year, it achieves a really hard durable finish. For cabinetry, I use 3 coats of paint, then 3 coats of polyacrylic, with random orbital sanding between coats. I have never used polyacrylic over cheaper paint (mixed acrylic and vinyl polymers); I would do a test patch first. |
| Question: | Can you use this over Annie Sloan Chalk paint to protect |
| Answer: | You can, but if you want it to have that flat, milky finish Annie Sloan Chalk paint is known for, then you shouldn't. This finish will give it a shine, even though it's satin. The recommended finish for chalk paint is wax (which I believe Annie Sloan also makes, but I'm not 100%). However, it's rather expensive and needs to be reapplied once every 6 months or so for best results. If you don't want to use wax, I've been told that General Finishes QTHM High Performance Water Based Topcoat will keep it looking the way chalk paint should.(Note to others: chalk paint is not the same as chalk BOARD paint. You can't write on Annie Sloan chalk paint, regardless of the finish.) |
| Question: | Can you use it on a dining table or will glasses leave rings |
| Answer: | I used this on a dining table, and glasses do not leave rings. It has held up very well across MOST of the table. It was also very easy to work with. However, I will mention that certain sections have basically "peeled/worn" away; now, this could very well be my fault (bad surface prep), OR the fault of the very deep-grained oak I was using, and I didn't use grain filler (water perhaps got into the "gaps" in the grain, sat there, and created a spot for even more water to seep underneath the finish.) I, personally, will probably use something oil-based next time I refinish my dining table, but I wouldn't hesitate to use this again for other future projects. |
General Finishes High Performance Water Based Topcoat, 1 Quart, Satin
General Finishes
Product description
High performance top coat is the hardest, most durable consumer polyurethane top coat on the market today. It contains all the consumer friendly characteristics of a polyacrylic blend. In addition it contains a UV stabilizer to protect it from breaking down in sunlight and to protect the underlying stains from fading. With its Pure polyurethane durability, it can even be used on floors.
- Do not apply clear topcoats over bright white paint, as yellowing may occur due to a reaction to the substrate. Light color paints may also experience yellowing due to topcoat application, but it will less noticeable.
- The hardest, most durable consumer polyurethane top coat on the market today
- Dry Time Between Coats is only 1 to 2 Hours
- Interior use only
User questions & answers
| Question: | Can this be used outside over chalk paint |
| Answer: | I finished an oak door with it and it hasn't yellowed yet. |
| Question: | Is the flat finish really flat |
| Answer: | I am sure the chemistry is similar but I think liquitex matte varnish or Bliks gloss medium is a better choice. |
| Question: | does it get yellow |
| Answer: | I doubt it. It will probably eat the surface of the photograph. You need to look it art supplies or something. |
| Question: | Hi can I use this over a painted cabnet door as a sealer ? After painting I realized I NEEDED to seal. With the reviews of this product I hope I'm |
| Answer: | The short answer is probably yes. As with all things, try a small area first. The product works very well on many surfaces. This poly does not yellow rapidly or at all where the product used that was removed may have already yellowed. |

Varathane 200141H Water-Based Ultimate Polyurethane, Quart, Semi-Gloss Finish, 32 Fl Oz
Varathane
Product description
Varathane Ultimate Water Based Polyurethane is a crystal clear protective layer for interior wood surfaces. Maximum scratch and stain resistance protect the surface from damage to preserve the color and quality over time. Ultra fast drying and easy soap and water clean up saves time and hassle.
From the Manufacturer
Varathane Crystal Clear Water-Based Polyurethane is specially developed to let wood’s natural beauty show through with the highest clarity over other water-based polyurethanes. Varathane provides outstanding scratch and stain resistance to keep your interior wood projects looking great longer.
- Protects indoor wood surfaces such as furniture, windows, cabinets, trim and more
- Water based formula dries fast and cleans up with soap and water
- Dries to the touch in 30 minutes with coverage up to 125 sq. ft., recoat after 2 hours
- Durable formula provides outstanding stain and scratch resistance with excellent clarity
- Semi gloss finish creates a smooth and classy look
- Clear formula ideal for interior projects like furniture, doors, cabinets and trim
- The best scratch and stain protection available
User questions & answers
| Question: | Is this latex |
| Answer: | Technically, I can't say. It is water base with water clean up. Easy to use, low odor & does at least as good or better than any oil base polyurethane I ever used. They recommend sanding between coats, but I never have & all the results are awesome. Good luck. |
| Question: | How well does this work over acrylic painted wood? I need a very smooth finish with no yellowing |
| Answer: | I use it on various painted wood surfaces, and it dries crystal clear. Not sure what you mean by “ acrylic” paint, tho. I’ve used it on water- based paint and oil- based,as well. Always clear! |
| Question: | Can I use this safely on child's toy box that is painted white using water based paint |
| Answer: | It should work fine. There is a vapor warning and some other warnings on the can, but it is a waterbase product. Works and look really good. Should top coat latex paint find. Contact Rust-oleum to be sure! |
| Question: | Can I use this with sprayer |
| Answer: | Yes, I had no problems. I believe the can says not to thin it. I found it plenty thin enough to spray with a pretty low-end sprayer. I have heard people say they have thinned with 10% water to extend the dry time, but I can't speak as to their end results. Mine came out great (cabinets) |
Aqua Coat, Best Wood Grain Filler. Clear Gel, Water Based, Low odor, Fast Drying, Non Toxic, Environmentally Friendly (Pint)
AQUA COAT
- DESIGNED WITH EVERYONE IN MIND: From the DIYer to the contractor this is the perfect product to fill the grain and seal the pores of wood before or after staining or on raw wood to get a smooth finish on oak, ash, mahogany, walnut and other porous woods. A favorite product for tabletops, desktops, cabinets, vanities, millwork, pianos, guitars and furniture refinishing. For that glass smooth finish, start and finish all your hard to fill wood projects with Aqua Coat.
- WATERBORNE AND ECO- FRIENDLY: Our entire line of products are MADE IN THE USA, low VOC, low odor, non-flammable, non-combustible, water-based fast drying, easy to apply, easy sanding, excellent adhesion, water clean up, environmentally friendly. This makes it the healthier option for your employees and your family. Achieve that beautiful glass smooth finish while keeping the environment and your health in mind.
- VERSATILE AND COMPATIBLE WITH OTHER PRODUCTS: Filling your wood grain before you stain not only creates that beautiful smooth finish you are looking to achieve it will also seal the pores and help minimize absorption of your top coat, saving you time and money. Aqua Coat Clear Grain Filler can be mixed with water soluble pigments/dyes.
- EASY TO USE- Work the Clear Grain Filler generously into open wood grain and pores against the grain with a small squeegee, bondo blade, old credit card, or fingers with a glove. Scrape off excess with a squeegee, bondo blade, or an old credit card with the grain. Let dry 45-60 minutes. VERY lightly sand with a 320 or higher grit sandpaper or a fine scotchbrite sanding pad immediately before your next application of grain filler. 2-3 coats are recommended.
- LONG LASTING- A little goes a long way. You can use one quart to do 2 quarts on a medium sized kitchen (30-40) drawers and doors.
User questions & answers
| Question: | I have old polyurethaned oak cabinets. Do I clean, sand prime cabinets first then apply aqua coat or is the process reversed |
| Answer: | The most successful process for refinishing your cabinets with Aqua Coat Grain Filler would be as follows. 1 We highly recommend you do this process completely to the end on the back of a drawer to help you assure success. 2 Sand with 220 grit sand paper. Wipe down with a dampwater paper towel or old t-shirt. Do not use tack rags. they contain oils or wax 3 De gloss 4 On your sample drawer back, apply 2 coats of Aqua Coat Grain Filler with a credit card. bondo blade, rag for curves. Lightly sanding with a 320-400 grit paper in between coats. You are not sanding it down, you are not sanding it off, the only reason you sand is to form a better bond between coats. Only sand immediately before applying the next coat. 5 for testing purposes On half of this drawer back apply a third coat. When you have completely gone through the testing process you will be able to decide if you need 2 or 3 coats. Lightly sand 3rd coat with 320-400 immediately before applying primer. 6 Apply 2 coats of a high build primer water based, oil based, solvent based 7 Apply 2 coats of a quality paint. water based. oil based, solvent based To save an immense amount of time we highly recommend going completely through the testing process to see if you need 2 coats or 3 and have confidence in your process. |
| Question: | Have you had any problems when filling in deeper gouges or chip out? I have used another product and it left the areas white when it dried |
| Answer: | If you left areas white then you applied it to thick. It is a pore and grain filler. Not a deep gouge filler. If you would like to touch up deeper indentations add a little sawdust from the piece you are working on to the grain filler. |
| Question: | How do i apply material |
| Answer: | I've used this on several guitars (including mahogany, spruce, padauk, bubinga). After sanding, I apply any stain I might want. Usually, I just use Minwax natural to add depth with not much color. I follow that with a coat of Zinsser Wax Free Seal Coat, diluted 50:50 with denatured alcohol. After a light sanding I do 2 or 3 coats of Aquacoat, using either a motel keycard as a spatula or just rub it in while wearing nitrile gloves, making sure to wipe off the excess to minimizing sanding. After it's dry, I lightly sand it, looking carefully for any spots that had build up, and finish it off with a dozen plus light coats of aerosol Deft Lacquer (gloss of your choice). |
| Question: | If this has a jello consistency, how will it stay in place when applying it to my upper cabinet frames? Won't it run off a bit |
| Answer: | Yeah, it will stay in place in a vertical application. Even upside down. It's way thicker than Jello. More like vasoline once spread. Once any stain or sealer is applied, I add a coat of gloss finish. Then, you can really see the pores or tear out your trying to fill. Add a the aquacoat, let it dry (20 minutes or so), sand, and repeat a few times. Then, proceed with finishing. Works great. |
Product features
Ideal Customers For Clear Wood Grain Filler
- Cabinet refinishers
- Furniture makers
- Luthiers
- Gun stock finishers
- Cabinet makers
- Piano restoration
- Antique restoration
- DIY woodworking hobbyists
DIRECTIONS FOR USE:
Aqua Coat Clear Wood Grain Filler should be applied after the piece is stained, and/or a seal coat has been applied.
- Stain and seal coat must be dry and lightly sanded with 220-grit or finer sandpaper.
- Grain Filler can be tinted with water-soluble colorants or dyes.
- If no stain or seal coat is used, you may apply Clear Grain Filler to the raw wood.
- Grain Filler may be applied with a soft cloth, using a circular motion, much like applying a paste wax. Or work Grain Filler generously into open wood grain pores with a small squeegee or flexible putty knife.
- Inspect to see if the grain is completely filled, then scrape or squeegee to remove excess.
- Let dry 30-45 minutes, then lightly sand with 320 grit paper.
- If grain is not completely filled, repeat the application process.
Better for Users and The Environment
Aqua Coat's Clear Wood Grain Filler is water-based and friendly to the environment! That along with its low odor and ease of use makes it the better choice for professionals and home DIY'ers!

Rust-Oleum 242057 Painter's Touch Latex Paint, Quart, Gloss Clear
Rust-Oleum
Product description
Rust-Oleum Painter's Touch Ultra Cover Multi-Purpose Brush-On Paint provides a smooth, durable finish on interior and exterior items. Projects take less time with a quick drying formula and excellent hide. Paint resists chipping and fading on a variety of surfaces.
From the Manufacturer
Rust-Oleum Painter's Touch provides long-lasting protection and durability. This high quality formula goes on smoothly and goes further than other multi-purpose paints.
- Use for a variety of indoor and outdoor project surfaces including wood, metal, plaster, masonry or unglazed ceramic
- Water-based acrylic formula is low odor, resist chips and provides long-lasting protection
- Covers up to 120 sq ft and dries to touch in 30 minutes for quick project completion
- Gloss finish provides a fresh new look for surfaces, goes on smoothly and provides excellent hide
- Prior to application sand surfaces with 180/200 grit sandpaper, then wash with a degreaser, allow the surface to dry and apply paint
- Indoor/Outdoor durability
- UV-resistant
User questions & answers
| Question: | can this be used as a varnish over an acrylic painting |
| Answer: | In my experience as a small paintings, yes. But I don't know how long will protect it. Goof luck! |
| Question: | Can this be used to seal rocks painted with acrylic paint |
| Answer: | Yup! I sealed a bunch of painted rocks my toddler did for Father’s Day. |
| Question: | Can this be used on aluminium outdoors to protect from oxidization |
| Answer: | The information says so. I have no way to try it other than on canvas, so far. |
| Question: | Can it handle the heat of hot candle wax and burning incense? I need something glossy to use on resin & polymer clay incense/candle holders |
| Answer: | I don't think this is heat tested you may want to look into paint for grills or engines they have high heat gloss paints |
Product features
Rust-Oleum 242057 Painters Touch Quart Latex, Gloss Clear
Rust-Oleum Painter's Touch Ultra Cover Multi-Purpose Paint Clear Brush provides long-lasting protection and durability. This high quality formula goes on smoothly and goes further. Tough, chip-resistant finish is ideal for a variety of painted indoor and outdoor objects.
FOR BEST RESULTS
Avoid excessive brushing as this will reduce film thickness and protection.
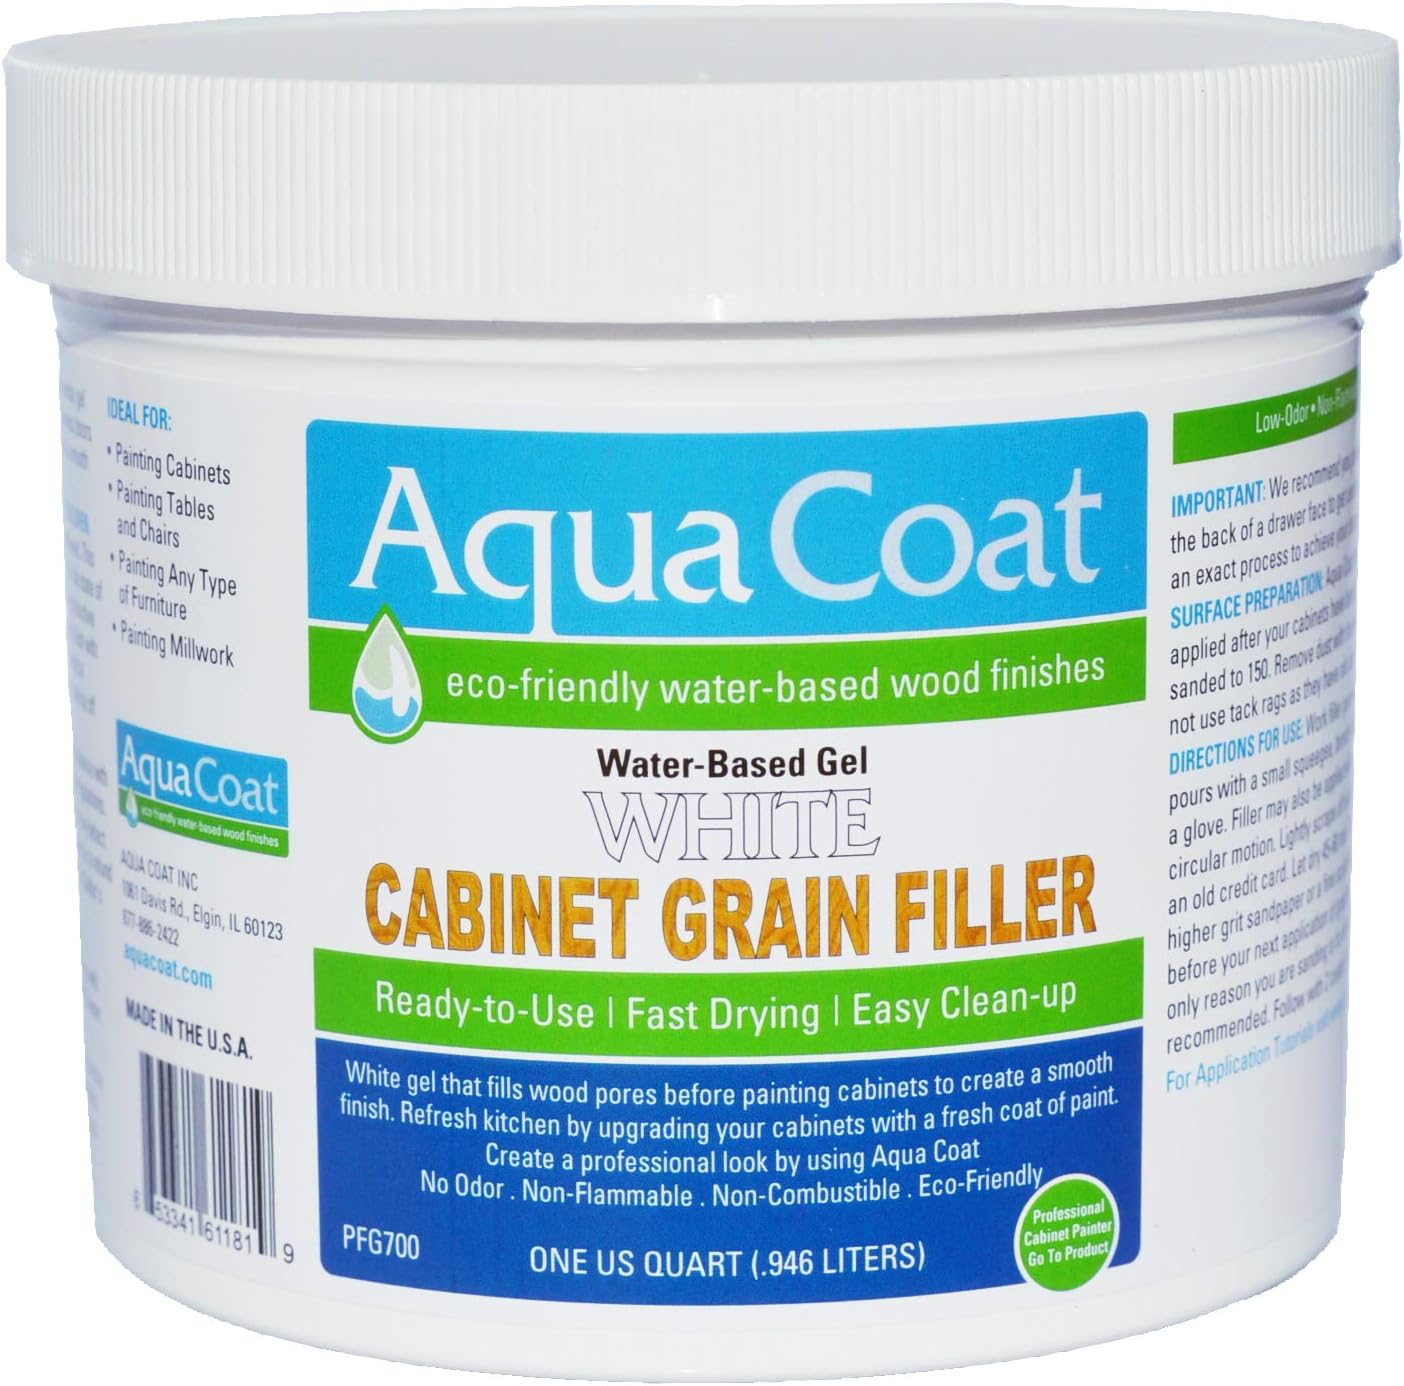
Aqua Coat, Best White Cabinet Wood Grain Filler, White Gel, Water Based, Low Odor, Fast Drying, Non Toxic, Environmentally Safe (Quart)
AQUA COAT
- DESIGNED WITH EVERYONE IN MIND: From the DIYer to the contractor this is the perfect product to fill the grain and seal the pores of wood before painting to get a smooth finish on oak, ash, mahogany, walnut and other porus woods. A favorite product for cabinet and vanity refinishing, millwork, and furniture refinishing. For that glass smooth finish, start and finish all your wood projects with Aqua Coat.
- WATERBORNE AND ECO- FRIENDLY: Our entire line of products are low VOC, Non-Flammable, Non-combustible, Low Odor, Fast Drying, Easy to Apply, Easy Sanding, excellent adhesion, Water Clean Up, Environmentally Friendly. This makes it the healthier option for your employees and your family. Achieve that beautiful glass smooth finish while keeping the environment and your health in mind.
- VERSATILE AND COMPATIBLE WITH OTHER PRODUCTS: Filling your wood grain before you paint or lacquer not only creates that beautiful smooth finish you are looking to achieve it will also seal the pores and help minimize absorption of your top coat, this leads to less coats of paint or lacquer needed saving you time and money. Our grain fillers are compatible with oil-based and water based primers, lacquers and paints. Aqua Coat White Grain Filler can be mixed with any water soluble pigments/dyes.
- EASY TO USE- Work the White Cabinet Grain Filler generously into open wood grain and pores against the grain with a small squeegee, bond blade, old credit card, or fingers with a glove. Scrape off excess with a squeegee, bondo blade, or an old credit card with the grain. Let dry 45-60 minutes. VERY lightly sand with a 320 or higher grit sandpaper or a fine scotchbrite sanding pad immediately before your next application of grain filler or your first coat of primer and paint.
- LONG LASTING- A little goes a long way. You can use 1 quart to do 2 coats on a medium size kithchen[30-40] doors and drawers It has a shelf life of over a year and passes two freeze/thaw cycles.
User questions & answers
| Question: | Is there a recommended temperature range for applying this product |
| Answer: | Yes ideally you want to apply where your temp is 72 degrees and 50% humidity. You can apply it between 65 -85 degrees. Any thing outside of that will affect dry and cure time. |
| Question: | Can I let the final Aqua coat layer stand two weeks before painting |
| Answer: | Yes you can let it dry for an unlimited time before applying primer and paint. Just make sure you lightly sand with 320 right before you start applying your primer. |
| Question: | what if the cabinets have already been painted? Should I sand them all the way down Or will a light sanding work |
| Answer: | If you have previously painted your cabinets you will need to let them fully cure [as per the manufacturers guidelines]. Not dry but cure. At that point you will lightly scuff sand with 220 to give it some tooth so the grain filler has something to stick to. After scuff sanding you can blow off the dust or use a cotton rag. Do not use tack cloths as they have oils and waxes in them and will repel the grain filler. Then apply 1-2 coats of grain filler. 1 coat of primer and 1-2 coats of paint. Always try your complete planned processes on the front of a drawer first. |
| Question: | Can I use this on old cabinets installed in 1972? Also, can I use it on the inside of the cabinet or is it just for the outer doors |
| Answer: | Yes. Inside or outer surface, wherever you have wood grain that you want to make smooth. I used Aqua Coat on the outside of oak cabinets and both sides of the doors and drawer fronts. The outside of the doors needed 3 coats with light sanding (220) between coats. It was labor intensive for the 22 cabinets I painted but well worth the time and effort. |
Product features
Aqua Coat White Cabinet Grain Filler
Aqua Coat's White Cabinet Grain Filler can be used before painting...
- cabinets
- kitchen tables
- desks
- chairs
- coffee tables
- side tables
- bathroom vanities
- wood shelving
- bookcases
DIRECTIONS FOR USE:
Work the White Grain Filler generously into open wood grain and pores against the grain with a small squeegee, bond blade, old credit card, or fingers with a glove. Filler may also be applied with a cotton rag or a soft cloth in a circular motion. Scrape off excess with a squeegee, bondo blade, or an old credit card with the grain. Let dry 45-60 minutes. VERY lightly sand with a 320 or higher grit sandpaper or a fine scotchbrite sanding pad immediately before your next application of grain filler and your first coat of paint. The only reason you are sanding is for adhesion purposes. 2-3 coats are recommended. Follow with 2 coats of primer and 2 coats of paint.
Better for Users and The Environment
Aqua Coat's White Cabinet Grain Filler is water-based and friendly to the environment! That along with its low odor and ease of use makes it the better choice for professionals and home DIY'ers!
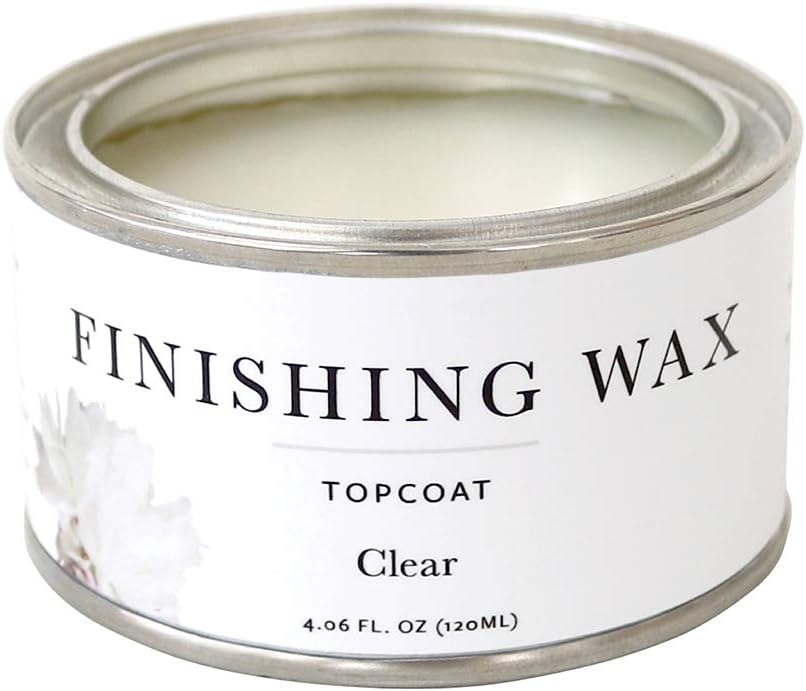
Jolie Finishing Wax - Protective Topcoat for Jolie Paint - Use on Interior Furniture, cabinets, Walls, Home Decor and Accessories - Odor-Free, Non-Hazardous - Clear - 120 ml
Jolie
- Premium Chalk Finish Paint Wax - Odorless, non-hazardous, and water-resistant sealing wax; available in a variety of colors
- Soft consistency and easy to apply: highlight texture and moldings and create custom finishes
- Creates a durable matte (flat) finish or it can be buffed to add a subtle sheen
- Apply to painted surface or directly on raw wood with a Jolie Wax Brush
- For best results, always apply Clear Finishing Wax to your piece before applying colored Finishing Waxes
User questions & answers
| Question: | Can you use this over milk paint? and, if i use it over pure white, will it turn tellow |
| Answer: | Yes it will but I'm very disappointed with the accuracy of the color. It was supposed to be red and it's way too pink. |
| Question: | Do you have a clear wax ingedient list |
| Answer: | We do not recommend attempting to paint over veneer with Shabby Chic Chalk Based Furniture Paint. SHABBY CHIC AESTHETIC: Chalk-based furniture paint designed to create distressed and ornate styles EASY TO USE: Refurbish a dresser, vanity, crib, and more without the need for a primer or undercoat MULTIPLE SURFACES: Ideal for wooden furniture and metal, plastic, brick, stone, and plaster surfaces RICH PIGMENTS: Chalk-based paint available in 37 different colors with matte or metallic finishes ADVANCED FORMULA: Non-toxic, water-based chalk paint safe for use near children and inside the house |
| Question: | Can you use this over a wood stain |
| Answer: | Yes but multiple coats will be needed to do a color change from dark brown to antique white. Shabby Chic Chalk Furniture Paint is genuine quality made in the UK. Water-based chalk paint with virtually no odour. The paint can be used directly onto Wood (bare or painted), brick, stone, plaster or any suitably primed rigid surface (eg.metal, plastic, ect). Create a distressed look by applying two coats in contrasting colours then sanding / scoring when dry. Paint Preparation: For best results, ensure surface is clean and free from wax or oil. If wax has been used clean the surface thoroughly with white spirit. We recommend that bare wood should be sanded before painting. Application: Stir thoroughly prior to use. The product may be applied by brush or roller. If applying by brush, apply evenly following the grain of the wood. If rolling, use a short nap mohair roller. To create a distressed look apply two coats in contrasting colours. Allow to dry then lightly abrade with moistened sand paper or stainless steel scoring pad - abrade with the grain of the wood. Coverage: up to 12m2 per litre. Coverage may vary depending upon method and rate of application and porosity of surface. Drying Time: Touch dry in 1 hour. Handle after 2 hours. Apply a second coat after 2 hours if necessary. Full hardness after 3 hours. Clean Up: with water. Do not empty into drains or water courses. Some local authorities have special facilities for the disposal of waste coatings. |
| Question: | Can this be used over latex paint and if the latex paint is gloss will it look matte after applied |
| Answer: | We do not recommend attempting to paint over veneer with Shabby Chic Chalk Based Furniture Paint. SHABBY CHIC AESTHETIC: Chalk-based furniture paint designed to create distressed and ornate styles EASY TO USE: Refurbish a dresser, vanity, crib, and more without the need for a primer or undercoat MULTIPLE SURFACES: Ideal for wooden furniture and metal, plastic, brick, stone, and plaster surfaces RICH PIGMENTS: Chalk-based paint available in 37 different colors with matte or metallic finishes ADVANCED FORMULA: Non-toxic, water-based chalk paint safe for use near children and inside the house |
Product features
Step 1
GET INSPIRED
Take our Style Quiz on our website or browse inspiration by style, color, finish, project, or room to plan your next project.
Step 2
BE IN THE KNOW
Learn from our Everyday Guide, Embellishment Guide, video tutorials, FAQ page, and color collections.
Step 3
STOCK UP
Shop Jolie Paint, topcoats, embellishment products, and brushes online or at your local Jolie Retailer.
Step 4
GET PAINTING
Complete your project and show it off! Share your transformation with us by tagging @joliepaints and #joliebyme
Create beautiful colors and finishes on furniture, cabinets, floors, walls, and home accessories.
MIX COLORS
Jolie Paint is available in 42 beautiful pre-tinted colors. Use them on their own or combine multiple colors to create a custom hue. Use the Jolie Color Mixing Guide as a reference, or experiment and create your own! Creating custom colors allows you to make your project even more personalized.
CREATE A VARIETY OF FINISHES
Whether you use a single color or layer a few, Jolie Paint can be used to create hundreds of custom finishes. Read the Everyday Guide to learn how to create basic, smooth, textured, washed, dry brushed, and distressed finishes.
Jolie products are designed to be versatile.
PAINT ANY MATERIAL
Jolie Paint adheres to almost any surface, including wood (raw, painted, stained, waxed, or sealed), metal, matte plastics, brick, concrete, stone, and some fabrics. See the Jolie Everyday Guide for additional information on the treatment of different surfaces.
PAINT FLOORS
Jolie Paint can be used to paint large, hard-wearing surfaces such as Floors. Instead of Finishing Wax, seal your floors with Floor Varnish.
COMPLETE OUTDOOR PROJECTS
Jolie Paint can be used on furniture and accessories that will primarily be used outside. Do not use Metal Leaf, Finishing Wax, or Floor Varnish on your outdoor projects.
Embellish with colored Finishing Waxes, Gilding Waxes, and Metal Leaf.
ADD METALLICS
Use Jolie Metal Leaf before waxing to add a bright metallic shine to your project. To knock back the brightness, apply Brown Finishing Wax.
COLORED & GILDING WAXES
Colored Finishing Waxes and Gilding Waxes are the perfect way to add that final special touch to any project. Layer waxes to create additional character and depth in your finish.
Jolie Everyday Guide
The Jolie Everyday Guide is the essential beginner's guide to learn six of Jolie Home's signature finishes. It covers everything from materials, preparing your surfaces, step-by-step techniques, applying Finishing Wax and Floor Varnish, mixing colors, cleaning, and care.
INCLUDED FINISHES:
- The Basic Finish
- The Smooth Finish
- The Textured Finish
- The Distressed Finish
- The Dry Brush Finish
- The Washed Finish.
Jolie Embellishment Guide
Add depth with colored Jolie Finishing Waxes, add metallics with Jolie Gilding Wax or Jolie Gold Size and Metal Leaf, or mix your own colored Finishing Wax by adding a little Jolie Paint! Download the Embellishment Guide to learn everything you need.
INCLUDES HOW TO USE:
- Colored Finishing Wax
- Custom Colored Finishing Wax
- Metal Leaf and Gold Size
- Gilding Wax
Updating Cabinets with Jolie Paint (Tutorial)
Follow along with Jolie Home's Youtube channel to learn how to paint your cabinets with Jolie Paint. Jolie Paint is a great option for transforming outdated cabinetry, including kitchen and bathroom cabinets. View the Jolie Everyday Guide for written instructions on creating various finishes.
Dyeing Fabric With Jolie Paint (Tutorial)
Did you know you can dye fabric with Jolie Paint? It is a great way to update simple linens to coordinate with your style and space. Fabric dyeing works best with natural fibers, like cotton or linen. Follow along with the tutorial by visiting our Youtube channel.
Latest Reviews
View all
Pink Salt
- Updated: 03.03.2023
- Read reviews

Method Mop For Tile Floors
- Updated: 13.07.2023
- Read reviews

Snowmobile Goggles With Mirrors
- Updated: 03.01.2023
- Read reviews

Anran Wireless Outdoor Cameras
- Updated: 05.07.2023
- Read reviews

Running Hiking Shoes
- Updated: 14.07.2023
- Read reviews