8 best ceramic tile shelf
A ceramic tile shelf is a type of bathroom shelf designed to be installed directly onto a tiled wall. These shelves are typically used for storing toiletries, bath essentials, or decorative items in bathrooms, kitchens, or other tiled areas. Here's what you need to know about ceramic tile shelves:
Material: Ceramic tile shelves are made from the same materials as ceramic tiles. They often feature a glazed finish, which not only adds to their aesthetic appeal but also makes them easy to clean and maintain.
Installation: These shelves are designed to be integrated into the tiled wall during the tiling process. They are usually installed by creating a niche or recess in the wall where the shelf fits seamlessly.This installation method provides a sleek and built-in look.
Sizes and Styles: Ceramic tile shelves come in various sizes and styles to match different bathroom designs and preferences. You can find rectangular, corner, or curved shelves to suit your needs.
Durability: Ceramic tile shelves are known for their durability and resistance to moisture. They are well-suited for use in bathrooms and shower areas, where they won't deteriorate or warp due to exposure to water and humidity.
Easy to Clean: The glazed surface of ceramic tile shelves is easy to wipe clean, making them a low-maintenance storage solution for bathrooms and kitchens.
Aesthetic Appeal: These shelves blend seamlessly with tiled walls, providing a cohesive and visually appealing look to the space. They can be left in their natural ceramic finish or coordinated with the tile design for a unified appearance.
Weight Capacity: The weight capacity of ceramic tile shelves can vary depending on their size and installation method. It's essential to follow the manufacturer's recommendations and ensure proper installation for secure and stable support.
Customization: In some cases, you may be able to customize the size and color of your ceramic tile shelf to match your specific design requirements.
Accessories: Some ceramic tile shelves come with accessories like brackets or railings to prevent items from falling off the shelf, especially in areas with high moisture levels.
Installation Considerations: Installing a ceramic tile shelf typically requires some knowledge of tile work and may be best done by a professional. It's essential to plan the shelf's location carefully during the initial tile installation or renovation process.
In summary, ceramic tile shelves offer a functional and aesthetically pleasing storage solution for bathrooms and other tiled areas. Their durability, resistance to moisture, and easy maintenance make them a popular choice for homeowners looking to maximize storage space while maintaining a cohesive design in their tiled spaces.
Below you can find our editor's choice of the best ceramic tile shelf on the market
Premium Quality Italian Carrara Marble Corner Shelf Polished (1)
Tenedos
Product description
Premium Quality Italian Carrara Marble Corner Shelf Polished. PRODUCT IS NATURAL STONE PRODUCT SO IT MIGHT BE DIFFERENT FROM ABOVE PICTURE. Product is 6 lbs weigh. Size: 9'' x 9'' Thickness : 9/16'' Best quality on the market, individual wrapped product for anti scratch and max protection. Price is per 1 pcs individual corner shelf. NO HARDWARE INCLUDED, you need to install it with silicone or adhesive or with tile installation. PRODUCT IS NATURAL STONE PRODUCT SO IT MIGHT BE DIFFERENT FROM ABOVE PICTURE. Color: Light Gray Carrara Marble with Grey veins. If you are buying more than 1 pcs , select the 2 pcs listing ASIN B082QRF585. The closest pieces in variation and color were selected for this product.
- Size: 9'' x 9'' Thickness : 9/16'' Best quality on the market, individual wrapped product for anti scratch and max protection
- Price is per 1 pcs individual corner shelf. NO HARDWARE INCLUDED, you need to install it with silicone or adhesive or with tile installation
- PRODUCT IS NATURAL STONE PRODUCT SO IT MIGHT BE DIFFERENT FROM ABOVE PICTURE.
- Color: Light Gray Carrara Marble with Grey veins
- If you are buying more than 1 pcs , select the 2 pcs listing ASIN B082QRF585. The closest pieces in variation and color were selected for this product
User questions & answers
| Question: | Any idea how much weight this can support? Want to use to put foot up on to shave |
| Answer: | Lenses are optical quality acrylic (fancy type of optical plastic, lighter than glass). |
| Question: | What's the difference between the premium italian carrara marble corner shelf polished 9" (1) and the same one with (2) behind it besides price |
| Answer: | CliC listings at Amazon are confusing. This is the XL or XXL, the terms are used interchangeably on this frame. There are 3 size options in this lens shape: Original (regular), Long, or "XL-XXL-Expandable". |
| Question: | Any issues with water pooling on these |
| Answer: | Yes |
| Question: | How do you install this in a shower |
| Answer: | I have reached out to the manufacturer to see if they have an answer for this question. They do not sell anything explicitly labeled for computer distance. I personally use my regular CliC readers at the computer as well and find that my magnification of 1.75 works suitably for both distances. I will update this answer if I get better information from the manufacturer. |

Premium Marble Corner Shelf - Shower Soap Dish - 8" Natural Stone Bathroom Caddy - Bath Wall Shampoo Holder (Black Marquina)
Product description
INSTALLATIAN TECHNIQUIS: Marble Corner shelves can be installed in several different ways. 1] Build-In Tile/ Wall: Most common way is to install the shelf in the shower when remodeling a bathroom. The shelf gets build in to shower tiles with the same tile installing thin-set mortar/adhesives. 2] Glue-On: Marble shelves can also be mounted on already tiled showers / bathrooms. The shelf is attached to the surface of tiles with the help of industrial adhesives. 3] Metal Brackets w/ Screws: Shelves can be attached to exiting tiled walls with the help of metal /aluminum brackets. You can use wall corner brackets with the screws. This requires some tile and wall drilling. 4] Mount-On Plastic Brackets: This is a transparent plastic bracket that is attached to the surface of the tiles with the help of special glue and clear epoxy that permanently support the shelf. AREA OF USE: These elegant stone shelves (Travertine and Marble corner shelves) can be used for variety of shelving purpose such as; shampoo holder, soap dish, bathroom caddy and so on. Install it in the wall corner of your shower to place a bar of soap, shampoo bottles, shower gels or shaving related items. Or Install it above your bathroom vanity sink corner to place your everyday lavatory items such as toothbrush holder, soap dispenser, etc. Install it near the kitchen sink where a wall corner available, above the kitchen countertop to store your everyday items. And so much more. WHAT ELSE WE OFFER: Besides offering a large selection of marble corner shelves in variety of white marbles, Italian carrara marble, emperador, nero marquina, thassos white, dolomite white marble, crema marfil marble, in all colors; white, brown, black, grey, beige, walnut and noce. NATURAL STONE INFO: Natural stone marble, travertine, limestone, etc. are product of nature. Therefor natural colors and veining may slightly vary from those pictured. Each piece is unique and different from the next... and that is the beauty of it!
- Black colors with some white veins. 8"x8" and 3/4" thickness (perfect size for showers)
- Water & Stain resistant, sealed with natural stone sealer.
- Handcrafted from natural stone premium Marble. Bullnosed polished edge for soft touch.
- Pictures represents overall colors and variations. Color and veining may vary from one to another due to the nature of the marble.
- This listing is for one 8" shelf. No Installation hardware included. If you are buying multiple quantity; the closest pieces in color and variations will be picked for your order.
User questions & answers
| Question: | How do you instsll the corner shelf for a new being installed ceramic shower |
| Answer: | I have not tried to personally, but an your eye doctor or a place that makes glasses could answer that for you. |
| Question: | Do you sell the brackets to mount before tiling? And what is your return policy |
| Answer: | To my knowledge, they are +1.25 corrective reading lenses. |
| Question: | Hello can this be installed with glue |
| Answer: | Yes, we can do that as a custom order for you with different lens strengths. The available standard lens strengths are 1.25, 1.50, 1.75, 2.00, 2.50, 3.00, and 3.50. You can order this item then message or call us immediately to tell us what lens powers you want, or you can place the order completely over the phone at (800) 985-9026. We don't have continuous phone coverage so if no one answers, please leave a message with your number and a good time to call you back. |
| Question: | I already tiled can you provide brackets or after tile mounting instructions |
| Answer: | CliC does not typically offer 2.75 in their glasses. We do usually have some genuine CliC 2.75 lenses that we can custom fit to the frames for you as a custom order, but we and CliC are both currently sold out. They are expected to be back in stock by the end of March 2021. |

Sanitary 3 Section Tile Recessed Ceramic Shower Niche Shelf-Gloss White Shampoo
Shower-shelf
Product description
The 3 Compartment niche is convenient for holds multi size items. This niche fits in the space of one 12x12 or four 6x6 ceramic tiles with no cuts necessary. Pair this unit up with the 1 Compartment and have plenty of storage for your shower toiletries in your shower. During firing our ceramic units shrink approx 11%, hence our measurement are nominal or approximate, thank you.Overall size is 12 3/4” x 12 3/4” x 4” Cut out size is 11 3/4” x 11 3/4”. Ribs of lower shelf have the backs removed so soap doesn't slide out. Please consider the Large two compartment as it is our "Best Value" as it holds more than the 3 compartment and fits between the studs easier. Install level in cut out opening using silicone caulk and tape in place with aluminum tape overnight, finish caulk next day. Please consult you tile setter, bathroom contractor or person who is remodeling your shower before purchasing. You Tube "ceramic niche install" Simple Ceramic Niche install video. Upon receiving immediately check for UPS damage by gently prying back and forth on the corners of the niche. Contact me immediately if damage, DO NOT RETURN UNIT if damage, send pictures. When installing or handling the ceramic corners can break easily if bumped into tile wall, be careful.
- Easy to Install in tile shower and Easy to Clean
User questions & answers
| Question: | What is the exact inside measurement of the shower niche |
| Answer: | Thank you for contacting us. The well-packaged eyeglasses case weight 0.062kg. |
| Question: | does this item only cone in white |
| Answer: | Outside is about 6.5 in long by about 2,5 inches wide. Depth is about 1in in the back to about 3/4in by the clasp |
| Question: | Can I get it sooner |
| Answer: | Yes there’s a soft part on the bottom of the case. |
| Question: | Came with no install suggestions, can the manufacturer shed a little light? Planning on thinsetting over my tile field so it sits out in front |
| Answer: | This glasses case is completely plastic outside, using magnetically close, and there is a removable white soft foam pad at the bottom of the case to protect the eyeglasses from scratching. |
10 inch Corner Bathroom Shelf - Polished Bright White Bathroom Storage Mounted Metro Flatback Wall Mount Organizer
Questech
- ✅ Installation Instructions: Scroll Down to Review Step-by-step Instructions to Ensure a Secure Installation With Your Tile Wall; Watch Our Installation Video for More Details on Our Proven Process
- ✅ EASY INSTALLATION: Our shelves use an easy no drill installation method, for application on any existing smooth stone and ceramic tile surface
- ✅ GLUE NOT INCLUDED: Compatible with Devcon 5 Minute Gel Epoxy (recommended) or comparable construction grade epoxy. See installation instructions in the package for a list of recommended adhesives.
- ✅ HOLDS UP TO 50 POUNDS: Wait for 24 hours for epoxy to set before adding any weight to the shelf
- ✅ SCRATCH AND STAIN RESISTANT: Q-Seal technology is made for wet areas providing a scratch and rust resistant surface that protects against stains
- ✅ AVAILABLE IN MULTIPLE CONFIGURATIONS AND FINISHES: Corner shelf, soap dish, floating shelf, footrest and shower caddy shower product organizer
User questions & answers
| Question: | Is the Sand color available? I did not see it |
| Answer: | Weighs 47 grams with the liner. 46 grams without it. Worth the 1 gram! |
| Question: | Can you use it as a foot rest to shave |
| Answer: | Don’t know the number but it’s really light. |
| Question: | Does water pool in the shelf even with the hole |
| Answer: | No. Normal size for regular glasses |
Product features
Product Benefits
Premium Material - Questech products are made of light weight cast stone and cast metal composite material which combines real premium stone and metals such as nickel silver, bronze and iron with polymers and ceramic for a high quality finish
Scratch and Rust Resistant: Ideal bathroom shower organizer storage for shampoo and soap because our patented Q-Seal technology is made for wet areas providing a scratch and rust resistant surface that protects against stains.
Made in the USA
GLUE NOT INCLUDED (SOLD SEPARATELY)
Full list of recommended glues listed on instruction sheet included with your order. Use the construction adhesive type most suitable for your application:
- Two-part epoxy gel/paste adhesive: Designed for vertical and overhead surfaces with no-run no-drip formula
- Polyurethane construction adhesive: 1 part polyurethane formula
3 Step Installation Instructions
No Drill Installation - Our 1-2-3 step installation makes it easy to install over existing tile and bathroom surfaces without damaging your tile
STEP 1: Use double sided tape and place on the specified areas on the back of accessory – remove paper tabs before installation. Following the construction adhesive manufacturer’s instructions, apply adhesive along guideline on back edges of accessory.
STEP 2: Press and hold the shelf in place to ensure it adheres to the tile. Use a level to check accurate placement of the shelf before applying the tape for support.
STEP 3: After epoxy adhesive is applied and the part is positioned, it can be supported using painters tape for 24 hours until the adhesive sets up sufficiently to form a final bond. Once fully cured, thoroughly caulk around the perimeter of the accessory to seal out water. Once fully cured, thoroughly caulk around the perimeter of the accessory to seal out water.
NOT FOR INSTALLATION OVER FIBERGLASS OR SHOWER INSERT SURFACES
Shower Niches

shower-shelf Recessed Ceramic Toilet Paper Holder Tile Niche
Product description
This item is for standard size toilet paper roll. This item will be larger than a metal t/p that has been removed. Please consult your tile setter before ordering. This item is well made of ceramic and is heavy but is easily supported by your drywall or backer board edge. Recessed Ceramic toilet paper holder gloss white. Install level in cut out opening using silicone caulk and tape in place with aluminum tape overnight, finish caulk next day. Please consult you tile setter, bathroom contractor or person who is remodeling your shower before purchasing. You Tube "ceramic niche install" Simple Ceramic Niche install video.During firing our ceramic units shrink approx 11%, hence our measurement are nominal or approximate, thank you.The opening is 5 1/2" x 5 1/2" . The depth is 3 1/2" (2x4 wall) and the hole for the roller is 2 1/2" from the back inside.
- Recessed Ceramic toilet paper holder gloss white
User questions & answers
| Question: | Just received this and it's perfect. Very high quality. Do you also sell the plastic toilet paper spindles individually? Would like to have extras |
| Answer: | Depends on what type of sunglasses. The inside dimensions are 6" x 2.25" x 2" for the see through case. The non see through is approximately 0.25" shorter |
| Question: | Are these desgined to be installed on tile or plain walls |
| Answer: | Yes, but the liner is also the seal, so it won't be waterproof without it. It's not like the full-sized cases, which have a separate o-ring seal. |
| Question: | What are the dimensions of this toilet paper dispenser? I am particularly interested in its depth into the wall |
| Answer: | Yes, they have a thin foam lining - works great for keeping my razor in my shaving kit. |
| Question: | will this product hold larger rolls of toilet paper |
| Answer: | As I said in my review, I could not fit my Ray-ban wrap around sunglasses in the case. After I wrote the initial review, the first case cracked (which I updated the review to mention this). Sometime later, I cracked the other case, and I gave up on this case, and moved on to other eyeglass cases. |
Product features
Get ready to glaze
I often refer to the glaze area of our studio as “the glaze kitchen.” While you should never bring food and drink into the glazing area, there’s a good reason for the name. The glazing area in any studio should be set up much like a commercial kitchen. You want clear staging areas and a flow that lets multiple people work without getting in one another’s way. The area should be designed with safety and efficiency in mind. In this chapter, we’ll cover how to set up a glaze area so that your workflow can be natural, with a focus on safety and minimal physical strain. We’ll also cover the tools necessary for glazing—and some fun extras!
Applying glaze (aka the dance)
You may have encountered people who badmouth glazing. You may have even met people who hate glazing. You know the type: they would rather do just about anything (even clean the studio!) other than glaze their work. These people often see glazing as a necessary step to finishing a piece. They must check it off the to-do list to get back to the more enjoyable process of working with wet clay. It is true that glazing can be intimidating, especially when you have fear of ruining a good pot with bad—or perhaps worse, boring—glaze. If you or your studio mates are in the “hate it” camp, chances are there’s more you can fix than the recipes you use.
Going further with glaze
It may take a kiln load or three to master those basic dance steps of glazing taught in Chapter 2. Having put in the time to master a set of glazes and glaze combinations, you may feel a sense of satisfaction—as well you should! Mastering glaze techniques, even the fundamentals, is no small feat. While it might be tempting to rest at the first feeling of contentment, I encourage you to continue the glaze journey with me. Examine the techniques in this chapter with an eye toward bringing additional variation and layers of expression to your work.
Special topics
The Japanese say it takes ten years to master the skill of centering clay. Not just to center at its most basic, but to do it masterfully, with grace. All master craftspeople follow similar yet individual paths. First, as students of a craft, they copied the masters who came before them. They became completely absorbed in their craft, developing competence in the basic techniques. They then began to improvise, and in so doing discovered their own voices. With repetition, dedication, and passion, they created something new, memorable, and of undeniable artistic merit. In this chapter, we will explore several special topics with masterful glaze artists who have established themselves within modern American ceramics.
Firing, finishing, and fixing
About thirty thousand years ago, humans began making and firing figurines in fire pits. With experience, these early ceramic artists were able to increase the temperature of their fires, eventually constructing the first primitive kilns within small caves by digging into the mountainside. Around seven thousand years ago, Egyptians discovered a clay body amenable to firing composed predominantly of glass and fluxes. The advent of Egyptian paste represents the beginning of glaze history, as potters began to experiment with the use of these materials on top of clay vessels to create a skin—a less permeable surface on the pot.
The recipes
The Odyssey ClayWorks glaze kitchen has built an impressive array of glazes, slips, and washes over the years. The recipes have come from a number of sources: instructors, resident artists, and students have all left their mark. Some of these recipes are popular, reliable classics found in many communal studios. Others are obscure gems found through mining old texts. Still others are the result of experimentation and tweaking. No matter the source, these glazes represent a living history, culled from dozens of workshops, hundreds of firings, and an innumerable number of tests. Credit is given to the source of the glaze whenever it is known. Thousands of color and texture combinations are possible using these recipes.

Sanitary 1 Compartment Tile Recessed Ceramic Shower Niche Shelf Gloss White
Shower-shelf
Product description
The 1 Compartment niche is convenient for holding 3-32 oz bottles. We recently supplied a large hospital remodel in Manhattan, NY with 375 of these, they are sanitary. This niche fits in the space of one 12x12 or four 6x6 ceramic tiles with no cuts necessary. Pair this unit up with the 3 Compartment and have plenty of storage for your shower toiletries. During firing our ceramic units shrink approx 11%, hence our measurement are nominal or approximate, thank you.Overall size is 12 3/4” x 12 3/4” x 4” Cut out size is 11 3/4” x 11 3/4”. Ribs of lower shelf have the backs removed so soap doesn't slide out. Install level in cut out opening using silicone caulk and tape in place with aluminum tape overnight, finish caulk next day. Please consult you tile setter, bathroom contractor or person who is remodeling your shower before purchasing. You Tube "ceramic niche install" Simple Ceramic Niche install video. Upon receiving immediately check for UPS damage by gently prying back and forth on the corners of the niche. Contact me immediately if damage, DO NOT RETURN UNIT if damage, send pictures. When installing or handling the ceramic corners can break easily if bumped into tile wall, be careful.
- Easy Install and Easy Clean
User questions & answers
| Question: | What is the depth of this unit |
| Answer: | Definitely, my sunglasses are large and they fit perfectly. |
| Question: | what are the opening dimensions |
| Answer: | I wouldn't sit it under a Keurig machine, the drawer is large enough to hold k cups but not strong enough to sit under a Keurig.. |
| Question: | is this nich able to be installed in a finished shower by cutting the rough opening into the tiled wall and then installing the nich with silicone |
| Answer: | yes, opens 180 degrees |
| Question: | What is the finish? Do you have a matte option |
| Answer: | I think it would be the Pelican 1060 - at least that is what that item description says. My iphone plus will not fit in this one. |

Daltile Bathroom Accessories 8-3/4 in. x 8-3/4 in. Almond Ceramic Corner Shelf Accessory Wall Tile
Daltile
User questions & answers
| Question: | How is the mounted? With adhesive |
| Answer: | No you cannot fit a case in them and oversized sunglasses cannot fit either.. I just ended up using it for my toddlers sun shades it fits children sunglasses perfectly. |

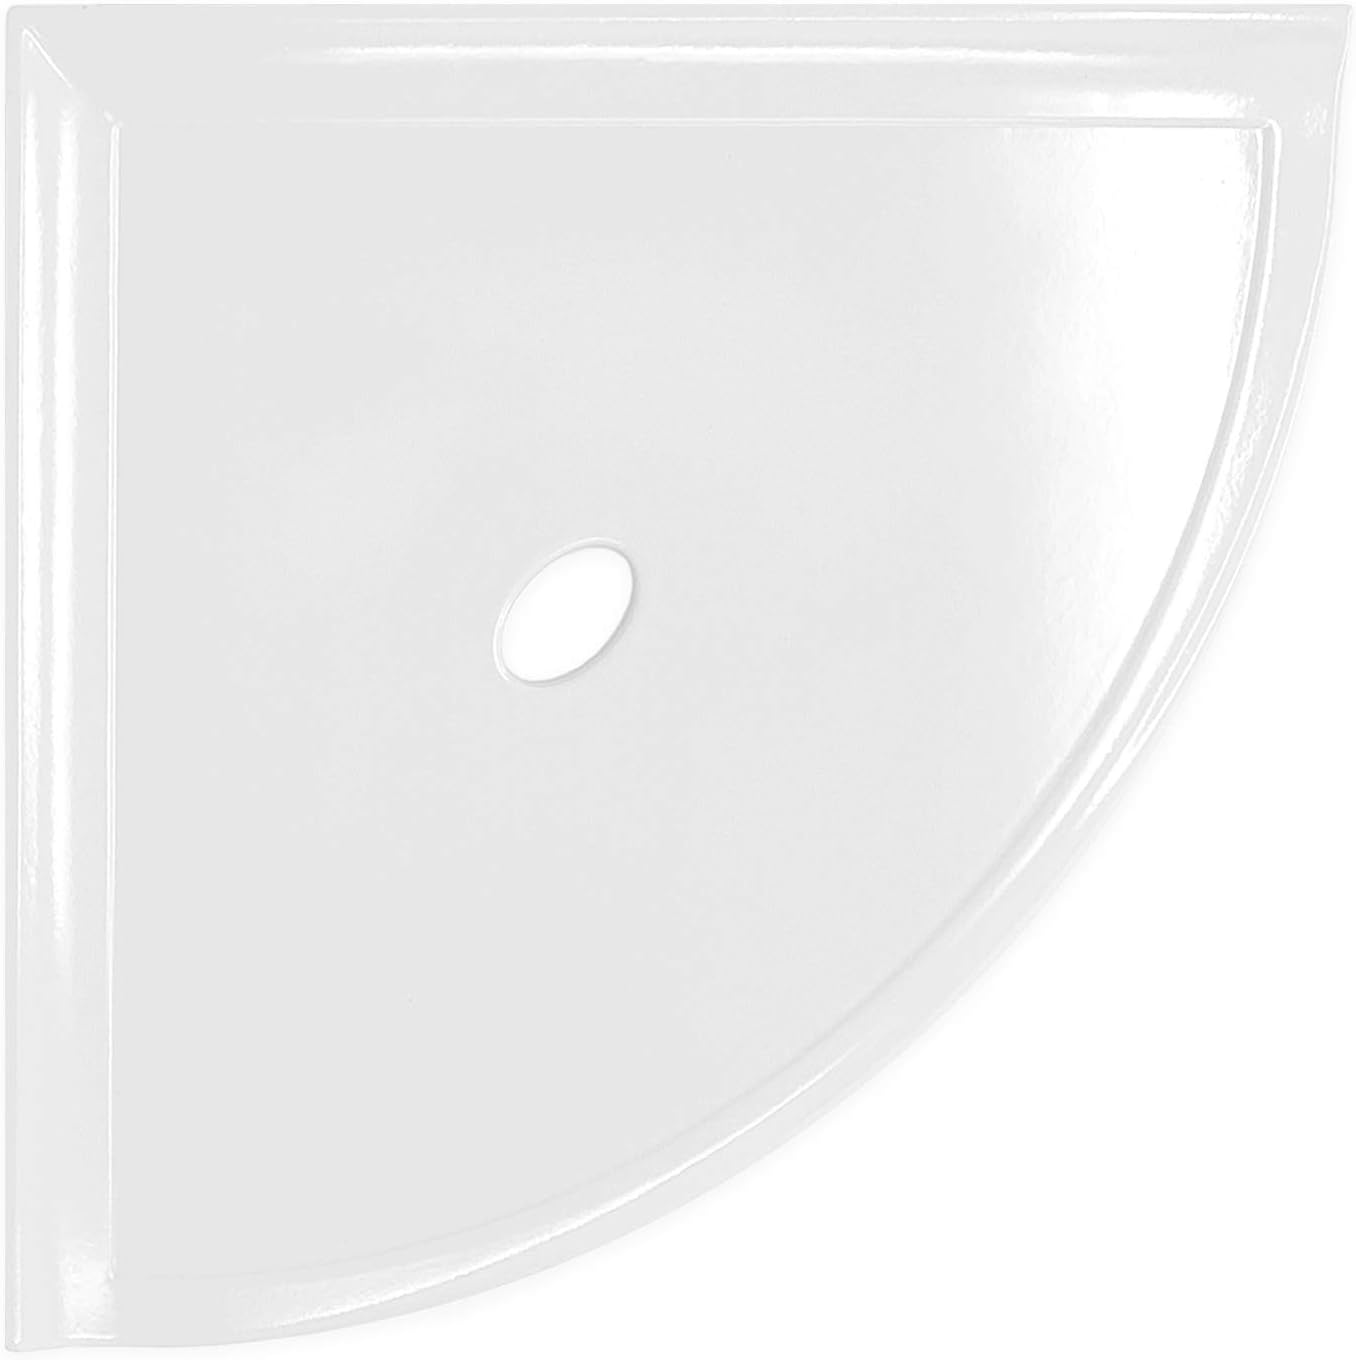
Daltile Bath Accessories White 8 in. x 8 in. Ceramic Wall Mounted Corner Shelf 0100BA7801P
Daltile
Product description
Daltile Bath Accessories White 8 in. x 8 in. Ceramic Wall Mounted Corner Shelf 0100BA7801P
User questions & answers
| Question: | How is this attached |
| Answer: | Yes it is stackable |
Latest Reviews
View all
Road Bike Tires
- Updated: 14.06.2023
- Read reviews

4K Processor
- Updated: 26.03.2023
- Read reviews

Hypoallergenic Shampoos For Cats
- Updated: 18.03.2023
- Read reviews

Front Door Camera For Outside
- Updated: 25.04.2023
- Read reviews

Organic Spa Gift Baskets
- Updated: 16.03.2023
- Read reviews