12 best regulator charges
If you have a particular product or component in mind or need information about a specific aspect of energy control or outdoor equipment, we recommend providing more details or checking with manufacturers or retailers in the relevant industry for the most accurate and up-to-date information. They can assist you in understanding the specific use and function of "regulator charges" in their products or systems.
Below you can find our editor's choice of the best regulator charges on the market
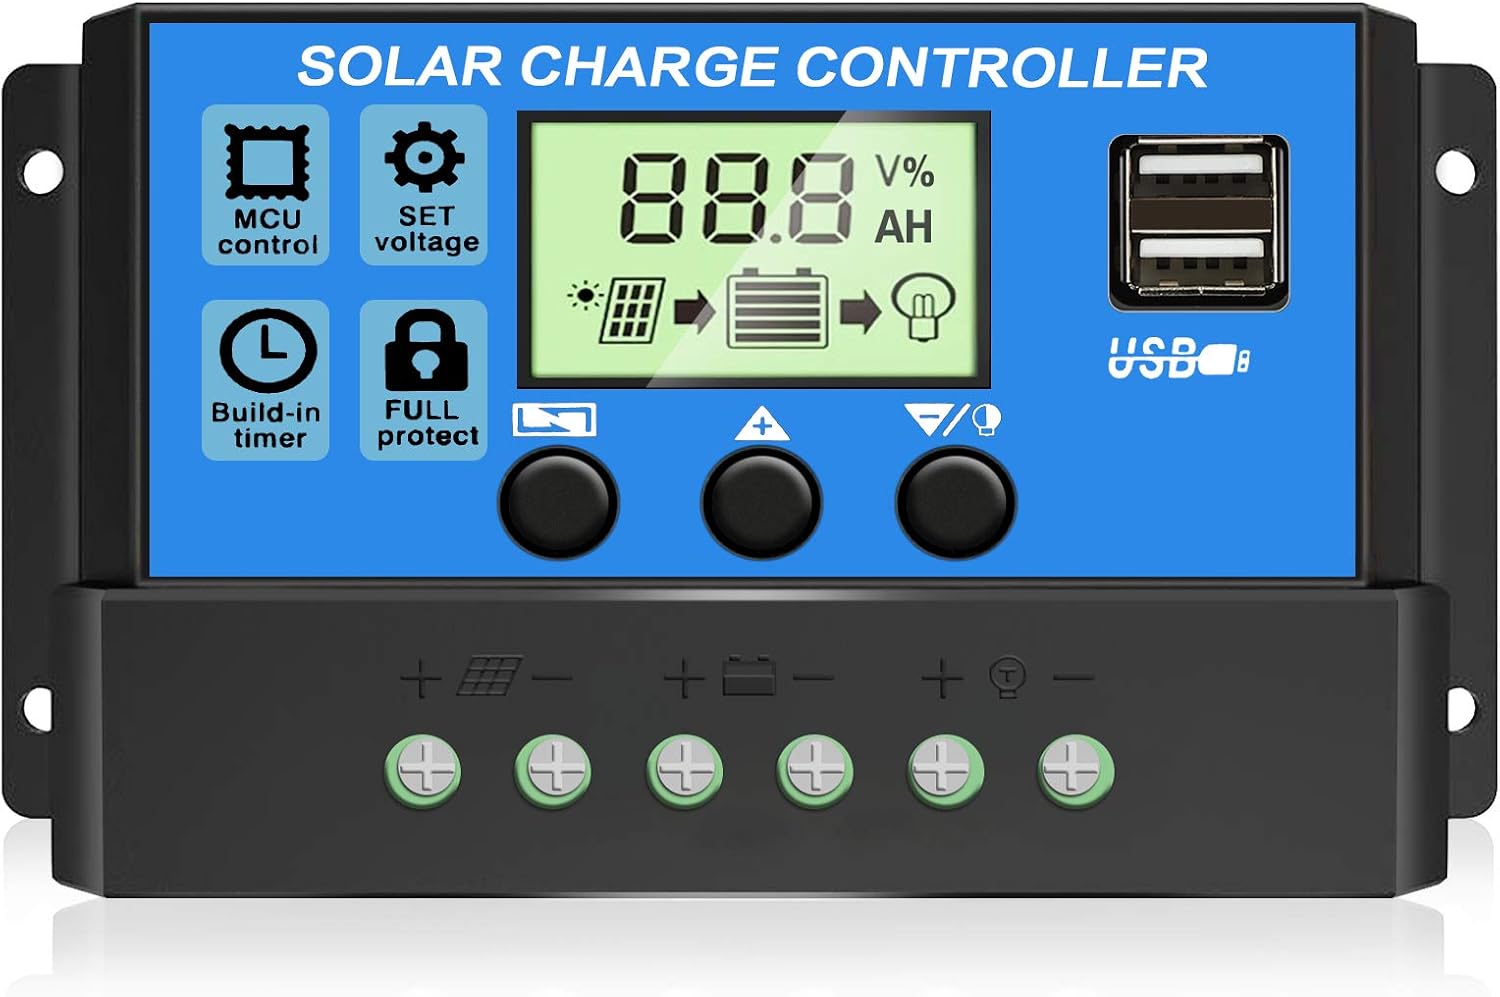
Sunway Solar Panels Charge Controller 12V Battery Regulator 7A for Safe Protection of 12Volt Solar Power Battery Charger, Solar Trickle Charger & Maintainer and Solar Powered System Kit
Product description
Solar charge regulator is designed to control the charging from solar panel into battery, and the power draw from the battery to outputs. Therefore keep the whole solar system at proper working condition. This solar charge regulator can be best used with our series solar panel with quick connector end.
Technical data:
Operating Temperature :-10℃ to 42℃
Humidity:≤80 %
Max. input Voltage :22V
Max. array current:7A
Over discharge protection:11V +/- 0.3V
Over charge protection:15.5V +/- 0.5V
How to Charge:
Please always connect the battery first.
Connect Solar panel, 12V rechargeable battery, and application (if any) as describe in the image of No.4 .
When solar panel is connected to the solar charge regulator, the charging LED will go on to show that the 12V rechargeable battery is receiving charge from the solar panel
The charge regulator provides following protections for the whole system
Over-discharge protection: When activated, “Low Voltage” indicator will go on, the charge regulator will shut off power output to prevent damage to the battery. In such case, Please stop using any application.
Over-charge protection: When activated, “High Voltage” indicator will go on, the charge regulator will shut off power input from solar panel to battery. Please disconnect solar panel from the charge regulator.
This solar charge regulator can be mounted through its three mounting holes
Caution:
1.Please do not short circuit and/or reverse the polarity of the load, the solar panel, & the battery.
2.Place the charge regulator at a cool and ventilated place. Avoid contact with water.
AFTER EACH USE: Disconnect the Charge Regulator from the battery and solar panels. Always disconnect the battery first.
- [For 12V DC Solar Systems]--This 7A solar battery charge Regulator use only for 12 volt DC solar power systems, solar panels and 12 volt rechargeable batteries protection. {IMPORTANT: Always Connect The Battery First and Disconnect Last.} If you need a 12V DC Quick Connect 16FT Extension Cable, please check the ASIN: B06X6LJTD6 .
- [Solar Power Input 100W Max.]--Max. input Voltage:22 VDC, Max. Current:7 AMP, solar Panel 100 Watt Maximum. Power Output: 12 VDC Battery. It can work with 5w 10w 20w 30w 50w 60 watts 100watt solar panel.
- [LED Indicators For Easy Monitoring]--This solar battery controller integrated with 3 LED indicators(green.yellow,and red) for low voltage(over discharge protection),charging and high voltage(over charge protection).
- [Quick and Easy Connection]--This solar battery charger controller coming with Versatile quick connect and quick disconnect clips SAE Plug Cable, quick and easy connection to solar panel,battery and load appliance. Users don’t worry about the Positive(+) and Negative(-). Get a 'sae polarity reverse adapter' if your polarity is reversed,please check the asin B07GPGPTFV.
- [Full Protection and More Safe]--This solar charging regulator protects over charge protection, over discharge protection, over load protection. {If you need SAE extension cable, battery clamps,male/female cigarette lighter plug and 12V Adapter for solar controller solar power system, please check the Asin B06X6LJTD6.}
User questions & answers
| Question: | Does this solar charge controller work with sunforce 15Watt solar panel |
| Answer: | Yes. I directly wired two 5V DC muffin fans to the solar panel bypassing the controller. Since all they do is vent hot air out of the chicken coop, I didn't need a battery. When the sun is out, it gets hot in there and the fans come on. When the sun goes behind the clouds or sets in the evening, the fans quit. I didn't need constant power and the fans were cheap enough that I didn't worry that they would last forever, just long enough to get through the heat! Oh and they are still working, only I reversed direction and they circulate the heat now that its colder. |
| Question: | Does this Sunway solar controller waterproof |
| Answer: | Yes,the panel is waterproof. |
| Question: | Does this work with sunforce,harbor freight tools schumacher, coleman,eco-worthy,battery tender,nature power allpowers solar panels trickle charger |
| Answer: | Hi David, if the heated pet water bowl is DC load, you need one small 12v battery, pls connect the battery, pet water bowl and solar panel to the charge controller, then the kit will bring power to the pet water bowl. If the pet water bowl is AC load, then you need one additional inverter to convert the voltage from 12v to 110v for the pet water bowl. Any further question, pls feel free to contact us [email protected]. |
| Question: | Does this sunway solar power regulator protect my solar power battery system at night |
| Answer: | The open circuit voltage (no load) will be 22.4 volts, but the voltage under load will be much lower, depending on the load. The charge controller will assure that the voltage at the battery does not exceed the 14 to 15 volt range while charging, and will also drop the voltage to the 13.8 volt "float" charge level when charging is complete. The controller will also prevent the discharging of the battery when the solar panel is not in the sun. |

EpRec MPPT 100A 12V/24V Auto Focus Tracking Solar Panel Charge Controller Regulator with Dual USB Port,LCD Display, Model:Wanderer BL912 (Blue)
Product description
Function:
Always keep the battery on fill voltage condition.
Reverse Polarity Protection for Battery
Reverse Polarity Protection for Solar Panels
When the battery voltage is low, the controller will automatically cut off the load from the system. If the voltage of battery is back to normal and the load will restart working.
Thunder protection
According to the battery voltage grade, the controller can automatically set charge-off voltage, the load-off voltage, the load- restore voltage. (The parameter is default under 25℃ condition, locked by the CPU procedure, cannot adjust.)
The controller will automatically compensate the temperature of the charging voltage according to the changes of ambient temperature.
Package Includes:
1 x MPPT Solar Charge Controller
1 x English User Manual
Product Questions:
1. Q: How many watts (W) of solar panels can be connected
A: 100A mppt,Maximum 1200W for 12V battery system. Maximum 2400W for 24V battery system.
2. Q: Does this controller support lithium batteries?
A: The controller can be used for lead-acid and lithium batteries.
3. Q: My solar panel is 36V 200W, can I charge 12V battery?
A: To charge a 12V battery, the working voltage of the solar panel can be between 17V and 23V(Voc), and for a 24V battery, the working voltage of the solar panel can be between 36V and 46V.(Voc)
Please make sure that the working voltage of the power supply and solar panels are within this range. If it is too high, the controller will be damaged.
4. Q: Can the inverter be connected to the load side of the controller?
A: Please connect the inverter directly to the battery and not to the load terminal of the controller.
- The solar regulator is only suitable for lead acid batteries: OPEN, AGM, GEL. It is NOT suited for nickel metal hydride, lithium ions or other batteries.
- There are many kinds of MPPT technology,Our Solar Controller Mppt technology is to detect the maximum charging current,not the boost type or the automatic charging of the solar panel voltage. Compared with normal solar charge controller, this MPPT controller could increase efficiency by 10%-30%.
- When the battery voltage is low, the controller will automatically cut off the load from the system. If the voltage of battery is back to normal and the load will restart working.
- This MPPT controller has perfect SOC function, control charge current, and supply power to the loads.Prevent the battery from over-charging , over-discharging and reverse charging to solar panels during nights.
- Any problem please contact with us , we will try our best to solve your problem and make you satisfied within 24 hours.
20A Solar Charge Controller Solar Panel Battery Intelligent Regulator with Dual USB Port 12V/24V PWM Auto Paremeter Adjustable LCD Display
Binen
Product description
☀️Suitable for farm solar power system, solar street light, solar patio light, solar billboards, outdoor camping solar system, ship solar system.
Specification:
*Batt voltage: DC 12V/24V Auto
*Charge /Discharge current: 20A
*Over discharge Protection: 10.7V/21.4V
*Charge recover voltage: 12.6V/25.2V
*Overcharge Floating charge: 13.7V/27.4V
*Over discharge Protection: 10.7V/21.4V
*Equalization: B01: sealed 14.4V / B02: Gel 14.2V / B03: flood 14.6V
Intelligent solar controller:
The product can automatically manage the working of solar panel and battery in solar system. For protecting the lifespan of your battery, once the voltage of the battery drop below 8V, the solar controller will turn off automatically (LCD will be unavailable at the same time).
Easy to operate and installation :
Wiring STEPS: Screw the adjustment screw counter-clockwise until the plates move down. Insert the wire into the new opening between the plate and the "top" of the Terminal hole, not under it. Screw the adjuster clockwise and the plate will move upwards thereby squishing the wire in the Terminal hole.
Installation STEPS:Connect the system in the order of 1.Battery > 2. Load > 3.PV Array in accordance with Figure, and disconnect the system in the reverse order 3. 2 .1.
Note:
<1>Please keep it in cool and well ventilated place to maintain good heat dissipation.
<2>the regulator is only suitable for lead acid batteries:OPEN, AGM, GEL, not for nickel hydride, lithium, ions, or other batteries.
<3>Make sure your battery has enough voltage for the controller to recognize the battery before first installation.
<4>The working temperature of this controller is -35°C to 60°C, during hot sunny days, the temperature outside might go up to 60-75°C. Please do keep the controller stay in cool and well-ventilated place to maintain good heat dissipation.
- ☀☀☀20A Solar Charge controller : Binen solar charger controller are UL 1741 certified,the solar charger controller compatibility with 12V 24V system. Discharge Current: 10A,build-in industrial micro controller, automatically manage the working of solar panel and battery in solar system. Dual USB output 5V/2.5A (max), to support mobile phone chargeing.
- ☀☀☀Multiple Protection Functions: Binen solar controller has short-circuit protection, open-circuit protection,reverse protection, over-load protection. Fully 3-stage PWM charge management, improve system efficiency and prolong the life span of the battery.
- ☀☀☀Battery Type: The charge regulator is only suitable for lead-acid batteries: OPEN, AGM, GEL, it is not suited for nickel hydride, lithium, Liions, or other batteries. For protecting the lifespan of your battery, once the voltage of the battery drop below 8V, the solar controller will turn off automatically.
- ☀☀☀LCD Display: Comes with a display that can clearly indicate the status and data, it can be conveniently switched modes and parameter configuration, suitable for home, industrial, commercial etc.
- ☀☀☀Easy to Install and Operate: The charge controller should connect the battery first, then the solar panel, and finally the load! The disassembly sequence is contrary to the wiring order.Dual mosfet Reverse current protection, low heat production. ( Note: The charge controller will heat up when it is running. Please be careful to install the charger controller on a flat, well-ventilated place)
Product features
20A solar charger controller
*Rated Voltage: 12V/24V
*Discharge current: 10MA
*Max. PV Voltage: 50V
*Max input power and voltage: 260W /12V; 520W/24V
*Floating charge: 13.7V/27.4V (defaul)
*Discharge Stop: 10.7V/21.4V (defaul)
*Charge recover voltage: 12.6V/25.2V (defaul)
*Load Mode: 24 hours, 1-23 hours, 0 hour
How to adjust the float voltage?
Step 1: The system default float voltage is 13.7V, but you can change it according to your needs. Press MENU to enter the parameter page and find the floating charge voltage page.
How to adjust the float voltage?
Step 2: In floating charge voltage interface long press 3-5 seconds MENU to enter setting and using UP or DOWN to set the floating voltage

OOYCYOO MPPT Charge Controller 100 amp 12V/24V Auto, 100A Solar Panel Charge Regulator with Blacklight LCD Display Max 100V for Lead-Acid Sealed Gel AGM Flooded Lithium Battery(K100A)
- ❶: Battery type: LiFePO4, AGM is compatible with more battery charging;
- ❷: The best open circuit voltage (Voc) of solar panels: 12V system: Voc ≥18V, Voc≤96V; 24V system: Voc ≥36V, Voc≤96V; (automatic identification of 12V/24V system);
- ❸: Charging current and MAX.PV input power: (12V/24 system)100A: MAX.PV=1300W/2600W;
- ❹: Prevention: overcharge, overdischarge, overload, overheat, reverse polarity, lightning and other protection functions;
- ❺: Worry-free installation and after-sales guarantee: professional technical team guides the installation; Amazon warehouse logistics;
User questions & answers
| Question: | What does the time setting 00H mean |
| Answer: | Yes, it can; You only need to set PV off = full voltage of lithium battery; |
| Question: | Will this work with lithium ion batteries |
| Answer: | Don’t think so you need a midnight charge control or three. Cost you about 1500 |
| Question: | Does this controller do an automatic equalization charge on schedule |
| Answer: | That depends on your solar panels. If its 100a then its rated at 1200 watts. So you could supposedly have 1200 peak watts of solar. Remember that solar panels vary in voltage and amperage as they experience different sunlight. |
| Question: | What is the maximum rated current for the load output? max charging output is 100a, is the load current the same |
| Answer: | Yes, it's a 5.5mm x 2.1mm plug. |
Product features
Feature
Advanced Maximum Power Point Tracking (MPPT) technology, with efficiency no less than 99%.
High quality components, perfecting system performance, with maximum conversion efficiency of 98.5%.
Ultra-fast tracking speed and great tracking efficiency.
Wide MPP operating voltage range.
12/24VDC automatically identifying system voltage.
LCD panel display design, dynamically displaying tool‟s operating data and working condition.
Support 3 charging lead-acid battery options: Sealed, Gel, Flooded.
Battery temperature compensation function.
Added Features:
- Blacklight LCD Display
- The display directly shows the amount of charge: KWH, without the need for other measuring instruments
- Two new vents are added for scientifically designed convection cooling.
- More Safety Protection
- Maximum DC/DC transfer efficiency is as high as 98.7%
COPPER COILS
True MPPT controller, The Three copper coils play a step-down roles to make your system work more stable.
TRANSFORMER
Short-circuting
Reverse-current
Overcharging
Overload
Over-discharging
Reverse polarity protection
FAN COOLING
Good Heat Gissipation
Intelligence Fan-on temperature >45℃ and off < 40℃ , let your controller feel cooling.
Fan use BEARING technologies increase life UP TO 5000hrs in normal use.
PORTS DESIGN
We consider that the larger diameter of the wire will be greater cost for customers, so we designed two connectors for each pos and negs on solar and batteries connectors
MPPT technology
Automatically detect 12V or 24V DC system voltages
Innovative MPPT technology with high tracking efficiency up to 99% and peak conversion efficiency of 98%
Various optional batteries
Deep cycle Sealed, Gel, Flooded and Lithium (12.8V LFP) battery option ready
Charges over-discharged lithium batteries
Protection System
Electronic protection: Overcharging, over-discharging, overload, and short circuit.
Reverse protection: Any combination of solar module and battery, without causing damage to any component
Customize charge controller
Customizable charging voltages
Positive ground charge controller
HOW TO WIRE YOUR SOLAR CONTROLLER?
Turn the adjusting screw counterclockwise until the plate moves downward.
Please peel off the coating of the cable tip by about 8 to 10 mm,Then Insert the wire into the new opening between the plate and the "top" of the terminal hole.
When turning the adjuster clockwise, the plate moves upward and crushes the wire in the hole of the terminal.
Make sure all connections going into and from the controller are tight.
IMPORTANT NOTE:
Make sure your battery must be atleast 60% charged prior to connecting to controller.
Always connect your battery first
Never connect your solar panel array to the controller without a battery.
Careful your input power and voltage does not exceed the max.

GHB 20A 12V 24V Solar Charge Controller Auto Switch LCD Intelligent Panel Battery Regulator Charge Controller Overload Protection Temperature Compensation
- LCD Screen Display >> This solar panel charger controller with LCD to display all parameters, the LCD has rich contents, the users can intuitively know the working condition of the controller. The LCD display is with built-in energy-saving backlight LCD, display better, more clear, more beautiful, more modern and more power-efficient.
- Fully Automatic >> This solar panel regulator with output switch, intelligent control, easy to operate, to connect the controller and the battery by cables with the right polarity. The battery indicator light on the controller will be on if successfully connected, otherwise, to check and reconnect.
- Power-efficient >> Microcontroller digital accuracy, when it's charging, the arrow between the panel icon and the battery icon will flashe fastly, when the battery was a full charge, it will be slow flashed, will stop charging,the function of the controller is to protect the voltage overshoot and discharge. Available for DC lamp and phone charging. A key to open and close the load.
- Rated Discharge Current >> 20A; USB Output Voltage: 5V; Total USB Output Current: 3A; DC Output Voltage: 12V. To connect your load and the cables with the right polarity and then connect with the load output port of the controller. Pay special attention to + - polarity to avoid reversed connection, otherwise, your load may be damaged. (Kindly suggest to use standard 11-15 AWG wire to connect with terminals perfectly.)
- Protection Functions >> Overload and Short circuit protection, Lightning protection, Under-voltage protection, Over-charging protection, Reverse Polarity protection charge controllers for solar panels. Use PWM&WPC mode, improve system efficiency and prolong the life span of the battery.
User questions & answers
| Question: | Can I hook up a 750 watt inverter to the Load terminals of the controller |
| Answer: | No you cannot. As previously stated, I’d hook the inverter straight to battery although you can hook a relay in series between the battery and inverter and use the controller load to power the coil of the relay. This will allow the controller to shut down the inverter in case of any problems. Use a relay rated for at least 70Amps for a 750 watt inverter. |
| Question: | Can you set this to charge the battery once it gets to a certain level |
| Answer: | It will charge the battery and taper off when the battery is fully charged. It won't charge a dead battery or work well if the battery is in a low charge state. |
| Question: | Can this controllers output voltage be set to 24 vdc? i need to series two twelve volt batteries and supply a system with 24 vdc |
| Answer: | The information on specs are unclear but it does work. I have two 12 volts in series on my boat in flat storage with no electrical around. I bought one 24V solar panel, connected to this controller and it works great. The serttings are automatic if you follow directions. Here is my summary for my fishing club: There’s math involved to determine solar panel size so hang in there. Each battery is 12 Volts rated at 90 amp hours (AH). Multiply volts times amps to get total watts. 12V X 90ah = 1080 watts each, times 2 batteries = 2160. That’s total watts from zero to full charge. Since you can’t run batteries to zero and expect them to work, only half of the power is usable. Therefore, my needs are half of the 2160 total = 1080 watts. I decided I wanted to get fully charged batteries after 2 days. There is good sunlight on my location an average of 6+ hours per day so I need a panel large enough to reach 1080 watts in 12 hours charging time. Watts divided by hours, 1080/12 gets me my panel size of 90. Solar panels and connections are subject to voltage loss due to dust, connections, shadows, etc. Figure 20%. I need 120 watts output in a 24-volt panel (match my battery voltage). I found the components below. A 24 volt, 150-watt panel, a controller (don’t want to overcharge) and special solar wiring and connectors all on Amazon. |
| Question: | Ok asking my question again. .... How many working amps? Didn't know children answered these too. Lol |
| Answer: | I think Dana is a little confused regarding the requirement for HEAVY gauge wires at 20 amps (as in "the wire would be too big for the controller connection screws"). 20 Amps at 12 volts is only 240 watts. (Meanwhile, 20 Amps at 110 volts is 2,200 watts, which WOULD require a heavy gauge wire.) You can easily attach a wire capable of handling 240 watts to this controller. I use this controller with three panels installed on the roof of my RV. (One 50-watt panel and two 160-watt panels, connected in parallel, for a total potential of 370 watts.) The controller works great, allowing for perpetual wilderness camping without running down my RV coach batteries over multiple days - even when using a heated Bi-Pap (CPAP) machine all night long using a 120v Inverter. I've seen this controller charge the batteries with 16.8 Amps at 13.7 volts (230.16 watts) with no issues or "hot wires". Dana debunks the controller for feeding 2.6 volts at 1 amp back into the solar panels. That's a whopping 2.6 watts, which is inconsequential next to two deep-cycle coach batteries connected in parallel. Besides, that's what blocking diodes are used for. |
Product features
GHB Solar Charge Controller
The product can automatically manage the working of solar panel and battery in the solar system. It is easy to set up and operate.
Specifications:
Overload/Short Circuit Protection: 1.5 Times by Rated Current
DC Output Voltage: 12V
Total DC Output Current: 2A
Short Circuit Recovery Time: 10s
Open Circuit Voltage of Solar Panel: 40V
No Load Loss: 0.05W
Over Voltage Protection: 15V; x2/24V
Float Charge Voltage: 14V; x2/24V
Discharge Recovery Voltage: 12V; x2/24V
Over-Discharge Voltage: 10.5V; x2/24V
Working Temperature: -35~55°C
Environmental Protection and Energy Saving
No matter at home or on the road, the GHB solar charge controller operates fully automatically, easy to operate.
Safety Instructions:
1. Make sure your battery has enough voltage for the controllers to recognize the battery type (12V/24V) before installation.
2. The regulator is only suitable for lead-acid batteries: OPEN, AGM, GEL. (NOT suitable for lithium batteries, Ni-MH battery)
3. Only suitable for working with photovoltaic solar panels. (NOT for other DC or AC power source)
Easy to Operate
1. Connect the battery to the charge regulator - plus and minus.
2. Connect the solar panel to the regulator - plus and minus.
3. Connect the load to the charge regulator - plus and minus.
NOTE: The reverse order applies when deinstalling! An improper sequence order can damage the controller!
Dual USB Charging Output Inter
Dual USB output (1A, 2A), this solar charge controller can simultaneously charge or supply power to two mobile phones, tablet PCs and other devices that require 5V power.
Fully Automatically
Makes you use 100% Available Solar Power. (Note: The battery cable should be as short as possible to minimize loss.)
Provide Full Protection
- Over-load protection
- Short circuit protection
- Lightning protection
- Under-voltage protection
- Over-charging protection
- Reverse Polarity protection

EEEKit 30A Solar Charge Controller, Solar Panel Charger Controller 12V/24V, Multi-Function Adjustable LCD Display with Dual USB Port Timer Setting PWM Auto Parameter
Product description
Features:
*30A Solar Charge Controller: Build-in industrial micro controller, automatically manage the working of solar panel and battery in a solar system.
*LCD Display: clearly indicate the status and data, it can be conveniently switched modes and parameter configuration, parameters adjustable.
*Safe to Use: It has short-circuit protection, open-circuit protection, reverse protection, over-load protection, and fully 3-stage PWM charge management, improve system efficiency and prolong the life span of the battery.
*Easy to Install and Operate: Battery --->Solar Panel ---> Load.
*with Timer Function: You can set the on/off and a certain number of hours as you like, without extra worry, it is convenient for your life.
Specification:
Type: Solar Charge Controller
Battery Voltage: 12V / 24V
Charge Current: 30A
Working Temperature: -35℃ - 60℃ / -90℉ - 140℉
Self consume: 10mA
Float Charge: 13V
USB output: 5V/2.5A
Overcharge Protection: 14.4V/28.8V
Overcharge Floating charge: 13.7V/27.4V
Charge recover voltage: 12.6V/25.2V
Over-discharge Protection: 10.7V/21.4V
Max input power and voltage: 390W /12V; 780W/24V
Q&A
1.Q: How to install it?
A: The charge controller should connect the battery first, then the solar panel, and finally the load. The disassembly sequence is contrary to the wiring order.
2.Q: Without using a battery, can it be wired to an inverter and work directly from that?
A: Sorry no. A solar panel can't run an inverter without a battery.
3. Q: What type of battery do I need?
A: The charge regulator is only suitable for lead-acid batteries: OPEN, AGM, GEL, it is not suited for nickel hydride, lithium, Li-ions, or other batteries. Any questions, please feel free to contact us.
Package Includes: 1 x Solar Charge Controller. 1 x User Manual.
- 【Wide Compatibility】The solar charger controller with 30A rated discharge current is compatible with 12V or 24V system automatically, suitable for lead-acid batteries: OPEN, AGM, GEL. Dual USB 5V/3A output ports support mobile phones, tablet PCs or other devices that require 5V voltage.
- 【Reliable Protection】EEEKit solar charge regulator provides over-current protection, short-circuit protection, inverse connection protection, low voltage and overcharge protection, a reliable protector for your devices.
- 【Intelligent】Build-in industrial microcontroller for automatical management, memorizing various parameters set by the user and the data won't be lost when the battery runs out. The solar controller will turn off automatically once the voltage is too low.
- 【Functional LCD Display】Intuitive LCD display that can clearly indicate the status and data is able to switch modes and parameter configuration, suitable for home, industrial, commercial, etc.
- 【Easy to Use】The charge controller should connect the battery first, then the solar panel, and finally the load! You can change the settings by the simple one-button operation.
User questions & answers
| Question: | Can the load be plugged into the usb ports and not wired to the connectors? powering 2 wifi cameras |
| Answer: | Perhaps. 500 mA limit? Other options: Motorcycle/marine ~12 V to 5V adapter. DroK voltage reducer connected to load wires. Use usb type A voltmeter to measure voltage output. |
| Question: | Where can I get a copy of the user manual for this controller so I can see if it fits my needs? thanks |
| Answer: | you can try contact the seller for a copy of the user manual. There are not much you need to know. Three sets (+ & -) of connectors: one to the solar panel output, one to a battery, and one to the load(what ever you want to power). You need the battery (for storage) for it to work. |
| Question: | Cual es el màximo voltaje que soporta del panel solar |
| Answer: | 12v y 24v |
| Question: | Why do people try and answer questions here that they clearly don’t have a clue about what they are saying |
| Answer: | Because Amazon encourages it |

Vehpro MPPT 40A-100A 12V/24V Auto Focus Tracking Solar Panel Regulator Dual USB Port Charge Controller (60A)
Product description
Function:
Always keep the battery on fill voltage condition.
Reverse Polarity Protection for Battery
Reverse Polarity Protection for Solar Panels
When the battery voltage is low, the controller will automatically cut off the load from the system. If the voltage of battery is back to normal and the load will restart working.
Thunder protection
According to the battery voltage grade, the controller can automatically set charge-off voltage, the load-off voltage, the load- restore voltage. (The parameter is default under 25℃ condition, locked by the CPU procedure, cannot adjust.)
The controller will automatically compensate the temperature of the charging voltage according to the changes of ambient temperature.
Package Includes:
1 x Solar Panels Battery Charge Controller
1 x User Manual
★★Note★★ :
➹ About delivery:
The whole delivery usually takes about 4-7 days , but it sometimes might be delayed 1-2 days by the bad weather or other factors , really need your understanding.
➹ About color:
Pictures are only samples for reference. Due to limitations in photography and the inevitable differences in monitor settings, the colors shown in the photograph may not correspond 100% to those in the items themselves.
➹ About service:
If there is any problem about the quality or the defective items , please feel free to contact us (Autoday), we will try our best to solve your problem within 24 hours.
- ✔️ --- NOTE: The regulator is only suitable for lead acid batteries: OPEN, AGM, GEL. It is NOT suited for nickel metal hydride, lithium ions or other batteries.
- ✔️ --- MPPT solar charge controller MPPT10-60: Compared with normal solar charge controller, this MPPT controller could increase efficiency by 10%-30%.
- ✔️ --- When the battery voltage is low, the controller will automatically cut off the load from the system. If the voltage of battery is back to normal and the load will restart working.
- ✔️ --- This MPPT controller has perfect SOC function, control charge current, and supply power to the loads.Prevent the battery from over-charging , over-discharging and reverse charging to solar panels during nights.
- ✔️ --- Any problem please contact with us , we will try our best to solve your problem and make you satisfied within 24 hours.
User questions & answers
| Question: | How many amps in a 100 watt solar panel |
| Answer: | I only have 300 watts on it and it gets quite hot. |
| Question: | Can this handle 900 watts of solar without buring or heating up |
| Answer: | Yes |
| Question: | Should the controller unit be grounded? Using it to run 2 5amp lights |
| Answer: | it has all the pwm functions and it is better than pwm |
| Question: | Pwm or mppt ? The product description states that this unit is an mppt, the user manual states it is pwm |
| Answer: | Street lamp mode 1, light control switch load (when there is sunlight, the controller will automatically turn off the load, if there is no sunlight, the controller will automatically turn on the load); |
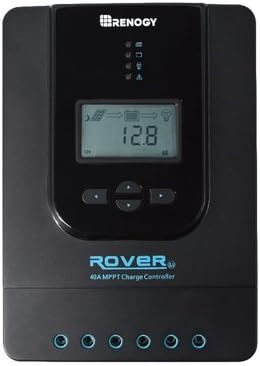
Renogy Rover 40 Amp 12V/24V DC Input MPPT Solar Charge Controller Auto Parameter Adjustable LCD Display Solar Panel Regulator fit for Gel Sealed Flooded and Lithium Battery
Renogy
Product description
"Specifications Rated Battery Current :40A Rated Load Current:20A Max. PV Input Short Current:50A Max. Battery Voltage :32V Max. Solar Input Voltage :100VDC Charge circuit voltage drop:≤ 0.26V Discharge circuit voltage drop : ≤ 0.15V Working Temperature :-35°C to +45°C Max. Terminal Size :8AWG Rated Load Current :10% to 90% NC Net Weight :4.41 lb. Overall Dimension :9.37 x 6.81 x 2.85in. "
- Automatically detect 12V or 24V DC system voltages Innovative MPPT technology with high tracking efficiency up to 99% and peak Conversion efficiency of 98%
- Die-cast aluminum design for heat dissipation and The capability of measuring the battery's temperature and remote monitoring Customizable charging voltages
- Charges over-discharged lithium-ion batteries Error code detection for easy self diagnoses
- Compatible with various Deep Cycle battery options: Sealed, Gel, Flooded, and Lithium Electronic protection: Overcharging, over-discharging, overload, and short circuit Reverse protection: Any combination of solar module and battery, without causing damage to any component 4-stage charging: Bulk, Boost, Float, and Equalization and LCD screen with programmable charging parameters
- RS232 port allows the Rover to communicate with the BT-1 Bluetooth module, which can pair with the Renogy DC Home smart phone app
User questions & answers
| Question: | If a conect my panels and my batteries to 24 v what will be the voltage that I¨ll recibe in the in load terminals |
| Answer: | Let say solar panel produce 36Vdc And battery voltage is 27Vdc The load terminal is about 27Vdc |
| Question: | What version of the 20amp model is being sold here from amazon? per the manufacturer website, renogy bt, is optimized for rover charge controllers f |
| Answer: | This is last year's model and currently sold out here the Renogy website and eBay. New models coming. Rich solar still has them at $89.00 for the 20amp..but offers no bt module |
| Question: | Can I disconnect the battery while the solar collector is still connected |
| Answer: | No, I dont think that's a good idea since they say connect batteries first the solor panels. If you was to shut ur system down, the go in reverse. Panels discount then battery. |
| Question: | Is anyone having problems with hf / vhf radio interference (rfi |
| Answer: | On MPPT and PMI controllers of different brands, RFI particularly in the VHF & UHF bands can be extreme. The solar panels do act as large antennas transmitting the interference. Some fairly simple decoupling circuitry can help. Right at the PV input, i've used a large forward diode into a large, CPU-grade electrolytic along with common-mode chokes on wiring before the diode. On the controller outputs, a "Corcom" type pi-filter helps a lot, but components in series with the output must accept full output current without much voltage drop. This can get rid of about 99% of RFI without too much problem. I do use solar and wind turbines for power at my off-grid property and run amateur radio equipment from 70 cm to 160 meter bands. |
Product features
Renogy Rover
20A/30A/40A MPPT Solar Charge Controller w/ LCD Display.
LCD Screen & Multiple LEDs
Displaying system operating information and error codes.
Die-cast Aluminum Design
For efficient heat dissipation.
RS232 Communication Port
Allows communication with optional BT-1 Bluetooth Module and usage of Renogy DC Home App.
Temperature Sensor
Wide Temperature Compensation Range up to 176 F, non-polarized wires are insulated and protected from harsh environments.
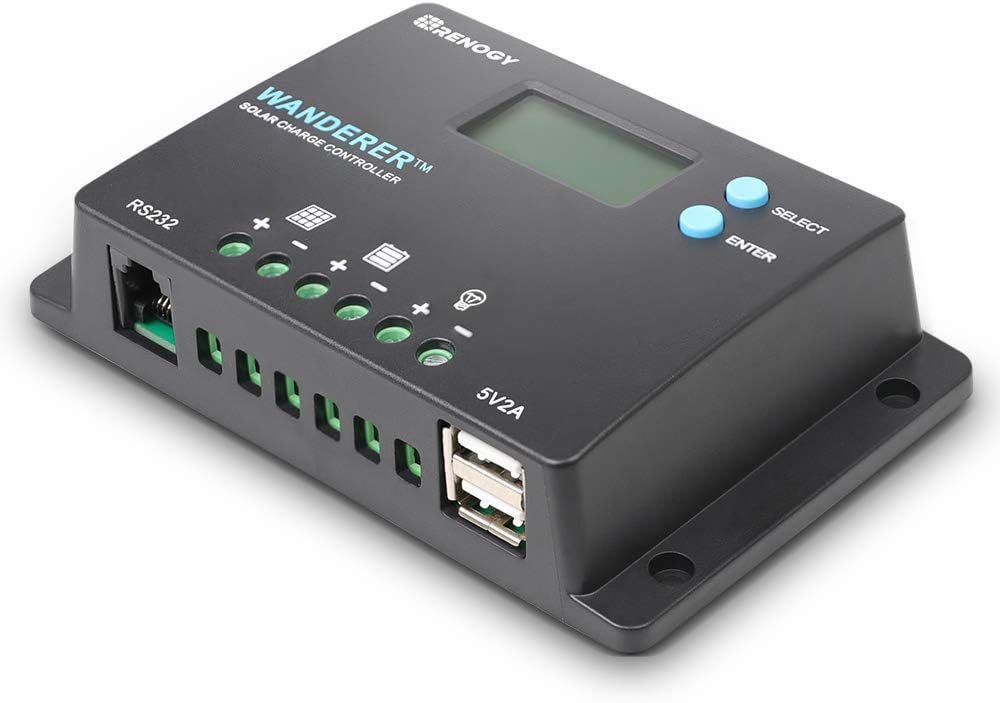
Renogy Wanderer 10 Amp 12V/24V PWM Negative Ground Solar Charge Controller Regulator Compatible with Bluetooth Module
Renogy
Product description
The Renogy Wanderer 10A solar charge controller integrates efficient PWM charging to increase battery life and improve system performance. Designed with a simple interface for ease of use the controller uses an LCD to notify users of battery information. This advanced charge controller is designed for off-grid solar applications and can be used with a 12V/24V battery or battery bank. The compact size of the controller makes installation a breeze. The controller comes equipped with fully comprehensive self-diagnostics and electronic protection functions to prevent damage from installation mistakes or system faults.
- Optimized for a 12V/24V system; Deep Cycle Sealed (AGM), Gel, Flooded and Lithium battery option ready.
- Smart 4-Stage PWM charging (Bulk, Boost, Float, and Equalization) increases battery life and improves system performance. Intelligent protection against reverse polarity, overcharging, short-circuit, and reverse current.
- Backlit LCD screen displays system operation, diverse load control, and error codes.
- Integrated 5V 2A USB ports to charge USB devices. Compact in size makes it easy to install virtually anywhere.
- Capable of charging over-discharged lithium batteries. Integrated RS232 port allows communication with BT-1 Bluetooth module and usage of Renogy DC Home smartphone app.
- Power Source Type: Solar-Powered
- Wanderer10A|30A Installation Notes: The default starting position of the Wanderer controller terminal hatches are closed (in the UP position) that could mistakenly look like an open wire hatch. Make sure to FIRST lower each terminal hatch by screwing the terminals counterclockwise (CCW) to expose the wire terminal hatch to the open position. THEN secure each cable by rotating the screws clockwise (CW) to the closed position.
- Simple Install: Fully open the hatch (CCW), insert the appropriate wires, and completely close the hatch (CW).
User questions & answers
| Question: | Is there a way to adjust the float voltage on this unit |
| Answer: | No, the float voltage on mine is 13.8V no matter the battery type setting. There is a manual on the Renogy website that lists float at 13.2V when set for Flooded batteries. However that is not the case on my unit, which I bought in 2016. |
| Question: | Can anyone explain the middle led's lighting sequence? What are the possible states of display, blinking, on, what do they mean |
| Answer: | The middle LED's lighting sequence is as follows: Green ON when battery level is in the right range. Green slowly flashing when battery level is full. Yellow ON when battery level is low. Red ON when loads cut off. Hope this helps. |
| Question: | max number of 100w panels for this controller |
| Answer: | This will depend on 2 things: 1 - what is the amp rating of your controller. &. 2 - what is the nominal voltage output of the panels. A 30 amp controller can handle a maximum of 3.6 100 watt panels of 12 volts (100 watts / 12 volts = 8.33 amps, 30 amp controller / 8.33 amp panel = 3.6 panels per controller). Of course, you can't have .6 panels so the safest load would be 3 panels. Yes, math is VERY IMPORTANT when being safe with electronics. |
| Question: | The description says "These are Positive Ground Controllers." How do you ground a system on the positive side |
| Answer: | Please ignore this if you're not interested in a dissertation on grounding. First, THIS is a NEGATIVE "ground" controller, so that's GOOD. Why? "Ground" is a misleading term. I've designed stuff for NASA spacecraft that had connections called "ground". Whaaat? We're going to run an extension cord to the spacecraft, so we can keep it tied to a metal pipe stuck in the dirt? Nope. "Ground" is just what electronics folks usually call a COMMON POINT the circuitry is referenced to. It doesn't necessarily have anything to do with the ground we walk on. Electrical stuff works by having two sides, positive and negative, with a voltage difference between them, the "pressure" that makes current flow. Electrical power folks tie one side to the dirt your house sits on, for safety. Your house has water pipes and stuff that's pretty well connected to the dirt. If you grab a water pipe and the 110V ground at the same time there's no voltage difference, so current doesn't flow through you and hurt you. 110V is 10x higher than a solar panel voltage so it's a lot more dangerous. Tying one side to the dirt was a very good idea. Long, long ago, and far, far away, electrical power folks chose the negative side to connect to the dirt, and most stuff made since has pretty much matched that. Then some folks decided to make "positive ground" devices, because for their designs it was easier and cheaper. Some of us think they should have been spanked. It caused all this "positive ground" and "negative ground" malarkey. On to solar power systems. Think of it like this: A controller has electronically controlled switches in it. One switch connects the solar panel to the battery to charge it and disconnects when the battery is full. Another switch connects the load to the battery when you want the load turned on. In a "negative ground" system, the terminals of the panel, battery and load called "minus" or "negative" are all tied together, and the controller switches the positive side connections. Since many loads are connected together on the minus side to ground (dirt) this is a GOOD THING. In a "positive ground" system it's the opposite. The positive side of everything is tied together, and the controller switches the negative side connections. Imagine this: If you connect the battery negative terminal and the load negative terminal both to ground (shorted together) and the controller switch is between them, what happens when the switch opens? That's right, NOTHING. The switch is shorted out by your ground connections so it can't disconnect the load. So that's what's wrong with a positive ground controller. Everyone is used to tying negative together and to ground and they do that and it screws up the controller. But a positive ground controller can be used as long as you don't connect the battery and panel to *anything* except the controller. For example, your van's battery negative is connected to the chassis of your van, and so are the negative sides of all the lights and devices in your van. JUST DON'T TIE THE SOLAR PANEL OR SOLAR BATTERY NEGATIVES TO YOUR VAN CHASSIS TOO. You CAN tie the controller's load output negative to your van chassis, as long as you don't connect any. other. point. in the solar charging system to chassis too. With a "negative ground" controller you don't have to worry about any of this malarkey. You can tie the battery, panel, load negatives all to chassis without any problems. This is why NEGATIVE GROUND CONTROLLERS ARE BETTER. Sorry for the lengthy explanation. I hope folks can follow this and it helps them understand this "ground" stuff. |
Product features
Renogy Wanderer
The Renogy Wanderer 10A solar charge controller integrates efficient PWM charging to increase battery life and improve system performance. Designed with a simple interface for ease of use the controller uses an LCD to notify users of battery information. This advanced charge controller is designed for off-grid solar applications and can be used with a 12V/24V battery or battery bank. The compact size of the controller makes installation a breeze.
Specification
Layout
- LCD Screen
- Select Button
- Enter Button
- USB Ports
- Load Terminal
- Battery Terminal
- PV Terminal
- RS232 Communication Port
RS232 Communication Port
Integrated RS232 port allows communication with BT-1 Bluetooth module (Not Included) and usage of Renogy DC Home App.
Compatible Battery Types
- Sealed
- Gel
- Flooded
- Lithium
USB Port
5V 2A USB Ports

ZEALLIFE Solar Panels Charge Controller, 8A Battery Regulator for 12V Solar Battery Charger, Solar Battery Maintainer and 12 Volt Batteries Power Kit Safe Protection
Product description
【Advantage 1: 】 It will turn off automatically at night, and won’t consume battery power.
【Advantage 2: 】If there is connection errors,it will not be damaged.
【The controller needs to be connected to a battery to work.】
ZEALLIFE 8-Amp Solar Charge Controller will prevent overcharging of
batteries by regulating the voltage from a 12-volt solar panel to a safe level for charging 12-volt batteries.
A solar charge controller is required for any solar array of 20-Watt or higher.
Designed for use with 12-volt solar panels, this solar charge controller is safe for
use with up to 8-amp or 130-Watt from a solar array.
A simple two LED display shows that the solar panel is functioning and whether your battery is charging or fully charged.
The solar controller will also prevent a battery from losing power through the solar panel at night.
Solar charge controllers should be installed close to the battery in a dry and ventilated area.
Protection:
Over-load protection; Short circuit protection; Lightning protection;
Under-voltage protection; Over-charging protection; Reverse Polarity protection
Specification:
Rated voltage: 12V
Rated charging current: 8A
Rated load current: 8A
Cut-in Voltage:13Volts
Cut-out Voltage:14.2Volts
Adjustable controlling parameter of the system
Suitable for Home, Industrial, Commercial etc
Note:
Never deeply discharge your battery
Never let your battery voltage pass below 11.0 volts
Use a DMM(DIGITAL MULTI-METER) to measure your battery’s voltage
Connect charge controller to the battery first and remove last
The charge controller is not waterproof, should be placed in a well ventilated dry area, free from flammable gases and moist
Package List:
1 x Solar Charge Controller
1 x User Manual
- 【 APPLY TO 12V SOLAR PANELS】:The 8A solar controller is used only for 12V solar panels and 12V batteries. The solar panels can convert light energy into electric energy stored in batteries which will be protected by the solar controller.
- 【THE MAXIMUM INPUT OF SOLAR ENERGY IS 130W】:The maximum power of solar panels is130W, the maximum voltage 22V, and the maximum current 8A. It is suitable for 12V rechargeable batteries. In order to lengthen its service life, please do not overload.
- 【EASY TO MONITOR THE LED INDICATOR LIGHTS】:The solar controller integrates two LED lights, green (fully charged) and yellow (charging). The product also provides overcharge, over-discharge, overload protection, as well as short-circuit and reverse-connection protection
- 【QUICK AND EASY CONNECTION】:This solar charge controller uses SAE plugs for easy use and access to solar panels, batteries and loading equipment. Users don't have to worry about positive (+) and negative (-)
- 【All-round protection 】:The product provides overcharge, over-discharge, overload protection, as well as short-circuit and reverse-connection protection. 【The controller needs to be connected to a battery to work. 】【Advantage 1: 】 It will turn off automatically at night, and won’t consume battery power. 【Advantage 2: 】If there is connection errors,it will not be damaged.
User questions & answers
| Question: | The description states " adjustable controlling parameter of the system". how can the controller charging points be adjusted for agm. li. etc |
| Answer: | No. It charges its own internal battery’s. I have 1 working and 1 dead. I’d give them a 3 rating. Of course I put them up to survail my property while I’m in Florida. 1 quit in about 30 days. The other one working now almost 3 months. |
| Question: | Is 13 cut in voltage the minimum dc volts needed going into the controller and 22 volts the maximum voltage for the controller to put out 14. volts?l |
| Answer: | This is an all in one unit. The base is a battery pack with a 1000mAh Li-ion Battery. You will not need additional batteries in the trail camera. The solar panel will charge the built in battery pack. Please be aware, this will require a very good sunlight source and will not charge in low light conditions. You will also need to charge it in direct sunlight for about 3 days before taking into the field. |
| Question: | What does it mean if neither of the indicator lights light up? Is this normal or is my unit broken |
| Answer: | The Stealth Cam Stealth Solar Power Panel, picture describing this product is showing an add on solar battery back up device and does not have picture taking capabilities. If you’re talking about the stealth camera with the built-in solar charger, yes you can use the 8gb SD card. |
| Question: | Is this waterproof |
| Answer: | Works on my older Moultrie S series (which is uniform across the brand), so yes. Plug is the same. |

EPEVER 60A Solar Charge Controller 12V/24V, 60 amp Solar Charge Regulator with Load Timer, 12V/720W, 24V/1440W with LCD Display and Dual USB 5V Input, fit for Lead-Acid Batteries
- 60 amp Solar Charge Controller: 12V/24V DC (Automatically detects systems voltage). Max.PV input voltage is 50V. Compatible with various Deep Cycle battery options: Sealed, Gel, Flooded
- Positive Ground Charge Controller 60A: 3-Stage intelligent PWM charging: Bulk, Boost/Equalize, Float; Multiple Load mode: Light control, Light Time control,Dual Time control
- Solar Charge Regulator Built in LCD display design, dynamically displaying all operating datas and working condition; humanized button for more comfortable and convenient operation
- Multiple protection against overcharge, over discharge, over load, short circuit, reverse polarity, over heat and battery under voltage;
- Professional after-sales customer service, Heat sink design for achieving higher heat dissipation. Extensive electronic protection and battery temperature compensation function.
User questions & answers
| Question: | My new deep cycle flooded is at 12.7v at night and 12.3v in the morning even though my load is only .1A. Reasons |
| Answer: | step ups are only common to mppts |
| Question: | For charging a 12v battery this charge controller will not step up amperage if volts in are more than battery needs? i thought only mppt does that |
| Answer: | Dear friend, The Max input power of the charge controller is 12*30=360W> 175 W, you can use it with a 175W-24V solar panel. The open circuit voltage of the solar panel should not exceed 50V, and the short-circuit current should not exceed the rated current of the controller. Warm tips: 1. Battery must be connected first! Never connect the soalr panel array to the controller Without a Battery. 2. DO NOT connect any inverter/ wind/Alternator or Charger into the charge controller! If you have any question please feel free to contact us via email: [email protected] Best wishes Y-SOLAR Service Team |
| Question: | Can I use this with a 175w - 24v solar panel |
| Answer: | For some reason only Amazon can explain, they've combined reviews as well as Q&A from multiple models of products. Although many things may have the nearly same questions with the same answers, different models may have different details and causes much confusion with the same answers (like one may see a question like "what's the amp rating?" and answer "10 amp" based on what they were looking at, but you looked at the "60 amp" model). When I click on any question I look at the model shown by the question before answering to tell what they were looking at specifically. FYI, PWM (or "pulse width modulation") is a technology used in MPPT units as well as cheaper ones. I first learned of PWM with it used to control hydraulic valves and how far they moved which in turn controls how fast hydraulic equipment moves. PWM sends out constant "pulses" of power like 10 times per second. During each cycle, it will have the power "on" for a given percentage of the cycle (like 20%) and be "off" for the remainder (like 80%). To change how much power is delivered they change the % times, like going "on" 40% (and off 60%) is twice the power while doing the same number of cycles per second. That can be done in battery charging as well as things like my hydraulic valve control example or others. So just because a controller is "MPPT" doesn't mean it has no PWM involved, rather the MPPT (Maximum power point tracking) just constantly tries to give you as much power as possible constantly. So some assume "PWM" and "MPPT" are contradictory, but they aren't (it's more like PWM being compared to a car auto-transmission and MPPT is like a cruise control that's a separate feature). |
| Question: | This is supposed to be a pwm controller but reviews are for mppt. Why |
| Answer: | A "12 v" 100 watt panel has various ratings: The "peak power" output will be roughly 18 volts at 5.56 amps (using a Grape polycrystalline as an example) But its short-circuit (Isc) current will be 6.13 amps. (at zero volts) (to be complete: its open-circuit voltage will be 22 volts, at zero amps) Those voltage and current number can be slightly exceeded depending upon temperature and amount of sun. |
Product features
Step: Connect the system in the order of 1.battery-->2. load-->3.PV array, and disconnect the system in the reverse order 3. 2. 1.
Wiring:
- Please always connect the battery before connect the soalr panel, disconnect in reverse order. And pay much attention to the “+” and “-”
- Battery must be connected first !!!
- DO NOT connect any inverter/ wind/ Alternator or Charger into the charge controller! If an inverter is to be connected to the system, connect the inverter directly to the battery.
- If the remote temperature sensor is not connected to the controller, the default setting for battery charging or discharging temperature is 25 °C without temperature compensation.
- The wire size is only for reference. If there is a long distance between the PV array and the controller or between the controller and the battery, larger wires can be used to reduce the voltage drop and improve performance.
- The battery fuse should be installed as close to battery as possible. The suggested distance is within 150mm.
Setting: 1. Accumulative power zero clearing: Under PV power interface, press SET button and hold on 5s then the value blink, press SET button again to clear the value. 2. Setting temperature unit: Under battery temperature interface, press SET button and hold on 5s to switch.
Positive Ground PWM Solar charge controller
- System voltage: 12V /24V DC Auto
- Rated charge/discharge current: 60A
- Max Input Power:12V @ 720W | 24V @ 1440W
- Max. PV Open Circuit voltage: 50V (45V at 25℃ temperature)
- Battery type: Sealed (Default) / Gel / Flooded
Solar Regulator LCD Display
- PV ( Voltage, Current, Kwh )
- BAT (Volt, Current, Temperature )
- Load (Current, Kwh, Work Mode), one key to zero clearing PV energy function.
- USB output: 5VDC/ 2.4A (Total)
- When no operation, the interface will be automatic cycle, but the follow two interfaces(Load type) not be display.
Heat sink
- Excellent heat dissipation characteristic
- Aluminum alloy
- Net weight: 1.02kg
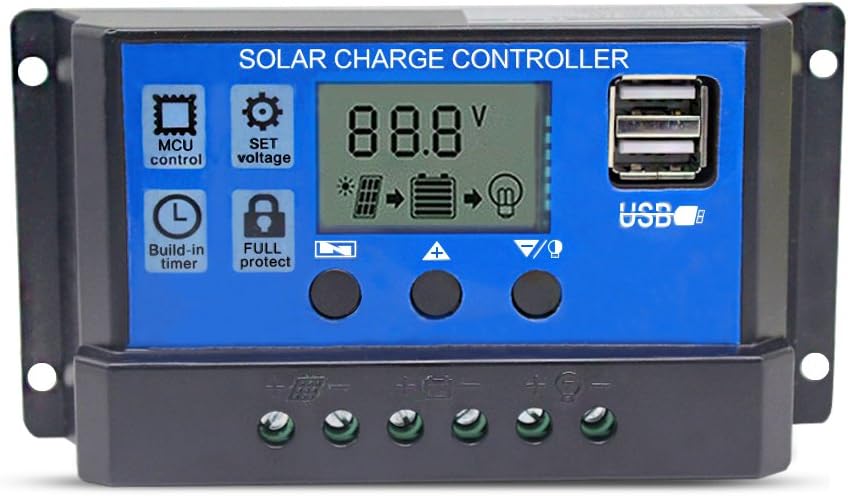
[2021 Upgraded] Solar Charge Controller, Solar Panel Battery Intelligent Regulator with Dual USB Port 12V/24V PWM Auto Paremeter Adjustable LCD Display (Blue 30a)
Product description
WHY CHOOSE US?
1. 3C standard: Using dedicated chips and dedicated software, can automatically manage the working of solar panel and battery in solar system
2. Support moblie phone charging
3. Safe to use with Built in protection
4. Dual MOSFET Reverse current, protection from lightning strike.
5. Prolong the battery life cycle and keep the load work well.
6. Easy to use and suitable for small solar energy system.
INSTALLATION:
1. Q: How to install the solar controller ?
A: Connect the battery, solar panel, and the load (in proper sequence)
2. Q: How are the wires connected to the controller?
A: Unscrew the screw, fit wire in small hole and screw in to tighten it up
PLEASE READ BEFORE BUYING:
1. This controller can only use photovoltaic panels as charging power. Do not use DC or other power as charging power.
2. if the LCD display has an error of 0.2 V- 0.3 V, please don't worry ,it is normal.
3. Old batteries may be degraded the capacity after hundereds of cycles, easily drop lower than 8V, which results in the controller will be shut off (LCD screen become totally “DEAD”).
4. Indoor use only: the working temperature of this controller is -35°C to +60°C, during hot sunny days, the temperature outside might go up to 60-75°C. Please do keep the controller stay in cool and well-ventilated place to maintain good heat dissipation.
ABOUT THIS CONTROLLER:
*Voltage: 12V/24V
*Over charge Protection: 14.4V/28.8V
*Over charge Floating charge: 13.7V/27.4V
*Charge recover voltage: 12.6V/25.2V
*Over discharge Protection: 10.7V/21.4V
*Load Mode: 24 hours, 1-23 hours, 0 hour
*Max input power and voltage: 390W /12V; 780W/24V
*Equalization: B01: sealed 14.4V / B02: Gel 14.2V / B03: flood 14.6V
- UPGRADED SOLAR PANEL CONTROLLER: Compatible with 12V 24V system.This solar charge controller helps you manage the working of solar panels and battery in solar systems automatically with the build-in industrial microcontroller. You don't need to reset it when the battery runs out cause it will memorize various parameters set by the user. You can also charge your mobile phone, tablet, PCs through Dual USB output 5V/2.5A (max).
- SAFE TO USE: Equipped with overcurrent protection, short-circuit protection, inverse connection protection, low voltage, and overcharge protection, and have fully 3-stage PWM charge management. This 30A solar charge controller will help you improve the system efficiency safely and prolong the life span of the battery.
- PLEASE NOTE: The charge regulator is only suitable for lead-acid batteries: OPEN, AGM, GEL. Do not support any other batteries. The solar controller will turn off automatically to protect the lifespan of your battery if the voltage of the battery drop below 8V.
- LCD DISPLAY: Let you know the status and data with LCD Display. You can also switch modes and parameter configuration conveniently and can use this controller in a different place like home, industrial, commercial, etc.
- WARRANTY: 12-month warranty and lifetime technique support. If there is any problem, please contact us through amazon email, we will arrange a refund or a replacement.
Latest Reviews
View all
Cordless Trimmer Ryobis
- Updated: 26.07.2023
- Read reviews

Logo Design Softwares
- Updated: 08.01.2023
- Read reviews

Bamboo Compression Sock
- Updated: 20.04.2023
- Read reviews

Contigo Water Bottles
- Updated: 28.07.2023
- Read reviews

Echo Gas Lawn Mowers
- Updated: 16.02.2023
- Read reviews