12 best charge controller for solar panels
A charge controller for solar panels, also known as a solar charge controller or solar regulator, is a crucial component in a solar power system. Its primary function is to regulate and control the electrical charge from solar panels to batteries and prevent overcharging or excessive discharge. Here's what you should know about charge controllers:
Purpose: Charge controllers are essential to ensure the efficient and safe operation of a solar power system. They protect the batteries from being overcharged during the day when the solar panels are generating power and prevent the batteries from discharging too much at night or during cloudy periods.
Types:
PWM (Pulse Width Modulation) Controllers: These are older and more basic types of charge controllers. They work by rapidly switching the solar panel's voltage on and off, controlling the battery voltage. PWM controllers are suitable for smaller solar setups.
MPPT (Maximum Power Point Tracking) Controllers: MPPT controllers are more advanced and efficient.They can optimize the solar panel's output by finding the maximum power point (MPP) at which the panel generates the most power. This makes them more efficient and suitable for larger solar systems.
Efficiency: MPPT controllers are generally more efficient than PWM controllers because they can harvest more power from the solar panels by tracking the MPP. This increased efficiency can result in higher energy production and faster battery charging.
Protection Features: Charge controllers typically come with various protection features, including overcharge protection, over-discharge protection, short-circuit protection, and temperature compensation. These features help extend the lifespan of the batteries and ensure safe operation.
Sizing: It's essential to select a charge controller that is compatible with your solar panel array's voltage and current output. The controller's rated capacity should also match the battery bank's capacity.
Installation: Charge controllers are usually installed between the solar panels and the battery bank. They regulate the voltage and current flowing from the panels to the batteries. Proper installation and wiring are crucial to ensure the system operates efficiently and safely.
Display and Monitoring: Some modern charge controllers come with digital displays that provide real-time information about the system's performance, including battery voltage, charging current, and other relevant data. This makes it easier to monitor and maintain the system.
Maintenance: Charge controllers are generally low-maintenance components. Regularly checking the connections and ensuring that the controller's cooling fins or heatsinks are free from dust and debris is recommended.
In summary, a charge controller for solar panels is a vital component in a solar power system that regulates the flow of electricity between the solar panels and the batteries. It helps prevent overcharging, over-discharging, and other potential issues, ensuring the efficient and safe operation of the system. The choice between PWM and MPPT controllers depends on the size and requirements of the solar power system.
Below you can find our editor's choice of the best charge controller for solar panels on the market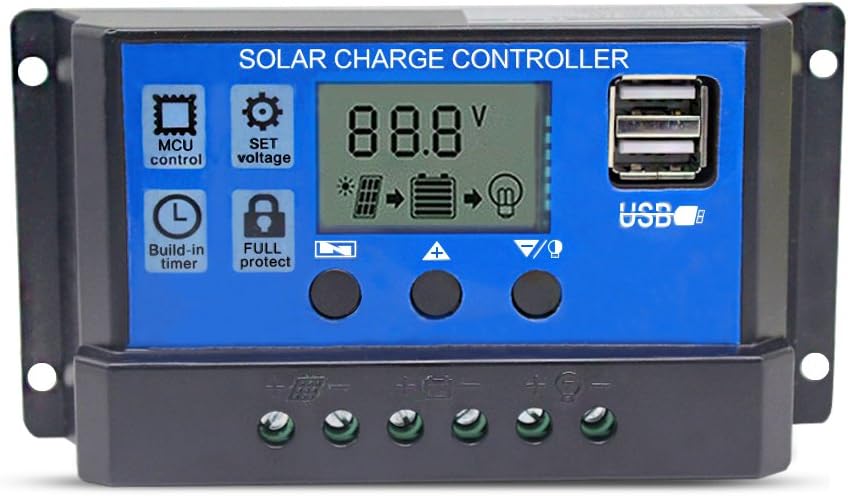
20A Solar Charge Controller Solar Panel Battery Intelligent Regulator with Dual USB Port 12V/24V PWM Auto Paremeter Adjustable LCD Display
Binen
Product description
☀️Suitable for farm solar power system, solar street light, solar patio light, solar billboards, outdoor camping solar system, ship solar system.
Specification:
*Batt voltage: DC 12V/24V Auto
*Charge /Discharge current: 20A
*Over discharge Protection: 10.7V/21.4V
*Charge recover voltage: 12.6V/25.2V
*Overcharge Floating charge: 13.7V/27.4V
*Over discharge Protection: 10.7V/21.4V
*Equalization: B01: sealed 14.4V / B02: Gel 14.2V / B03: flood 14.6V
Intelligent solar controller:
The product can automatically manage the working of solar panel and battery in solar system. For protecting the lifespan of your battery, once the voltage of the battery drop below 8V, the solar controller will turn off automatically (LCD will be unavailable at the same time).
Easy to operate and installation :
Wiring STEPS: Screw the adjustment screw counter-clockwise until the plates move down. Insert the wire into the new opening between the plate and the "top" of the Terminal hole, not under it. Screw the adjuster clockwise and the plate will move upwards thereby squishing the wire in the Terminal hole.
Installation STEPS:Connect the system in the order of 1.Battery > 2. Load > 3.PV Array in accordance with Figure, and disconnect the system in the reverse order 3. 2 .1.
Note:
<1>Please keep it in cool and well ventilated place to maintain good heat dissipation.
<2>the regulator is only suitable for lead acid batteries:OPEN, AGM, GEL, not for nickel hydride, lithium, ions, or other batteries.
<3>Make sure your battery has enough voltage for the controller to recognize the battery before first installation.
<4>The working temperature of this controller is -35°C to 60°C, during hot sunny days, the temperature outside might go up to 60-75°C. Please do keep the controller stay in cool and well-ventilated place to maintain good heat dissipation.
- ☀☀☀20A Solar Charge controller : Binen solar charger controller are UL 1741 certified,the solar charger controller compatibility with 12V 24V system. Discharge Current: 10A,build-in industrial micro controller, automatically manage the working of solar panel and battery in solar system. Dual USB output 5V/2.5A (max), to support mobile phone chargeing.
- ☀☀☀Multiple Protection Functions: Binen solar controller has short-circuit protection, open-circuit protection,reverse protection, over-load protection. Fully 3-stage PWM charge management, improve system efficiency and prolong the life span of the battery.
- ☀☀☀Battery Type: The charge regulator is only suitable for lead-acid batteries: OPEN, AGM, GEL, it is not suited for nickel hydride, lithium, Liions, or other batteries. For protecting the lifespan of your battery, once the voltage of the battery drop below 8V, the solar controller will turn off automatically.
- ☀☀☀LCD Display: Comes with a display that can clearly indicate the status and data, it can be conveniently switched modes and parameter configuration, suitable for home, industrial, commercial etc.
- ☀☀☀Easy to Install and Operate: The charge controller should connect the battery first, then the solar panel, and finally the load! The disassembly sequence is contrary to the wiring order.Dual mosfet Reverse current protection, low heat production. ( Note: The charge controller will heat up when it is running. Please be careful to install the charger controller on a flat, well-ventilated place)
Product features
20A solar charger controller
*Rated Voltage: 12V/24V
*Discharge current: 10MA
*Max. PV Voltage: 50V
*Max input power and voltage: 260W /12V; 520W/24V
*Floating charge: 13.7V/27.4V (defaul)
*Discharge Stop: 10.7V/21.4V (defaul)
*Charge recover voltage: 12.6V/25.2V (defaul)
*Load Mode: 24 hours, 1-23 hours, 0 hour
How to adjust the float voltage?
Step 1: The system default float voltage is 13.7V, but you can change it according to your needs. Press MENU to enter the parameter page and find the floating charge voltage page.
How to adjust the float voltage?
Step 2: In floating charge voltage interface long press 3-5 seconds MENU to enter setting and using UP or DOWN to set the floating voltage

Zamp Solar Legacy Series 180-Watt Portable Solar Panel Kit with Integrated Charge Controller and Carrying Case. Off-Grid Solar Power for RV Battery Charging - USP1003
Zamp solar
- Handcrafted in the USA; 25-year output warranty; Best-in-class solar cells; Easiest start to solar
- No installation required; Includes everything you need; Charges most 12-volt batteries, even lithium
- Compatible with Zamp Solar Ready RV ports; Comes with both SAE plug and alligator clips to connect
- Integrated 15-amp digital charge controller protects your battery and lets you monitor your power
- Kit includes: 180-watt foldable panel, 15-amp charge controller, nylon carrying case, 15-foot cable
User questions & answers
| Question: | description says 140 watts but model USP1003 should be 180 watts - which is correct |
| Answer: | The product is a 180 watt solar panel. I ordered and received the 180 watt suitcase and it works as advertised. I saw the same description mistake but saw a post by another person verifying that the model number was correct and it was in fact the 180 watt suitcase. |
| Question: | Does the controller have a lithium setting |
| Answer: | Yes, it has settings for wet cell lead, AGM & lithium. Very easy to set for the appropriate battery type. |
| Question: | Would this work for a mobile home in a mobile home park |
| Answer: | If you utilize 12-volt batteries than yes. |
| Question: | Will this work for 2x 6 volt batteries |
| Answer: | Yes I’m charging two 12s It automatically adjust to 6 V when you hook it up. |
Product features
Off-Grid Solar Panels to Last a Lifetime
Our portable solar kits are the most flexible and efficient solar option. With the largest selection of portable kits on the market, you’re sure to find a solution that works for you.
Made in the USA:
Our panels are handcrafted in Bend, Oregon using the finest materials available (locally sourced whenever possible.) They are built to last 25 years or more and every panel is signed by the person who made it and tested it.
So instead of saving a few bucks now and buying a new solar kit every couple of years, invest once and charge with confidence for the next couple of decades.
Remove From Case and Unfold.
Unzip the bag and pull out the portable panel. Open the clasp and unfold the panels (except for the 45-watt portable, which is a single panel).
Pull out Legs and Set Up the Panel.
Pull out the support legs and set the panel out in direct sunlight. The panel will sit at an angle and should face the sun as directly as possible for maximum efficiency.
Connect the Panel to Your Solar Port or Battery.
Use the included SAE port to plug the kit into a Zamp Solar Ready port, or use the included alligator clamps to connect directly to the battery.
Plug & Play with Zamp Solar Ready Ports:
Most newer RV’s come with a Zamp solar port on their wall or roof. If you have one, you can just plug the panel in with the included SAE cable and start charging!
No port? No Problem!
Use the included alligator clips to attach your portable kit to any kind of 12-volt battery or battery bank (including lithium).
Got a different solar port?
Check out our Furrion adapter.
Includes Everything
Our portable solar kits include everything you need to charge a 12-volt battery or battery bank, including the panel, charge controller, wires, and connectors.
Durable Carrying Case
Every portable comes in a rugged nylon carrying case with thick padding to protect the panel when it’s not in use.
Charge Controller on EZ-View Bracket
A weather-resistant, 5-stage digital charge controller is integrated into the panel to protect your battery and mounted on an EZ-view bracket for convenient monitoring.
Smooth-Slide Support Legs
The support legs on our portable kits open and close smoothly and easily without any weird bolts or wingnuts to cut your fingers on.
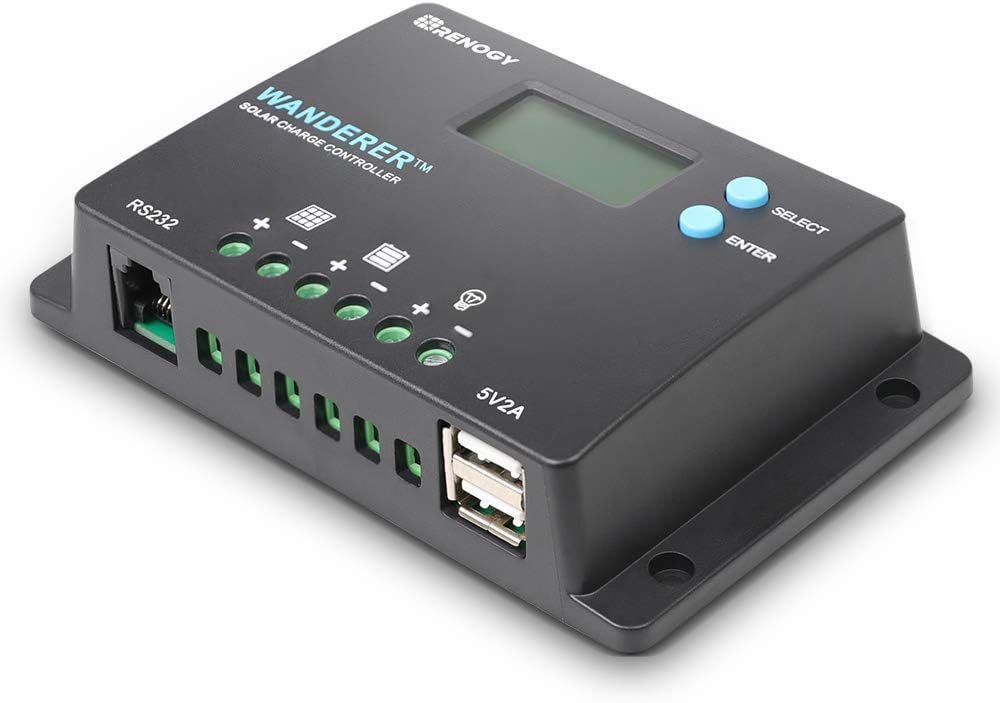
Renogy Wanderer 10 Amp 12V/24V PWM Negative Ground Solar Charge Controller Regulator Compatible with Bluetooth Module
Renogy
Product description
The Renogy Wanderer 10A solar charge controller integrates efficient PWM charging to increase battery life and improve system performance. Designed with a simple interface for ease of use the controller uses an LCD to notify users of battery information. This advanced charge controller is designed for off-grid solar applications and can be used with a 12V/24V battery or battery bank. The compact size of the controller makes installation a breeze. The controller comes equipped with fully comprehensive self-diagnostics and electronic protection functions to prevent damage from installation mistakes or system faults.
- Optimized for a 12V/24V system; Deep Cycle Sealed (AGM), Gel, Flooded and Lithium battery option ready.
- Smart 4-Stage PWM charging (Bulk, Boost, Float, and Equalization) increases battery life and improves system performance. Intelligent protection against reverse polarity, overcharging, short-circuit, and reverse current.
- Backlit LCD screen displays system operation, diverse load control, and error codes.
- Integrated 5V 2A USB ports to charge USB devices. Compact in size makes it easy to install virtually anywhere.
- Capable of charging over-discharged lithium batteries. Integrated RS232 port allows communication with BT-1 Bluetooth module and usage of Renogy DC Home smartphone app.
- Power Source Type: Solar-Powered
- Wanderer10A|30A Installation Notes: The default starting position of the Wanderer controller terminal hatches are closed (in the UP position) that could mistakenly look like an open wire hatch. Make sure to FIRST lower each terminal hatch by screwing the terminals counterclockwise (CCW) to expose the wire terminal hatch to the open position. THEN secure each cable by rotating the screws clockwise (CW) to the closed position.
- Simple Install: Fully open the hatch (CCW), insert the appropriate wires, and completely close the hatch (CW).
User questions & answers
| Question: | Is there a way to adjust the float voltage on this unit |
| Answer: | No, the float voltage on mine is 13.8V no matter the battery type setting. There is a manual on the Renogy website that lists float at 13.2V when set for Flooded batteries. However that is not the case on my unit, which I bought in 2016. |
| Question: | Can anyone explain the middle led's lighting sequence? What are the possible states of display, blinking, on, what do they mean |
| Answer: | The middle LED's lighting sequence is as follows: Green ON when battery level is in the right range. Green slowly flashing when battery level is full. Yellow ON when battery level is low. Red ON when loads cut off. Hope this helps. |
| Question: | max number of 100w panels for this controller |
| Answer: | This will depend on 2 things: 1 - what is the amp rating of your controller. &. 2 - what is the nominal voltage output of the panels. A 30 amp controller can handle a maximum of 3.6 100 watt panels of 12 volts (100 watts / 12 volts = 8.33 amps, 30 amp controller / 8.33 amp panel = 3.6 panels per controller). Of course, you can't have .6 panels so the safest load would be 3 panels. Yes, math is VERY IMPORTANT when being safe with electronics. |
| Question: | The description says "These are Positive Ground Controllers." How do you ground a system on the positive side |
| Answer: | Please ignore this if you're not interested in a dissertation on grounding. First, THIS is a NEGATIVE "ground" controller, so that's GOOD. Why? "Ground" is a misleading term. I've designed stuff for NASA spacecraft that had connections called "ground". Whaaat? We're going to run an extension cord to the spacecraft, so we can keep it tied to a metal pipe stuck in the dirt? Nope. "Ground" is just what electronics folks usually call a COMMON POINT the circuitry is referenced to. It doesn't necessarily have anything to do with the ground we walk on. Electrical stuff works by having two sides, positive and negative, with a voltage difference between them, the "pressure" that makes current flow. Electrical power folks tie one side to the dirt your house sits on, for safety. Your house has water pipes and stuff that's pretty well connected to the dirt. If you grab a water pipe and the 110V ground at the same time there's no voltage difference, so current doesn't flow through you and hurt you. 110V is 10x higher than a solar panel voltage so it's a lot more dangerous. Tying one side to the dirt was a very good idea. Long, long ago, and far, far away, electrical power folks chose the negative side to connect to the dirt, and most stuff made since has pretty much matched that. Then some folks decided to make "positive ground" devices, because for their designs it was easier and cheaper. Some of us think they should have been spanked. It caused all this "positive ground" and "negative ground" malarkey. On to solar power systems. Think of it like this: A controller has electronically controlled switches in it. One switch connects the solar panel to the battery to charge it and disconnects when the battery is full. Another switch connects the load to the battery when you want the load turned on. In a "negative ground" system, the terminals of the panel, battery and load called "minus" or "negative" are all tied together, and the controller switches the positive side connections. Since many loads are connected together on the minus side to ground (dirt) this is a GOOD THING. In a "positive ground" system it's the opposite. The positive side of everything is tied together, and the controller switches the negative side connections. Imagine this: If you connect the battery negative terminal and the load negative terminal both to ground (shorted together) and the controller switch is between them, what happens when the switch opens? That's right, NOTHING. The switch is shorted out by your ground connections so it can't disconnect the load. So that's what's wrong with a positive ground controller. Everyone is used to tying negative together and to ground and they do that and it screws up the controller. But a positive ground controller can be used as long as you don't connect the battery and panel to *anything* except the controller. For example, your van's battery negative is connected to the chassis of your van, and so are the negative sides of all the lights and devices in your van. JUST DON'T TIE THE SOLAR PANEL OR SOLAR BATTERY NEGATIVES TO YOUR VAN CHASSIS TOO. You CAN tie the controller's load output negative to your van chassis, as long as you don't connect any. other. point. in the solar charging system to chassis too. With a "negative ground" controller you don't have to worry about any of this malarkey. You can tie the battery, panel, load negatives all to chassis without any problems. This is why NEGATIVE GROUND CONTROLLERS ARE BETTER. Sorry for the lengthy explanation. I hope folks can follow this and it helps them understand this "ground" stuff. |
Product features
Renogy Wanderer
The Renogy Wanderer 10A solar charge controller integrates efficient PWM charging to increase battery life and improve system performance. Designed with a simple interface for ease of use the controller uses an LCD to notify users of battery information. This advanced charge controller is designed for off-grid solar applications and can be used with a 12V/24V battery or battery bank. The compact size of the controller makes installation a breeze.
Specification
Layout
- LCD Screen
- Select Button
- Enter Button
- USB Ports
- Load Terminal
- Battery Terminal
- PV Terminal
- RS232 Communication Port
RS232 Communication Port
Integrated RS232 port allows communication with BT-1 Bluetooth module (Not Included) and usage of Renogy DC Home App.
Compatible Battery Types
- Sealed
- Gel
- Flooded
- Lithium
USB Port
5V 2A USB Ports

GHB 20A 12V 24V Solar Charge Controller Auto Switch LCD Intelligent Panel Battery Regulator Charge Controller Overload Protection Temperature Compensation
- LCD Screen Display >> This solar panel charger controller with LCD to display all parameters, the LCD has rich contents, the users can intuitively know the working condition of the controller. The LCD display is with built-in energy-saving backlight LCD, display better, more clear, more beautiful, more modern and more power-efficient.
- Fully Automatic >> This solar panel regulator with output switch, intelligent control, easy to operate, to connect the controller and the battery by cables with the right polarity. The battery indicator light on the controller will be on if successfully connected, otherwise, to check and reconnect.
- Power-efficient >> Microcontroller digital accuracy, when it's charging, the arrow between the panel icon and the battery icon will flashe fastly, when the battery was a full charge, it will be slow flashed, will stop charging,the function of the controller is to protect the voltage overshoot and discharge. Available for DC lamp and phone charging. A key to open and close the load.
- Rated Discharge Current >> 20A; USB Output Voltage: 5V; Total USB Output Current: 3A; DC Output Voltage: 12V. To connect your load and the cables with the right polarity and then connect with the load output port of the controller. Pay special attention to + - polarity to avoid reversed connection, otherwise, your load may be damaged. (Kindly suggest to use standard 11-15 AWG wire to connect with terminals perfectly.)
- Protection Functions >> Overload and Short circuit protection, Lightning protection, Under-voltage protection, Over-charging protection, Reverse Polarity protection charge controllers for solar panels. Use PWM&WPC mode, improve system efficiency and prolong the life span of the battery.
User questions & answers
| Question: | Can I hook up a 750 watt inverter to the Load terminals of the controller |
| Answer: | No you cannot. As previously stated, I’d hook the inverter straight to battery although you can hook a relay in series between the battery and inverter and use the controller load to power the coil of the relay. This will allow the controller to shut down the inverter in case of any problems. Use a relay rated for at least 70Amps for a 750 watt inverter. |
| Question: | Can you set this to charge the battery once it gets to a certain level |
| Answer: | It will charge the battery and taper off when the battery is fully charged. It won't charge a dead battery or work well if the battery is in a low charge state. |
| Question: | Can this controllers output voltage be set to 24 vdc? i need to series two twelve volt batteries and supply a system with 24 vdc |
| Answer: | The information on specs are unclear but it does work. I have two 12 volts in series on my boat in flat storage with no electrical around. I bought one 24V solar panel, connected to this controller and it works great. The serttings are automatic if you follow directions. Here is my summary for my fishing club: There’s math involved to determine solar panel size so hang in there. Each battery is 12 Volts rated at 90 amp hours (AH). Multiply volts times amps to get total watts. 12V X 90ah = 1080 watts each, times 2 batteries = 2160. That’s total watts from zero to full charge. Since you can’t run batteries to zero and expect them to work, only half of the power is usable. Therefore, my needs are half of the 2160 total = 1080 watts. I decided I wanted to get fully charged batteries after 2 days. There is good sunlight on my location an average of 6+ hours per day so I need a panel large enough to reach 1080 watts in 12 hours charging time. Watts divided by hours, 1080/12 gets me my panel size of 90. Solar panels and connections are subject to voltage loss due to dust, connections, shadows, etc. Figure 20%. I need 120 watts output in a 24-volt panel (match my battery voltage). I found the components below. A 24 volt, 150-watt panel, a controller (don’t want to overcharge) and special solar wiring and connectors all on Amazon. |
| Question: | Ok asking my question again. .... How many working amps? Didn't know children answered these too. Lol |
| Answer: | I think Dana is a little confused regarding the requirement for HEAVY gauge wires at 20 amps (as in "the wire would be too big for the controller connection screws"). 20 Amps at 12 volts is only 240 watts. (Meanwhile, 20 Amps at 110 volts is 2,200 watts, which WOULD require a heavy gauge wire.) You can easily attach a wire capable of handling 240 watts to this controller. I use this controller with three panels installed on the roof of my RV. (One 50-watt panel and two 160-watt panels, connected in parallel, for a total potential of 370 watts.) The controller works great, allowing for perpetual wilderness camping without running down my RV coach batteries over multiple days - even when using a heated Bi-Pap (CPAP) machine all night long using a 120v Inverter. I've seen this controller charge the batteries with 16.8 Amps at 13.7 volts (230.16 watts) with no issues or "hot wires". Dana debunks the controller for feeding 2.6 volts at 1 amp back into the solar panels. That's a whopping 2.6 watts, which is inconsequential next to two deep-cycle coach batteries connected in parallel. Besides, that's what blocking diodes are used for. |
Product features
GHB Solar Charge Controller
The product can automatically manage the working of solar panel and battery in the solar system. It is easy to set up and operate.
Specifications:
Overload/Short Circuit Protection: 1.5 Times by Rated Current
DC Output Voltage: 12V
Total DC Output Current: 2A
Short Circuit Recovery Time: 10s
Open Circuit Voltage of Solar Panel: 40V
No Load Loss: 0.05W
Over Voltage Protection: 15V; x2/24V
Float Charge Voltage: 14V; x2/24V
Discharge Recovery Voltage: 12V; x2/24V
Over-Discharge Voltage: 10.5V; x2/24V
Working Temperature: -35~55°C
Environmental Protection and Energy Saving
No matter at home or on the road, the GHB solar charge controller operates fully automatically, easy to operate.
Safety Instructions:
1. Make sure your battery has enough voltage for the controllers to recognize the battery type (12V/24V) before installation.
2. The regulator is only suitable for lead-acid batteries: OPEN, AGM, GEL. (NOT suitable for lithium batteries, Ni-MH battery)
3. Only suitable for working with photovoltaic solar panels. (NOT for other DC or AC power source)
Easy to Operate
1. Connect the battery to the charge regulator - plus and minus.
2. Connect the solar panel to the regulator - plus and minus.
3. Connect the load to the charge regulator - plus and minus.
NOTE: The reverse order applies when deinstalling! An improper sequence order can damage the controller!
Dual USB Charging Output Inter
Dual USB output (1A, 2A), this solar charge controller can simultaneously charge or supply power to two mobile phones, tablet PCs and other devices that require 5V power.
Fully Automatically
Makes you use 100% Available Solar Power. (Note: The battery cable should be as short as possible to minimize loss.)
Provide Full Protection
- Over-load protection
- Short circuit protection
- Lightning protection
- Under-voltage protection
- Over-charging protection
- Reverse Polarity protection

OAE 60A MPPT Solar Charge Controller 60amp Panel Battery Charger Controller 48V 36V 24V 12V Auto Max 150VDC Input Sealed Gel AGM Flooded Lithium Battery
Product description
Photovoltaic module load voltage (recommend data): 12V System best mppt working voltage range (18V-60V); 24V System best mppt working voltage range (36V-72V); 36V System best mppt working voltage range (54V-144V);48V System best mppt working voltage range (72V-144V). NOTE: 1.There will be some data records on the product display, which is due to our installation and quality testing left behind, this is a normal phenomenon! 2.The product is packed in a sealed color box! The product picture is introduced.If you have any problem,please contact us to solve them by the website on the product,thank you.
- Solar Panel: Fit for 900W(12V);1700W(24V);3400W(48V);Max input Voltage:150V PV
- LCD Display---clear to see operating data and working condition, Real-time energy statistics function with Multiple load control modes,Mppt solar charge controller Display the daily power generation curve and current curve.
- Support 4 charging options: Sealed Gel AGM Flooded Lithium Battery,User-defined, 12V 24V 48V Auto
- The tracking rate of maximum power is ≥99% and the maximum conversion rate is >98%
- Multiple protection against overcharge, over discharge, over load, short circuit, reverse polarity, over heat and battery under voltage.
User questions & answers
| Question: | Does this require a battery to operate, or can it run a DC load without a battery |
| Answer: | The battery is charged by solar energy. If the battery have no power, dc load can not be run. |

EEEKit 30A Solar Charge Controller, Solar Panel Charger Controller 12V/24V, Multi-Function Adjustable LCD Display with Dual USB Port Timer Setting PWM Auto Parameter
Product description
Features:
*30A Solar Charge Controller: Build-in industrial micro controller, automatically manage the working of solar panel and battery in a solar system.
*LCD Display: clearly indicate the status and data, it can be conveniently switched modes and parameter configuration, parameters adjustable.
*Safe to Use: It has short-circuit protection, open-circuit protection, reverse protection, over-load protection, and fully 3-stage PWM charge management, improve system efficiency and prolong the life span of the battery.
*Easy to Install and Operate: Battery --->Solar Panel ---> Load.
*with Timer Function: You can set the on/off and a certain number of hours as you like, without extra worry, it is convenient for your life.
Specification:
Type: Solar Charge Controller
Battery Voltage: 12V / 24V
Charge Current: 30A
Working Temperature: -35℃ - 60℃ / -90℉ - 140℉
Self consume: 10mA
Float Charge: 13V
USB output: 5V/2.5A
Overcharge Protection: 14.4V/28.8V
Overcharge Floating charge: 13.7V/27.4V
Charge recover voltage: 12.6V/25.2V
Over-discharge Protection: 10.7V/21.4V
Max input power and voltage: 390W /12V; 780W/24V
Q&A
1.Q: How to install it?
A: The charge controller should connect the battery first, then the solar panel, and finally the load. The disassembly sequence is contrary to the wiring order.
2.Q: Without using a battery, can it be wired to an inverter and work directly from that?
A: Sorry no. A solar panel can't run an inverter without a battery.
3. Q: What type of battery do I need?
A: The charge regulator is only suitable for lead-acid batteries: OPEN, AGM, GEL, it is not suited for nickel hydride, lithium, Li-ions, or other batteries. Any questions, please feel free to contact us.
Package Includes: 1 x Solar Charge Controller. 1 x User Manual.
- 【Wide Compatibility】The solar charger controller with 30A rated discharge current is compatible with 12V or 24V system automatically, suitable for lead-acid batteries: OPEN, AGM, GEL. Dual USB 5V/3A output ports support mobile phones, tablet PCs or other devices that require 5V voltage.
- 【Reliable Protection】EEEKit solar charge regulator provides over-current protection, short-circuit protection, inverse connection protection, low voltage and overcharge protection, a reliable protector for your devices.
- 【Intelligent】Build-in industrial microcontroller for automatical management, memorizing various parameters set by the user and the data won't be lost when the battery runs out. The solar controller will turn off automatically once the voltage is too low.
- 【Functional LCD Display】Intuitive LCD display that can clearly indicate the status and data is able to switch modes and parameter configuration, suitable for home, industrial, commercial, etc.
- 【Easy to Use】The charge controller should connect the battery first, then the solar panel, and finally the load! You can change the settings by the simple one-button operation.
User questions & answers
| Question: | Can the load be plugged into the usb ports and not wired to the connectors? powering 2 wifi cameras |
| Answer: | Perhaps. 500 mA limit? Other options: Motorcycle/marine ~12 V to 5V adapter. DroK voltage reducer connected to load wires. Use usb type A voltmeter to measure voltage output. |
| Question: | Where can I get a copy of the user manual for this controller so I can see if it fits my needs? thanks |
| Answer: | you can try contact the seller for a copy of the user manual. There are not much you need to know. Three sets (+ & -) of connectors: one to the solar panel output, one to a battery, and one to the load(what ever you want to power). You need the battery (for storage) for it to work. |
| Question: | Cual es el màximo voltaje que soporta del panel solar |
| Answer: | 12v y 24v |
| Question: | Why do people try and answer questions here that they clearly don’t have a clue about what they are saying |
| Answer: | Because Amazon encourages it |

Victron Energy SmartSolar MPPT 100V 20 amp 12-24-Volt Solar Charge Controller (Bluetooth)
Victron Energy
Product description
A solar charger gathers energy from your solar panels, and stores it in your batteries. Using the latest, fastest technology, SmartSolar maximises this energy-harvest, driving it intelligently to achieve full charge in the shortest possible time. SmartSolar maintains battery health, extending its life. The SmartSolar charge controller will even recharge a severely depleted battery. It can operate with a battery voltage as low as 0 Volts, provided the cells are not permanently sulphated or otherwise damaged.
User questions & answers
| Question: | What is the default battery type setting if I choose to plug and play without messing with the blutooth app or an additional control module |
| Answer: | AGM. That being said, the app takes about 20 seconds to set up and use, so it's worth the time. |
| Question: | what's the maximum load wattage I can put on this? I know the max charge current is 20a, but is the load fused, or just pulls from battery |
| Answer: | To correct multiple incorrect answers on this question: The fuse is to protect the charge controller from reverse battery connection: it DOES NOT protect the load output, nor does it protect the charging circuit to the battery, nor does it protect the PV input. Please see the user manual available at victronenergy.com/support-and-downloads/manuals. |
| Question: | When using an a/c battery charger/converter, do i hook it's output to the load side of the controller |
| Answer: | You can have multiple charging inputs to the batteries. They will work just fine independent of each other. Typical motorhome has alternator, inverter/charger and solar charger connected. |
| Question: | The item i received says 48v on the side. will it work with 12v/24v systems |
| Answer: | Even though the mppt has the 48V stamp, it will work with 12V 24V & 48V systems. The 48V is to differentiate it from the 12V/24V only mppt. Here is documetation from Victron showing it will work with all three Voltages. https://www.victronenergy.com/upload/documents/Datasheet-SmartSolar-charge-controller-MPPT-75-10,-75-15,-100-15,-100-20_48V-EN.pdf |
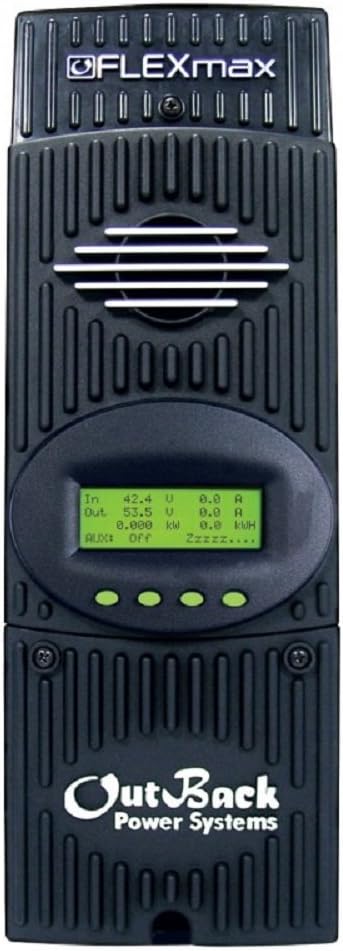
Outback Flexmax 80 FM80 MPPT 80 AMP Solar Charge Controller
Outback
Product description
FlexMax80 FM80-150VDC Charge Controller FLEXmax MPPT Charge Controllers are the only choice when you demand a high performance, efficient and versatile charge controller for your advanced power system. The FLEXmax Charge Controllers are the revolution. Developed by OutBack Power, its features include support for a wide range of nominal battery voltages and the ability to step-down a higher voltage solar array to recharge a lower voltage battery bank. A built-in, backlit 80 character-display shows the current status and logged system performance data for the last 128 days at the touch of a button. The FLEXmax family of charge controllers is the latest advanced improvement in Maximum Power Point Tracking (MPPT) charge controllers from OutBack Power Systems. The ground-breaking FLEXmax MPPT software algorithm is both continuous and active, it increase your photovoltaic array power yield up to 30% compared to non-MPPT controllers. With the technology of active cooling and intelligent thermal management cooling, the FLEXmax charge controllers can operate at their full maximum current rating in ambient temperatures as high as 104F (40C) (Optional Remote Temp Sensor Recommended for optimal operation- Sold separately). . Features: Built-in 128 days of Data Logging Programmable Auxiliary Control Output. Fully OutBack Network Integration Capable (with use of the OutBack HUB - Sold separately). Programmable Battery Voltages from 12 VDC to 60 VDC. Advanced Continuous Maximum Power Point Tracking Increases PV Array Output by up to 30%. Specifications: Nominal Battery Voltages: 12, 24, 36, 48
- Programmable to Charge Battery Voltages from 12 VDC to 60 VDC.
- Advanced Continuous Maximum Power Point Tracking Increases PV Array Output by up to 30%.
- Backlit 80 character-display shows the current operational status.
- Input PV voltages up to 150VDC open circuit for charging battery banks from 12-60VDC.
- Gets more amp hours from your solar panels into your batteries everyday.
User questions & answers
| Question: | hello, how many 300 watts panel I can put using series configuration with this flex max |
| Answer: | This depends on the battery bank nominal voltage... i.e. 12, 24, 48VDC battery bank and the voltage and rated current output of your solar modules. All specs and recommendations for current and voltage limits on The Flex Max series chargers are available at the manufacturer's website wwww.OutBackPower.com |
| Question: | Can I hookup a 2000 watt solar panel array to this voltage controller |
| Answer: | The Outback FM80 has a NEC recommended maximum array at STC nameplate wattages: 1000-watts for 12VDC systems, 2000-watts for 24VDC systems, 4000-watts for 48VDC systems. Absolute Maximum (coldest site conditions) array open circuit voltage input 150VDC / Startup and operating maximum 145VDC . Full specifications and user manuals can be downloaded at the manufacturer Outback Power site. |
| Question: | Does this product have a warranty ? How many years |
| Answer: | This product comes with the manufacturer Outback Power 5-Year warranty. |
| Question: | how many watts of solar panels can it handle charging a 12v battery bank |
| Answer: | The Outback FM80 has a NEC recommended maximum array at STC nameplate wattages: 1000-watts for 12VDC systems, 2000-watts for 24VDC systems, 4000-watts for 48VDC systems. Absolute Maximum (coldest site conditions) array open circuit voltage input 150VDC / Startup and operating maximum 145VDC . Full specifications and user manuals can be downloaded at the manufacturer Outback Power site. |

PowMr MPPT Charge Controller 60 amp 48V 36V 24V 12V Auto - Max 190VDC Input LCD Backlight Solar Charge for Vented Sealed Gel NiCd Lithium Battery【Software Update Version】(MPPT-60A)
- ❶【Software Update Version】100% MPPT 60A solar charge controller Intelligent, Max efficiency ≥98.1%, PV utilization ≥99%.Built-in DSP controller with high performance Automatic battery voltage detection 12V/24V/36V/48V, Make sure batteries' voltage more than 12V to boost controller and make sure battery has enough power to Self-detection when connected to the controller.
- ❷Fit for USER(can be set Lithium, Lifepo4, Li(NiCoMn)O2)/Vented/Flooded/Sealed/Gel/NiCd battery.User programmable for absorption voltage/Floating voltage/Low voltage disconnect./Load Timer. Real-time energy recording.
- ❸Blacklight LCD Dispaly PV voltage/output power/Battery voltage/charging current/working mode/Temperature, ☀ TROUBLESHOOTING function and LCD display and can help users not only check the whole system operating data and statuses but also quickly identify system faults and modify parameters.
- ❹Intelligence Fan-on temperature >45℃ and off < 40℃,Porous heat dissipation.and fan use BEARING technologies increase life UP TO 5000hrs in normal use.
User questions & answers
| Question: | What are the output specs? What is the max current for each battery voltage 12/24/48V |
| Answer: | Yes, the Outback Flexmax series charge controllers can have solar PV input of open circuit voltages up to 150VDC and charge battery banks from 12 to 60 VDC nominal. The Outback Power FM60 is user programmable for battery charging in various type storage systems from 12 to 60 VDC. The programming of all charge parameters are user adjustable to meet the requirements of various types of cells as recommended by a battery manufacturer. Complete user manuals and specification may be downloaded from the manufacturer's Outback Power website. |
| Question: | why am i getting 100 watts from a 600 watt array? why is it reading only one panel. ive continuity tested everything else. is there multi panel mode |
| Answer: | The Outback FM 60 is capable of a maximum 150 open circuit DC voltage input from a solar array to charge a battery bank of 12, 24, 36,48 or 60 VDC nominal. Additional information and full owner and installation/operation manuals may be downloaded at the manufacturer Outback Power site. All electrical wiring should only be performed by a qualified electrician and meet NEC code and local code requirements. |
| Question: | What is the max voltage input allowed from the solar panels to this controller |
| Answer: | Yes this can operate at 12, 24 or 48 volts. The amount of solar panels you can connect will depend on which battery voltage you pick ML SOLAR |
| Question: | Are these stackable |
| Answer: | All charging parameters of the output to the batteries are field programmable with the Outback Power FM60 to meet a battery manufacturer's charging recommendations. More information and the FM60 charge controller specifications and manuals are available to download at the manufacturer Outback Power website. |
Product features
FEATUREs
- Charging 3-stage: constant current(MPPT), constant voltage(Absorption Voltage), floating charge
- Selectable battery type Vented / Sealed / Gel / NiCd / Lithium battery (default is Sealed) (defined voltage for other battery by user)
- Soft start time ≤1S, Dynamic response and recovery time 100us
- Max efficiency ≥98.1%, PV utilization ≥99%
- In order to reduce the cost of electricity caused by high current, PV and battery each have two terminals
- MULTIPLE ELECTRONIC PROTECTIONS
- Short-circuting
- Reverse-current
- Overcharging
- Overload
- Over-discharging
- Reverse polarity protection
COPPER COILS
True MPPT controller, The Three copper coils play a step-down roles to make your system work more stable.
TRANSFORMER
Three Electronic transformer, more safe
MULTIPLE ELECTRONIC PROTECTIONS:
- Short-circuting
- Reverse-current
- Overcharging
- Overload
- Over-discharging
- Reverse polarity protection
FAN COOLING
- Good Heat Gissipation
- Intelligence Fan-on temperature >45℃ and off < 40℃ , let your controller feel cooling.
- Fan use BEARING technologies increase life UP TO 5000hrs in normal use.
PORTS DESIGN
we consider that the larger diameter of the wire will be greater cost for customers, so we designed two connectors for each pos and negs on solar and batteries connectors
Positive Ground 60A MPPT Charge Controller
- System voltage: 12V / 24V / 36V / 48VDC Auto
- Rated charge current: 60A / discharge current: 5A
- Max Input Power: DC20V ~ DC80V (12V) / DC37V ~ DC105V (24V) / DC50V ~ DC160V (36V) / DC72V ~ DC160V (48V)
The maximum PV input voltage (Voc): DC160V (The controller can’t work at this voltage of long duration that will break controller. Please refer to Input voltage from PV ).
Max PV Input Power
The maximum PV input power (The total power rated of PV can’t be over this watt that will break the controller ).
- 12V system (720W) / 24V system (1440W);
- 36V system (2100W) / 48V system (2800W);
- Battery System Voltage:
- DC9V~DC15V (12V) / DC18V~DC30V (24V) / DC32V~DC40V (36 V) / DC42V~DC60V (48V)
Protection Voltage
- Iutput specification Overcharging protection voltage:
- 12V system (15V) / 24V system (30V);
- 36V system (45V) / 48V system (60V);
CONNECTION DIAGRAM
- Always connect battery first!!! Make sure enough batteries’ voltage let controller recognize the right system voltage. The disassembly sequence is contrary to the wiring order.
- DO NOT connect any Inverter/ wind/ Alternator or Charger into the charge controller! connect the Inverter directly to the battery.
- Ensures solar input voltage higher 3V or more than batteries’ voltage and total input power in the range. if input power is too low for max input power, it may be appears to have been discontinued., the charging current almost be zero when controller is floating charge.
- Parameter Setting Rules:Floating voltage > Low voltage reconnect > Low voltage discharge.
- The solar controller will stop output when the battery under 10.7V. The LCD will be blank when the battery under 8V and it will re-output when the battery up to the 12.6V (adjustable).
- Install the Charger controller to the battery as close as possible. Tighten the wire.
- When controller makes buzzing sound because of It's working hard to dissipate heat for your controller. Rest your heart, it will be stop when temperature return to normal.
- Remove all the debris around the controller ( leaving a space of approx. 5.91in ).

Victron SmartSolar MPPT 100/50 Charge Controller
Victron
Product description
A solar charger gathers energy from your solar panels, and stores it in your batteries. Using the latest, fastest technology, SmartSolar maximises this energy-harvest, driving it intelligently to achieve full charge in the shortest possible time. SmartSolar maintains battery health, extending its life. The SmartSolar charge controller will even recharge a severely depleted battery. It can operate with a battery voltage as low as 0 Volts, provided the cells are not permanently sulphated or otherwise damaged.
- SmartSolar MPPT 100-Volt 50 amp: A solar charger gathers energy from your solar panels, and stores it in your batteries, Using the latest, fastest technology, SmartSolar maximises this energy-harvest
- The SmartSolar charge controller will even recharge a severely depleted battery. It can operate with a battery voltage as low as 0 Volts, provided the cells are not permanently sulphated or otherwise damaged
- By constantly monitoring the voltage and current output of your solar (PV) panels, MPPT technology ensures that every drop of available power is rinsed out of your panels, and harvested for storage
- Anytime anywhere remotely control and monitor the extensive features of your SmartSolar MPPT charger with built-in Bluetooth by pairing it with your smartphone or other device via VictronConnect
- Incorrect installation can be hazardous, Please consult a licensed professional and follow all applicable electrical codes during installation
User questions & answers
| Question: | Does this take care of the function of the victron batteryprotect? it seems so but just want to make sure. thanks |
| Answer: | your solar can have a VOC up to 100 volts and then it will drop it down to 12 or 24 volts to charge the battery bank. |
| Question: | Can I have much higher input (nominal voltage of 24v) into this unit and have the unit charge a 12v battery bank? 36v->unit->13.5v |
| Answer: | The single difference between them is that the SmartSolar MPPTs have Bluetooth built-in so that you can monitor and configure them through the VictronConnect smartphone app. The BlueSolar MPPTs do *not* have the Bluetooth built-in; you can use a VE.Direct to Bluetooth Dongle to achieve the same functionality, but the cost of a SmartSolar ends up a little less (typically) than a BlueSolar MPPT +a VE.Direct to Bluetooth Dongle, so it usually makes more sense to order the SmartSolar. If you're not planning on monitoring the MPPT or changing any of the settings, however, a BlueSolar will be just fine, as the actual circuitry is virtually identical. Regards, -Justin Mobile Power Pros / Bay Marine Supply |
| Question: | what is the difference between smart solar and blue solar |
| Answer: | The charger will compensate for temperature based on it's internal sensor, essentially gauging the local environment's temperature. An option Smart Battery Sense can be attached to the battery for true battery temperature. Those are new and in short supply, but should be fully available by the end of June, 2018. |
| Question: | Does this unit alternate voltage based on battery temperature |
| Answer: | No |

Zamp solar Legacy Series 140-Watt Portable Solar Panel Kit with Integrated Charge Controller and Carrying Case. Off-Grid Solar Power for RV Battery Charging - USP1002
Zamp solar
- Handcrafted in the USA; 25-year output warranty; Best-in-class solar cells; Easiest start to solar
- No installation required; Includes everything you need; Charges most 12-volt batteries, even lithium
- Compatible with Zamp Solar Ready RV ports; Comes with both SAE plug and alligator clips to connect
- Integrated 10-amp digital charge controller protects your battery and lets you monitor your power
- Kit includes: 140-watt foldable panel, 10-amp charge controller, nylon carrying case, 15-foot cable
User questions & answers
| Question: | will this work with my current 10-amp furrion solar port |
| Answer: | Yes. It comes with cables to connect into the solar port |
| Question: | Does this include the cable needed for solar ready rv’s |
| Answer: | I can't be sure because I don't have a solar ready RV, but they do have a plug they sell that can be mounted to RV's and wired in to the electrical system. It seems reasonable that this plug is the same in solar ready RV's, it's a common SAE connector. |
| Question: | Can this be used when Generator is running |
| Answer: | Technically speaking, the generator and solar would both be connected to the battery bank positive and negative terminals. If it is daytime, the solar charging system has a specific output voltage. It is possible that if you choose to operate a generator at the same time, the controller for the generator output voltage may be different that the solar output. When there is a difference in potential, there is additional current flow from the highest voltage to the lower voltage source. This inter-system current exchange may or may not cause additional problems between controllers. A conservative approach may be to separate the solar system when you choose to operate the generator. That is what choice I make, as I have both systems too. |
| Question: | Do i need anything else if i already have the zamp hookup and solar installed on my airstream. can i use this for additional charge capabilities |
| Answer: | This is a complete solar system. It includes the panel, charge controller and wires. The charge controller regulates the power from the solar panels to the battery. Without a good charge controller, it would be too much power and damage the battery by overcharging it. If you have a Zamp sidewall port on your Airstream, all you have to do is remove the battery alligator clips this portable comes with and reveal a 2-pin plug that will go into your solar port on your RV. You can use this to supplement power when charging form other sources or you can use this by itself. It's a powerful unit and should do the job for most typical RV'ers with RV's up to 30-feet or so. |
Product features
Off-Grid Solar Panels to Last a Lifetime
Our portable solar kits are the most flexible and efficient solar option. With the largest selection of portable kits on the market, you’re sure to find a solution that works for you.
Made in the USA:
Our panels are handcrafted in Bend, Oregon using the finest materials available (locally sourced whenever possible.) They are built to last 25 years or more and every panel is signed by the person who made it and tested it.
So instead of saving a few bucks now and buying a new solar kit every couple of years, invest once and charge with confidence for the next couple of decades.
Remove From Case and Unfold.
Unzip the bag and pull out the portable panel. Open the clasp and unfold the panels (except for the 45-watt portable, which is a single panel).
Pull out Legs and Set Up the Panel.
Pull out the support legs and set the panel out in direct sunlight. The panel will sit at an angle and should face the sun as directly as possible for maximum efficiency.
Connect the Panel to Your Solar Port or Battery.
Use the included SAE port to plug the kit into a Zamp Solar Ready port, or use the included alligator clamps to connect directly to the battery.
Plug & Play with Zamp Solar Ready Ports:
Most newer RV’s come with a Zamp solar port on their wall or roof. If you have one, you can just plug the panel in with the included SAE cable and start charging!
No port? No Problem!
Use the included alligator clips to attach your portable kit to any kind of 12-volt battery or battery bank (including lithium).
Got a different solar port?
Check out our Furrion adapter.
Includes Everything
Our portable solar kits include everything you need to charge a 12-volt battery or battery bank, including the panel, charge controller, wires, and connectors.
Durable Carrying Case
Every portable comes in a rugged nylon carrying case with thick padding to protect the panel when it’s not in use.
Charge Controller on EZ-View Bracket
A weather-resistant, 5-stage digital charge controller is integrated into the panel to protect your battery and mounted on an EZ-view bracket for convenient monitoring.
Smooth-Slide Support Legs
The support legs on our portable kits open and close smoothly and easily without any weird bolts or wingnuts to cut your fingers on.

Victron Energy SmartSolar MPPT 75V 15 amp 12/24-Volt Solar Charge Controller (Bluetooth)
Victron Energy
Product description
A solar charger gathers energy from your solar panels, and stores it in your batteries. Using the latest, fastest technology, SmartSolar maximises this energy-harvest, driving it intelligently to achieve full charge in the shortest possible time. SmartSolar maintains battery health, extending its life. The SmartSolar charge controller will even recharge a severely depleted battery. It can operate with a battery voltage as low as 0 Volts, provided the cells are not permanently sulphated or otherwise damaged.
User questions & answers
| Question: | Can you send the performance history to your computer |
| Answer: | Yes, the app will create a .csv file that can be sent to your computer via email, bluetooth, etc. |
| Question: | Are these chargers able to stop charging if the battery reaches a defined voltage (over-voltage protection |
| Answer: | The Victron charges have a sophisticated charging method that uses three states. The final one, called a float charge reduces the current to a trickle at a safe battery voltage. |
| Question: | What is the manufacturer warranty on this item? Please provide link |
| Answer: | The boxes have a sticker - 5 year warranty, but i'll be darned if i can find a link for ya. (I have the 100/30A, and 150/60A units). wish you well. |
| Question: | I have flat plate agm batteries, but the only settings are for gel and spiral agm. what do i do |
| Answer: | For AGMs, you can use the factory default, or "Gel Victron deep discharge", both of which are 14.4V charge, 13.8V float. Or, set it to your battery manufacturer's recommendation with a custom profile. |
Latest Reviews
View all
Intech Golf Bag
- Updated: 01.05.2023
- Read reviews

Professional Photo Printers
- Updated: 04.01.2023
- Read reviews

Goggles For Nerf Guns
- Updated: 21.01.2023
- Read reviews

Outdoor Toys For Kids
- Updated: 08.03.2023
- Read reviews

Stihl Chainsaws
- Updated: 04.06.2023
- Read reviews