12 best epoxy resin coatings
Epoxy resin coatings are a type of epoxy-based material commonly used in various industrial, commercial, and residential applications. These coatings offer a protective and decorative finish that is known for its durability, chemical resistance, and versatility. Here's what you need to know about epoxy resin coatings:
Composition: Epoxy resin coatings are typically composed of two main components: epoxy resin and a hardener. When these two components are mixed in the correct proportions, a chemical reaction occurs, resulting in a hardened, durable, and glossy finish.
Applications:
Flooring: Epoxy resin coatings are frequently used for flooring in commercial and industrial settings. They create a seamless, high-gloss surface that is easy to clean and highly resistant to chemicals, abrasion, and impact.
Countertops: In residential kitchens and commercial spaces, epoxy resin coatings can be applied to countertops for a smooth, visually appealing, and durable surface.
Art and Crafts: Epoxy resin is popular in the art and craft world for creating glossy, three-dimensional artworks and jewelry.
Woodworking: Woodworkers use epoxy resin coatings to create a protective and attractive finish on wooden surfaces, such as tabletops and river tables.
Marine: Epoxy resin coatings are used in boat construction and repair due to their water-resistant properties.
Automotive: Some automotive enthusiasts use epoxy resin coatings for custom vehicle finishes and to protect and enhance vehicle surfaces.
Industrial Equipment: Epoxy coatings are applied to industrial equipment to protect against corrosion and wear.
Advantages:
Durability: Epoxy resin coatings are incredibly durable and long-lasting, making them suitable for high-traffic areas and environments exposed to harsh conditions.
Chemical Resistance: They are highly resistant to chemicals, including acids, oils, and solvents, making them ideal for use in industrial settings.
Versatility: Epoxy resin coatings can be customized with various colors, patterns, and textures, allowing for creative design options.
Easy Maintenance: The smooth, non-porous surface of epoxy resin coatings is easy to clean and maintain.
Safety: Some epoxy coatings are formulated with slip-resistant additives to enhance safety in wet or slippery areas.
Application Process: The application of epoxy resin coatings typically involves the following steps:
- Surface Preparation: The surface to be coated must be clean, dry, and free of contaminants.
- Mixing: Epoxy resin and hardener are mixed according to the manufacturer's instructions.
- Application: The mixed epoxy is applied to the surface and spread evenly using tools like rollers or brushes.
- Curing: Epoxy coatings require a curing period to harden and achieve their full properties.
Safety Precautions: When working with epoxy resin coatings, it's important to follow safety guidelines, including wearing appropriate protective gear, working in a well-ventilated area, and avoiding skin contact with uncured epoxy.
In summary, epoxy resin coatings are versatile and durable materials used in a wide range of applications, from flooring and countertops to art and industrial equipment.Their combination of strength, chemical resistance, and design flexibility makes them a popular choice for protective and decorative finishes.
Below you can find our editor's choice of the best epoxy resin coatings on the market
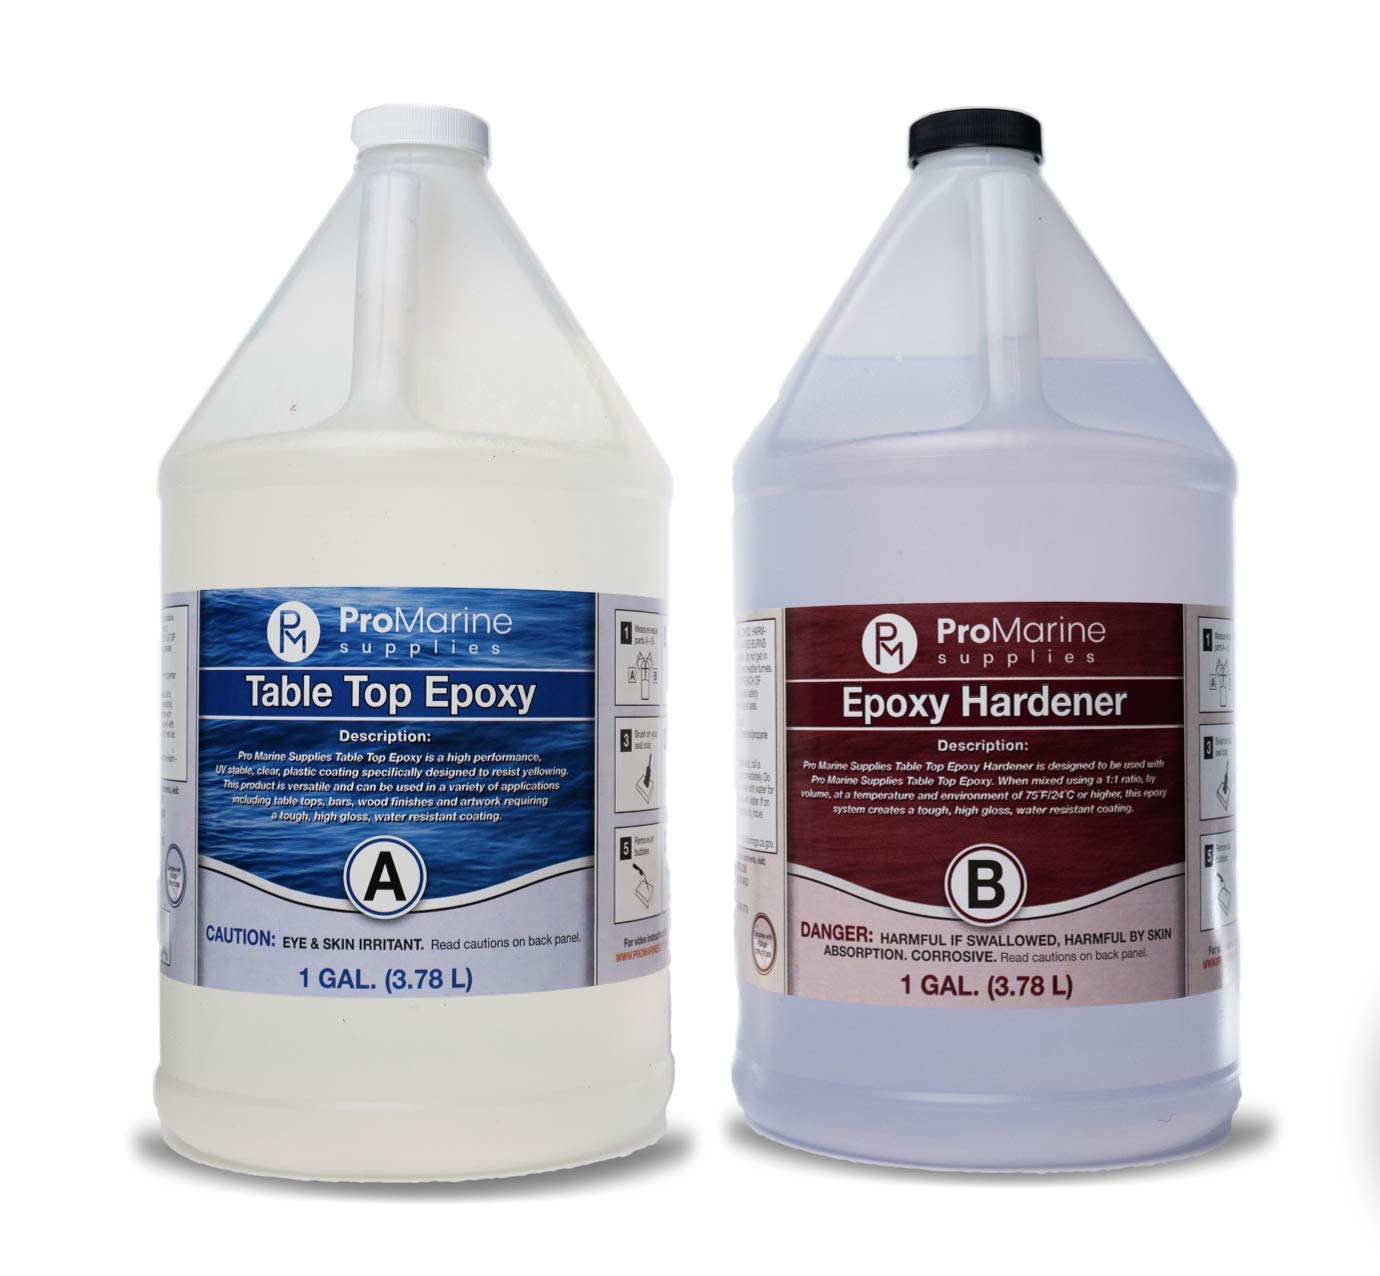
Clear Table Top Epoxy Resin Coating for Wood Tabletop - 1 Gallon Kit
Pro Marine Supplies
- Designed for Table Tops, Bars, Wood finishes, See-Through Encapsulations, Art work, and other applications
- Self Leveling and High Gloss U.V. Resistant Formula
- Produces a Tough, High Gloss, Water Resistant Coating
- Eliminates Craters, Crawling and Fish Eyes
- Blush Resistant
User questions & answers
| Question: | I ran out in the middle of a project. Next batch wont arrive until after the 12 hour window for multiple coats. Should I just sand before next coat |
| Answer: | Yes, lightly sand to help your next coat adhere better to the last one. |
| Question: | I have wood table that I want to make shine, would this product will give me what I'm looking for |
| Answer: | Yes it will make the table very glossy but it is not an easy process . If you have not worked with epoxy much you will want to practice before you use it on your table. |
| Question: | What are the instructions for installation? Other answer says practice first, but I'm wondering what possible complications might be |
| Answer: | Possible complications we found is not mixing this properly therefore it will not harden. |
| Question: | Is there a recommended maximum depth for this |
| Answer: | 1/8 normal. I have done 2 inch at time but you really need deep pour product for river table. |
Product features
High Gloss & Durable
High performance and Crystal clear! Produces a tough, high gloss, water and scratch resistant coating.
Versatile
Can be used for a wide variety of applications, art, and home projects.
FDA Compliant
FDA Compliant formula for artistic items used around food, such as trays, tumblers, and glassware.
Easy 1:1 Self-Leveling Formula
Use our product with ease, featuring an easy 1:1 self-leveling formula!
Beautiful and Versatile, Crystal Clear Finish...Every Single Time!
Step 1: Measure
Pour equal parts of resin and hardener into a clean mixing container or graduated mixing tubs, using a 1:1 ratio (by volume) It is crucial that the product is measured accurately and mixed thoroughly. Measure 1 part RESIN to 1 part HARDENER by volume. Do NOT vary this ratio. Our Epoxy is formulated to cure at a specific mixing proportion, and any variances can cause the product never fully to cure. We recommend always pouring the HARDENER into your mixing container first, followed by the RESIN. This will help the two components mix thoroughly.
Step 2: Mix
First Mix: Mix with a flat bottom stir stick or spatula being sure to scrape the sides and bottom of the container as you go. Your mixture will appear hazy at first, and then become more transparent as the resin and hardener molecules begin to blend within three to five minutes.
Second Mix: Pour the Resin and Hardener from your first container into a second container scraping all the mixture out from the sides and bottom of the cup. Thoroughly mix for an additional three minutes.
Step 3: Seal Coat Stage
The best way to apply a seal coat is to start on one end of the table and pour the resin all the length of the surface, zigzagging as you go. Then use a foam brush to drag the resin across the entire surface to achieve an even coat. The epoxy cures rather quickly in the container, so it is necessary to paint the seal coat on quickly or mix up a smaller amount so that it does not cure in the container while you are still working on it. The seal coat does not need to be smooth as the flood coat will fill in the brush strokes and irregularities making it crystal clear. Once the entire surface is sealed, wait 4-6 hours to pour the flood coat. Do not exceed 10 hours or you run the risk of the flood coat not blending into the seal coat flawlessly.
Step 4: Flood Coat Stage
Each flood coat self-levels at approximately 1/8” thick. If depths thicker than 1/8” are desired multiple coats are necessary. You must wait at least 4 to 10 hours between flood coats. The epoxy will still be tacky so the next pour will stick to it.
The best way to apply the flood coat is to start on one end and pour the resin the entire length of the surface, zigzagging as you go. After you are finished pouring, set the container down. Do NOT try to scrape anything else out of the bucket. Because you are pouring about three times the amount of product you did with the seal coat, the material will immediately start to flow out.
Step 5: Remove Air Bubbles
Once you have sufficiently covered the entire surface with your flood coat, you will begin the process of popping air bubbles. The best tool for removing bubbles is a small propane torch. Hold the flame approximately 6 to 10 inches away from the table top and quickly sweep across the entire surface using an ironing motion. You will immediately see the bubbles start to pop. Do this until all the bubbles are gone from the surface of your table.
* After pouring your epoxy, it is common for air bubbles to form. Bubbles can continue to develop for up to 60 minutes after the curing process has begun. The most efficient way to get rid of them is to run a blowtorch over the surface sporadically 10 - 15 min at a time.
Step 6: Curing Process
After applying your final coat, the product should be kept in a clean, dust-free environment at a minimum of 75-80° F degrees. The product takes approximately 12-14 hours to dry to the touch. However, the product should not be put into any use for at least three days which will allow it to achieve sufficient hardness to resist scratching. At temperatures below 75 F, the product will take longer to cure and might not cure to complete hardness.

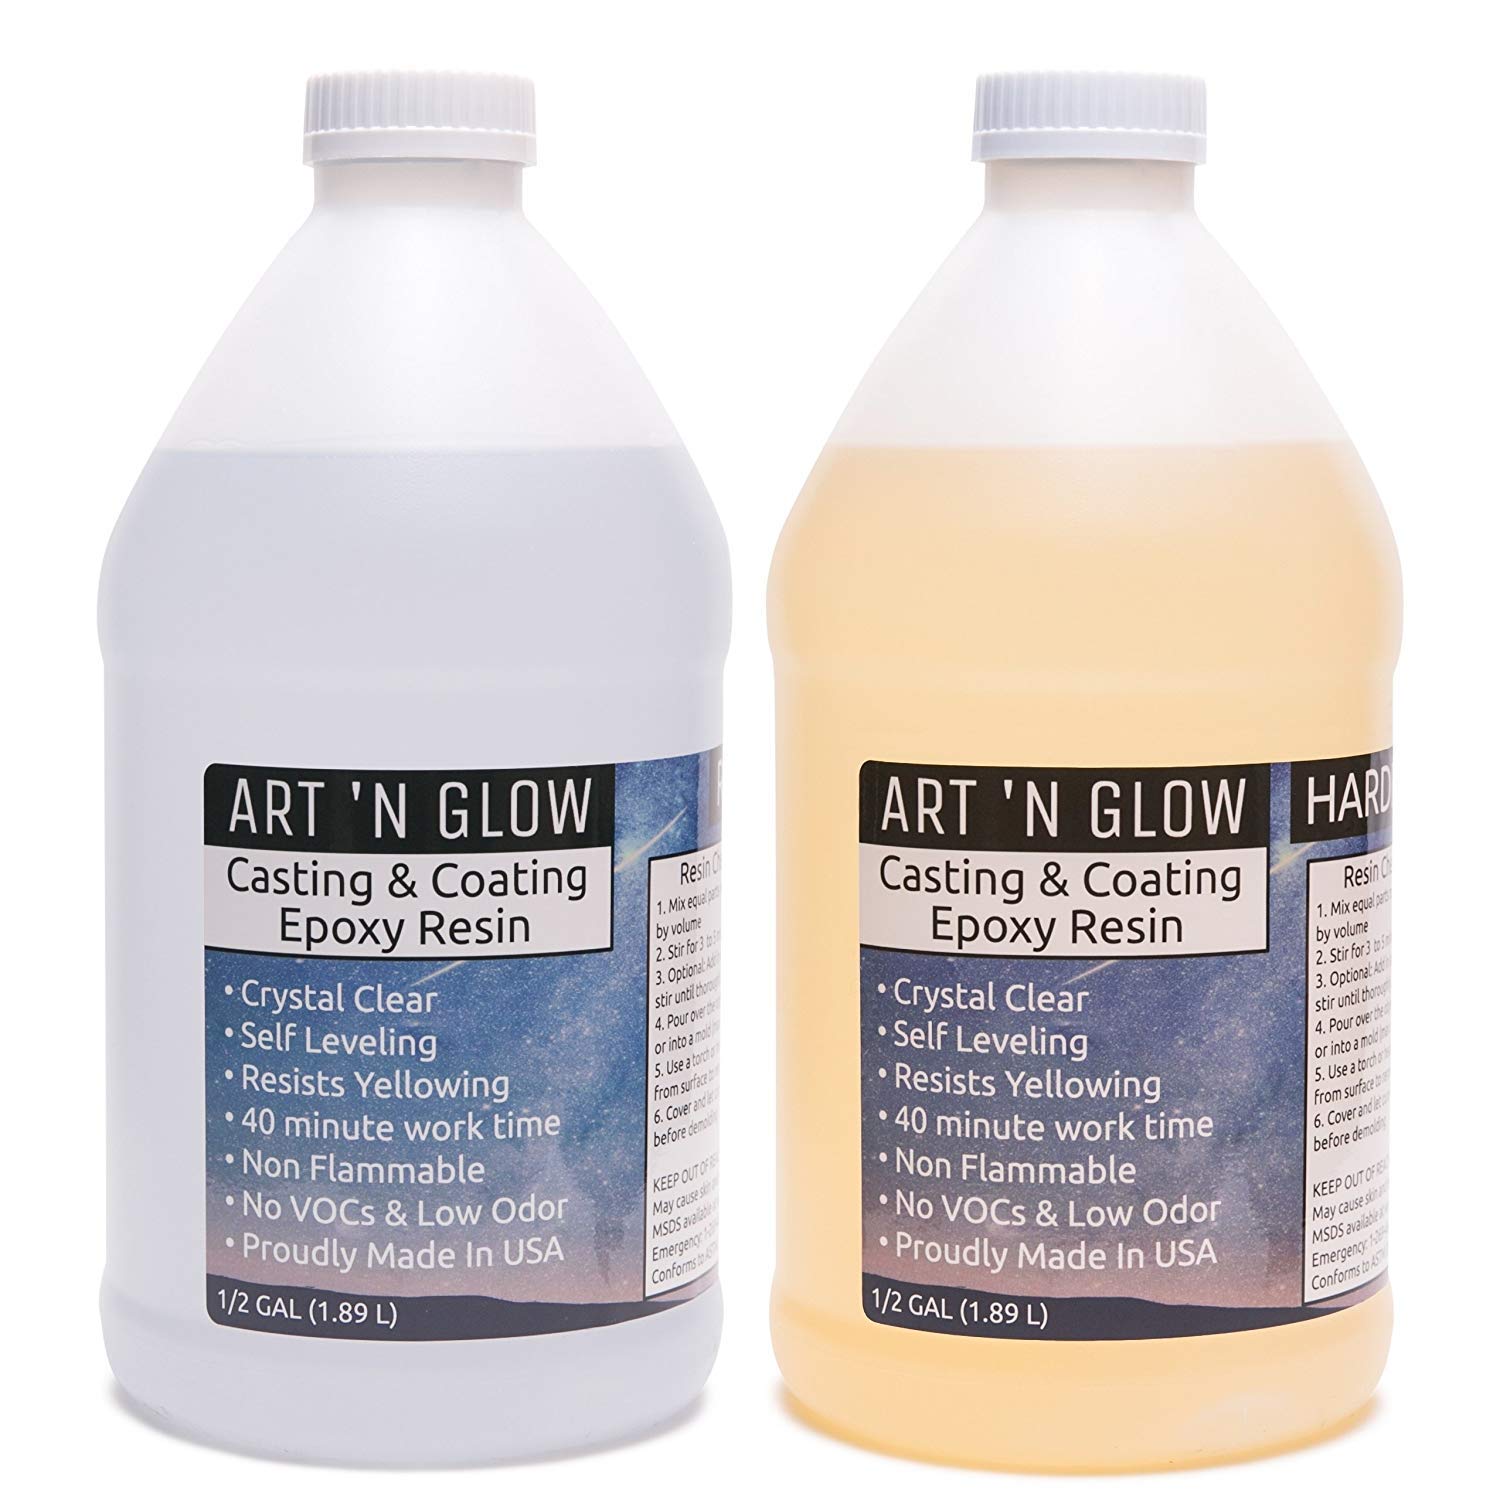
Art 'N Glow Clear Casting and Coating Epoxy Resin - 16 Ounce Kit
- Use our clear epoxy resin for all of your casting AND coating applications. Hardens crystal clear and hard as a rock
- Rigorous testing was done to ensure that our resin is a perfect match for all of our glow in the dark and other craft pigments
- Our resin is self leveling, self degassing, odor free, resistant to yellowing from sun exposure, and is made in the U.S.A.
- One to one mix ratio is fool proof and has a forgiving 40 minute work time
- Use to coat tables and bars, encapsulate objects, cast figurines and jewelry, make resin paintings and more
User questions & answers
| Question: | How thick can I pour this resin |
| Answer: | If you set up a damn you could pour it fairly thick (1/4" or so). But depending on the area you wanted to cover you might want to buy more resin. These are about the size of bottles that Bubbles come in. You could also do multiple layers, but that might take a while. Amazon is a good resource, but YouTube has more examples. |
| Question: | Could I use this to cover a photo mounted on cardboard? If yes, what would be the longevity until the photo underneath would yellow |
| Answer: | Yes you can definitely do that. Just glue down the photo first with a glue stick and then brush a thin layer of epoxy over the photo and cardboard before doing the actual pour. This will hold the photo in place and prevent air bubbles from escaping from the paper and into the thick coating of resin. As long as the epoxy is kept indoors it should stay clear for a long time. It should only yellow if it is exposed to the sun too much. |
| Question: | Is this fda approved for use with products that potentially touch food |
| Answer: | It is okay to use for a table top where food may spill and touch it for a short amount of time but it should not be used for any food containers or in an application that has prolonged contact with food. |
| Question: | What is the total cure time |
| Answer: | I've been making dice with this resin, and although it comes out amazingly well, I'd let it cure the full 72 hours before removing from the molds. I have dice that are still tacky after 36 hours. It's worth the wait. |
Product features
Artist Approved Epoxy Resin Designed For Your Imagination
Our epoxy resin can be used on canvas, wood, concrete, granite, ceramics, precious stones, rocks, paper, and more to give a durable, glass-like, and crystal clear finish. Our customized epoxy resin formula can also be used for casting objects using any suitable mold available. Whatever your creative idea, art project, or material, bring it to life and make it shine with our specially formulated art resin.
Product Specifications
- Material: Epoxy Resin and Hardener
- Longevity: Resists yellowing due to UV exposure but should not be left permanently outdoors as all epoxy resins will eventually yellow from sun exposure
- Safety: Keep out of reach of children. Use only in a well ventilated area.
Casting
Our proprietary epoxy resin blend is ideal for casting jewelry, including earrings, pendants, rings, figurines, coasters, paperweights, DIY crafts, and custom molds. (Max casting size is 6 fluid ounces.)
Clear Coating
Art ‘N Glow resin is ideal for clear coating and sealing artwork, photography, paintings, paper collages, tabletops, bartops, counters, and more. Our resin cures crystal clear and as hard as a rock.
Fluid Art Pours
Mix our resin with pearl powder, resin tint, and alcohol ink to create one-of-a-kind fluid pour creations. Choose from 19 pearl pigment colors. All pigments are designed to work flawlessly with our resin.
Glow in the Dark Crafts
Blend our resin with Art 'N Glow glow in the dark pigment powder to create artwork that glows for up to 12 hours. We have 14 glow in the dark colors to choose from. Just charge with a UV light or the sun for a bright and long lasting glow!
Crystal Clear Bar Table Top Epoxy Resin Coating for Wood Tabletop - 2 Gallon Kit
Pro Marine Supplies Inc.
- Designed for Table Tops, Bars, Wood finishes, See-Through Encapsulations, Art work, and other applications
- Self Leveling and High Gloss U.V. Resistant Formula
- Produces a Tough, High Gloss, Water Resistant Coating
- Eliminates Craters, Crawling and Fish Eyes
- Blush Resistant. A total of 2 gallon combined
User questions & answers
| Question: | Putting 3/4 of an inch down. Do i need to prep different layers. Gonna do it a couple days apart |
| Answer: | I would sand before recoating... but... it took mine about 3days before i could sand it @ 1/4" thick... so plan for that... maybe sand it with 600grit or even 400 should be just fine |
| Question: | Are there paints/ primers/ stains/ adhesives that I should avoid using under the resin? I am planning to stain/ prime a wood base w/ objects glued on |
| Answer: | Embedding solid objects: Wood, rocks, shells, bottle caps, coins, etc. may be embedded with this product also. Allporous objects must be sealed first with a good coat of epoxy. If the objects are not properly sealed, they will releasetiny air bubbles which will form around the object during the flood coat. Placement of these objects may be donebefore you apply the first seal coat or they can be placed into a seal coat using it as glue to hold them down. Makesure that your seal coat completely surrounds the embedded objects so that when it hardens they are secured to yoursurface and do not float up into the flood coat. You will want to wait 24 hours before pouring the flood coat if you areusing the seal coat as a glue. This will allow the seal coat enough time to harden. If you are not placing objects in theseal coat, then they must be glued down or they can float up into the flood coat. Most regular glues will work fineexcept for hot glue sticks. In that instance you will pour the flood coat 4 hours after the seal |
| Question: | What about wood expansion/movement? Once the wood is imbeded in the epoxy, will it continue to expand/contract causing the epoxy to crack |
| Answer: | I coated the wood I embedded and the wood trim before I poured. Keeps the air bubbles from surfacing and the wood from expanding |
| Question: | Is this product fda compliant |
| Answer: | From their website and blog dated sept 10, 2017.... The short answer is, yes. Once Pro Marine Supplies Table Top Epoxy has cured it becomes safe, per FDA code, 21CFR175.300 which states "Resinous and polymeric coatings may be safely used as the food-contact surface of articles intended for use in producing, manufacturing, packing, processing, preparing, treating, packaging, transporting, or holding food" and can be used as a "functional barrier between the food and the substrate" and "intended for repeated food-contact use |
Product features
Beautiful and Versatile, Crystal Clear Finish...Every Single Time!
High Gloss & Durable
High performance and Crystal clear! Produces a tough, high gloss, water and scratch resistant coating.
Versatile
Can be used for a wide variety of applications, art, and home projects.
Food Safe
Food Safe formula for artistic items used around food, such as trays, tumblers, and glassware.
Easy 1:1 Self Leveling Formula
Use our product with ease, featuring an easy self leveling 1:1 formula.
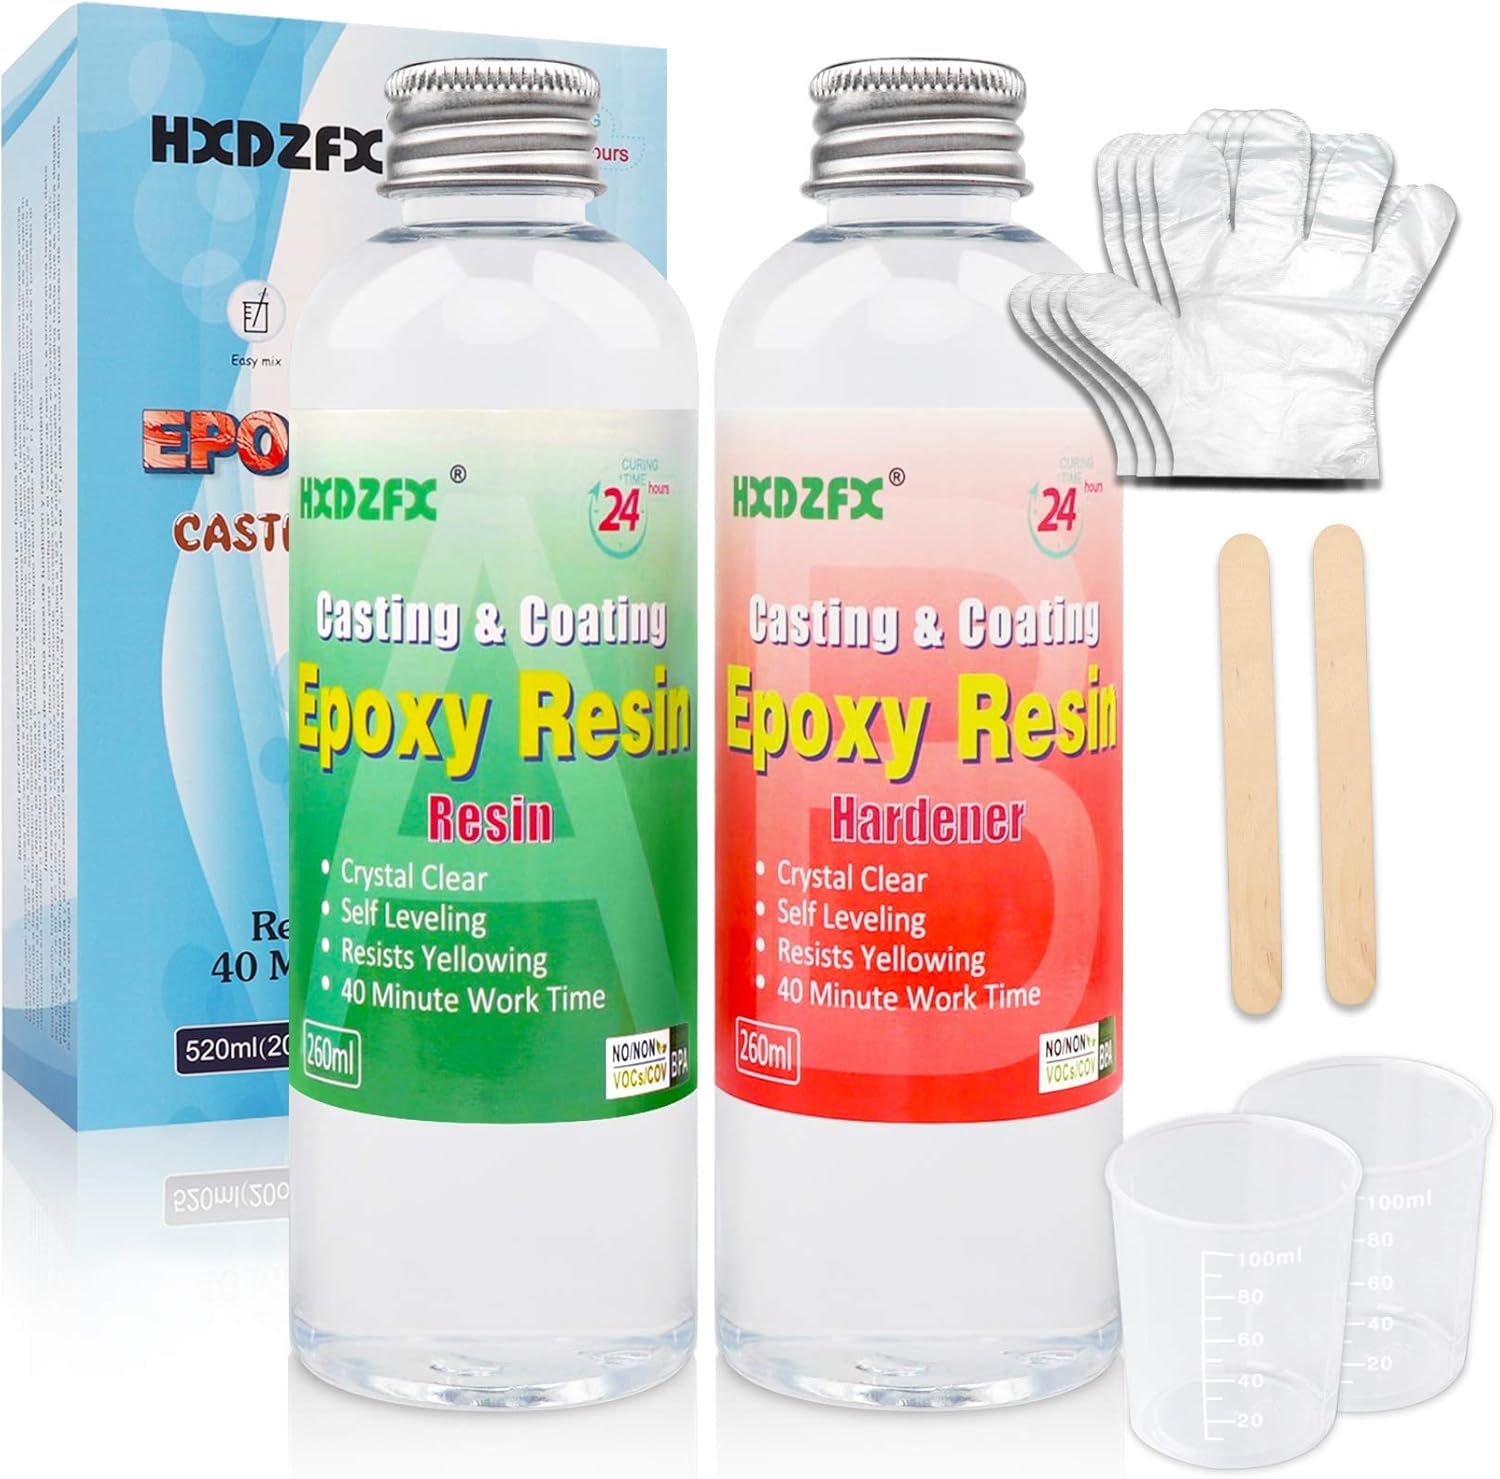
Epoxy Resin Clear Crystal Coating Kit 520ml/20oz - 2 Part Casting Resin for Art, Craft, Jewelry Making, River Tables, Gloves, Measuring Cup and Wooden Sticks
- HXDZFX art resin kit includes: One 260ml bottle of resin and one 260ml bottle of hardener, 2 x gloves, 2 x graduated cup, 2 x wooden sticks and comes with a detailed instruction manual, which is very suitable for professional artists or beginners.
- Crystal Clear - self leveling and high gloss resistant formula, cures crystal clear and hard as a rock, anti-scratch and anti-yellowing function can make your artwork and DIY projects better protected.
- EASY TO USE - 1:1 ratio by volume, 40 minute work time. With eliminating craters, crawling and fish eyes, which could easily to get a perfectly transparent finish.
- We conducted rigorous testing to ensure that HXDZFX epoxy resin perfectly matches other hand-made pigments such as epoxy resin dyes, glow in the dark, mica and alcohol ink.The epoxy resin kit is ideal for use in DIY resin art, jewelry making, river tables, crystal clear coating, casting and the others.
- Please read the attached manual carefully before use. If you have any questions or are not satisfied with our epoxy resin kit, please contact us.
User questions & answers
| Question: | Can you you use this to put over a led light strip on a snowboard? I really just want to know if it will hold |
| Answer: | You'll need to create an airtight mold going beyond some tape. Hot glue with a solid surface, followed by some cutting, sanding, and polishing. I do know this resin is flexible compared to others that dry brittle, so it's a great choice |
| Question: | Is it 1:1 ratio by volume or by weight |
| Answer: | Appears the mfr. mixes measurements on the bottle. Volume of each container is stated as 240ml, but instead of staying with ml which is the same as cubic centimeter measure, the mfr. switches to weight from volume, making it confusing to those that get the difference. But doesn't state the specific gravity of each part. That's scary, and possibly why so many people say it stays soft and flexible and takes days to harden! I can't afford to ruin my project with soft resin, so I will weigh it when it arrives since the mfr. can't stick to one type of measure. I'll measure the height and diameter of each bottle. If discrepancy of volume, will update and advise. If it's all good, will not update. |
| Question: | How long does it take to cure |
| Answer: | 24-48 hours |
| Question: | Can I use paint to color this Resin |
| Answer: | Use Micah powder instead. Super cheap, luminescent, and it won't have a chemical reaction during drying time. Paint will work, but heat discoloration is a "maybe/probably" situation that depends on brand/type. |
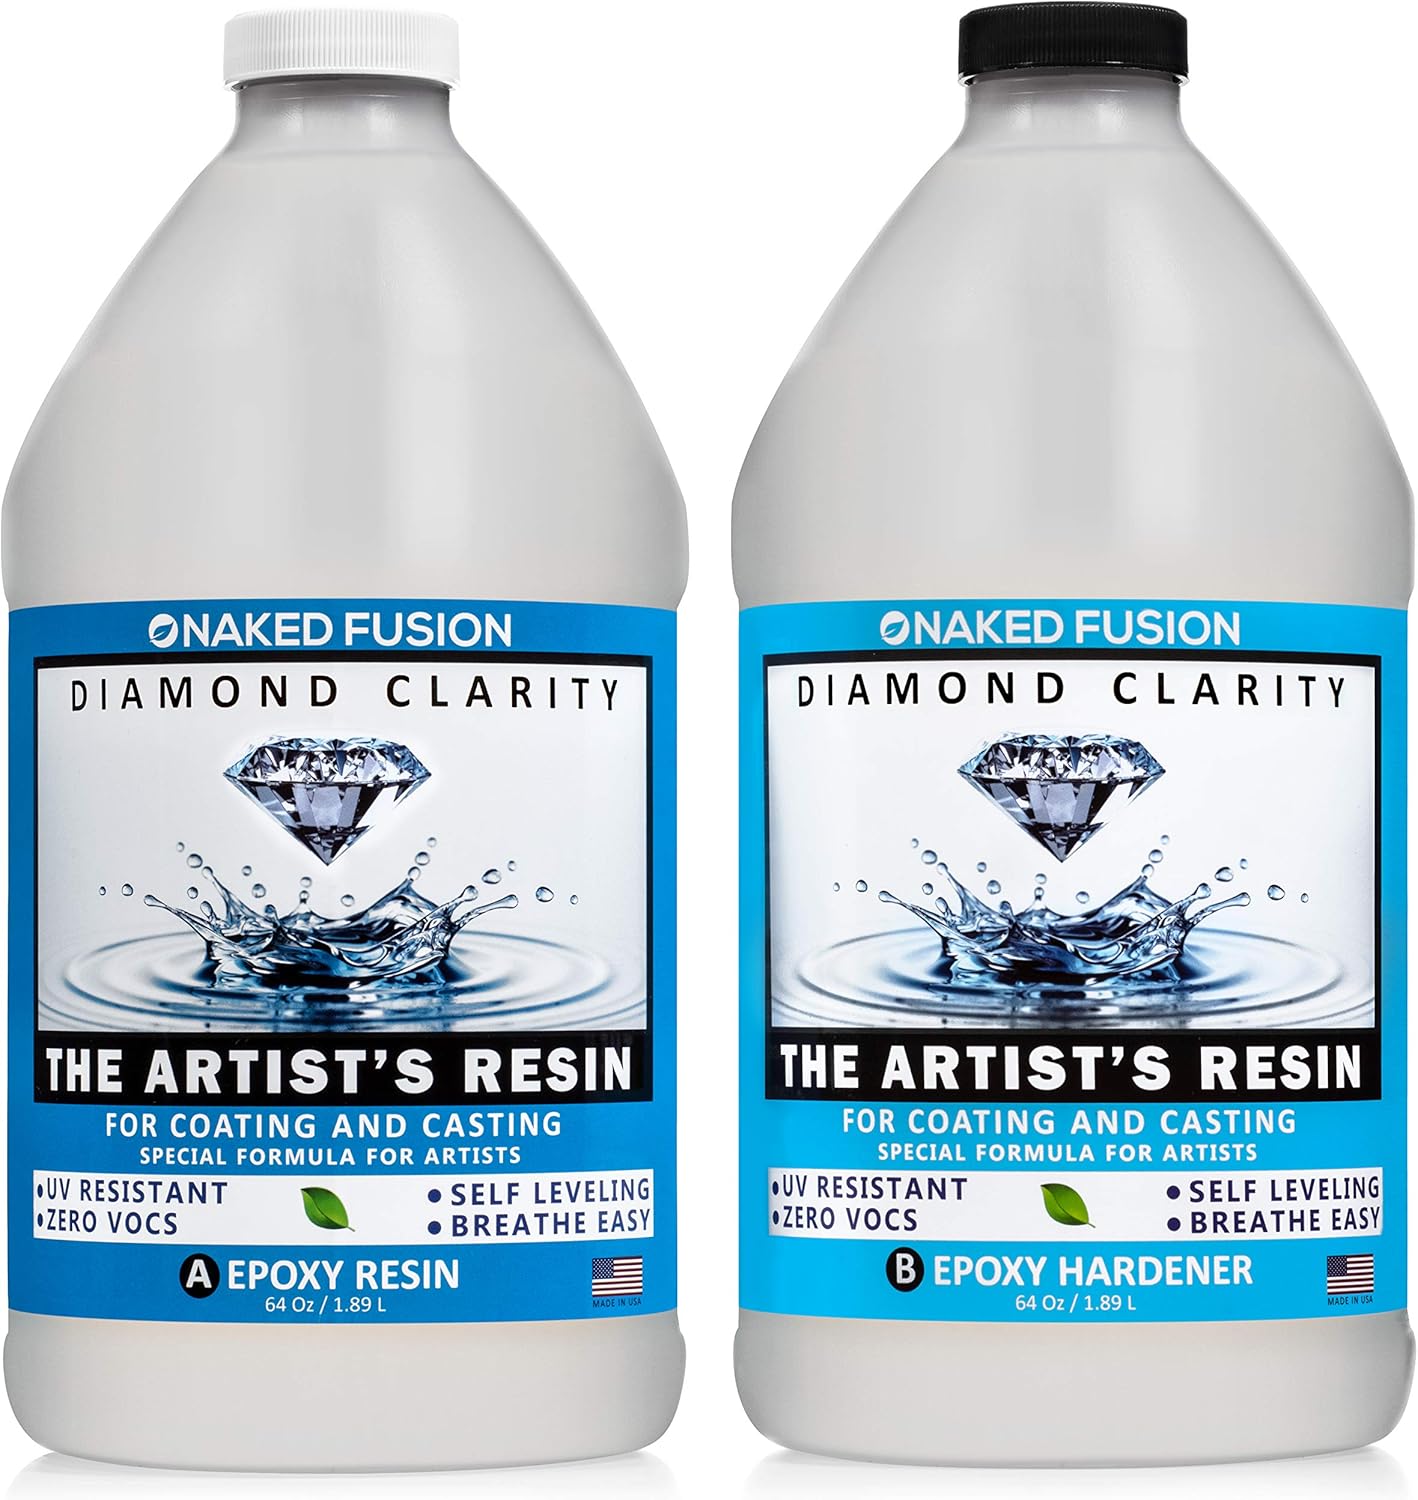
Epoxy Resin Art Resin Crystal Clear Formula- The Artist's Resin for Coating, Casting, Resin Art, Geodes, Tabletop, Bar Top, Live Edge Tables, River Tables- Non-Toxic -1 Gallon Kit
- NAKED FUSION-The ARTIST’S RESIN – Art Resin Epoxy Kit is specially formulated for ARTISTS! CRYSTAL CLEAR & NON-TOXIC- It’s NAKED – ZERO VOCS and odor free for better air quality while you work - breathe easy while working with Naked Fusion.
- THE ARTIST’S RESIN is fantastic for producing VIVID and LUMINESCENT COLORS when mixed with MICA PIGMENTS and pastes. It also works fabulous with alcohol inks and it creates beautiful cells! This resin makes stunning effects that you will fall in love with!
- MADE IN THE USA. Our resin chemists have been innovating resin formulas for over 40 years.
- It’s UV RESISTANT, SELF LEVELING and cures ROCK SOLID with a HIGH GLOSS mirror shine. Add a beautiful GLASS like coating to any surface. Enjoy the LONGER 45 minute working time that gives more time for the creative process. It is BPA free and food safe for use on counter tops, cutting boards and other items in the kitchen.
- EXCELLENT for all Casting, Coating and Art Projects including Resin Art, Resin Jewelry, Coating Artwork/Acrylic Pour Paintings, Geode Paintings, Molds, Coasters, Tabletops, Bartop, Countertop, Live Edge River Tables, Tumblers, Wood Blocks, Cutting Boards and more! It has fantastic color stability to preserve the rich colors of your artwork.
User questions & answers
| Question: | Is this similar to gallant epoxy resin |
| Answer: | I'm sorry but I have never used gallant resin . This is the only one I use after trying many others. It's great |
| Question: | Is this good for mold casting |
| Answer: | To answer your question Naked Fusion Resin is great for casting. For best results we recommend you closely follow the instructions on our site to pour at the correct depth in layers and use the proper techniques. If you do you'll have a gorgeous finished product! Let me know if I can answer more questions for you! |
| Question: | Is this product FDA compliant |
| Answer: | Yes, the resin is FDA food safe/ compliant for use on counter tops,cutting boards and other items in the kitchen. Let us know if we can answer any other questions for you! |
| Question: | Is this FDA approved to make drinking glasses |
| Answer: | Yes, while it doesn't list glasses, their website says that once the resin is fully cured it is FDA compliant with coming in contact with food items. It's BPA free. They recommend waiting 72 hours after pouring for full cure before using with food items. |
Product features
CRYSTAL CLEAR EPOXY RESIN
Crystal Clear Epoxy Resin perfect for resin art, casting, geodes, high gloss coatings, river table, coasters, tumblers, resin jewelry and more. We offer in depth technical support from our experienced in-house art team to make sure your project has amazing results! For beginners or experienced resin users we will give you the tips and tricks you need to achieve your desired outcome!
NAKED- ZERO VOCS-
Naked Fusion is NAKED=ZERO VOC’s – NON TOXIC – Breathe easy when using Naked Fusion, no respirator required. Food safe and great to use on cutting boards, tumblers, charcuterie platters, countertops and other items in the kitchen.
UV RESISTANT - SELF LEVELING
UV Resistant Epoxy Resin with added UV inhibitors to protect from UV exposure. Our Self Leveling Epoxy Resin formula self levels to a beautiful glass like finish. Easy 1 to 1 ratio makes measuring and mixing much easier. Cures rock hard and scratch resistant.
PERFECT FOR ART AND CASTING
The Artist’s Resin special formula for artists is excellent for Casting and Resin Art. Perfect for use with silicone molds. Crystal Clear and mixes beautifully with a variety of pigments. Releases bubbles easy with a heat gun or torch to have an amazing finished product! Proudly MADE IN THE USA!
Why choose Naked Fusion Resin?
Naked Fusion Resin’s Special Formula for Artists was designed and formulated for artist’s needs. Our resin chemists have a long history in the resin industry innovating resin formulas since the 1970’s. Our chemists collaborated with Naked Fusion Resin to design this unique formula. With the growing need for a refined resin formula for artists, Naked Fusion Resin is designed with high performance qualities that produce amazing results for all of your resin art, resin casting and resin projects. It has amazing crystal clear clarity whether using it for a high gloss coating, resin art or casting projects. We know how important it is to have a resin that is easy and pleasant to work with while still producing a beautiful finished product. Naked Fusion is NAKED=ZERO VOC’s and odor free so you can breathe easy and be comfortable while working with our resin. Being comfortable allows all your focus to funnel into the important things.. your ART.
EPOXY ART RESIN JEWELRY
The Artist's Resin is crystal clear epoxy that is fantastic for making resin jewelry and casting. Whether mixing it Crystal Clear or with Mica Pigments you will love the results when casting resin in silicone molds! The step by step process is available in our instructions for a beautiful finished product! Casting is an art form and we here to answer any questions you may have.
EPOXY RESIN ART
The Artist's Resin is perfect for resin art. You can achieve amazing effects, cells plus vibrant colors with pigments and layers. Our art resin works great on canvas or wood. The long 45 min. working time is a big plus! Also excellent for coating artwork and acrylic pours. Looking for tips for your art project? Our in-house art team can answer your questions.
GEODE RESIN COASTERS AND TUMBLERS
The Artist's Resin is great for coaster sets and tumblers. The colors will come to life when creating geode coasters with pigments. Embed gold flakes, glitter or cracked glass for texture and special effects. Enjoy the clarity when using alcohol inks making your coasters. For tumblers our resin gives a beautiful high gloss finish, have fun add some glitter!
RESIN AND WOOD
The Artist's Resin works amazingly for epoxy resin and wood projects. Our resin is excellent for river tables, live edge tables, wood resin blocks and embedding objects with resin and wood. The Artist's Resin is designed to pour in layers to achieve the desired depth. Whether pouring clear resin or adding translucent or opaque pigments you will love the results!
RIVER TABLES AND LIVE EDGE TABLES
Capture and bring out the beauty of your live edge wood creating amazing River Tables. The crystal clarity of the epoxy resin will make the table stunning!
GLAM AND GLITTER RESIN COASTERS
Create glitter and glam with mica pigments, silver or gold leaf foil, glitters and resin. With a huge variety of coasters silicone molds on the market the options are endless!
RIVER COFFEE TABLES
River Tables can come in all sizes! Small end tables, coffee tables, counter tops and even stools can be made with live edge wood and epoxy. Even have fun making a skateboard with epoxy and wood!

Clear Table Top Epoxy Resin Coating for Wood Tabletop - 1 Gallon Kit
Product description
Premium epoxy resin sold by The Epoxy Resin Store, USA. We have been in business for 20 years. We are the manufacturer of this product and not a reseller. We manufacture, label, package and ship all in house. Your resin will ship from lake Elsinore, CA. This resin is a 1 gallon kit. These are each half gallons with a combined weight of 8 pounds. You will receive 1 half gallon of resin and 1 half gallon of hardener. The resin is a premium quality 100% solid with no cheap additives. This resin can be used for coatings and small castings. Ideal applications are jewelry making, wood working, crafts, arts, coatings of concrete, wood, and stone. The mix ratio on our resin is 1:1 by volume (1 cup to 1 cup). Fully cures in 24 hours and cures to a shiny rock hard finish. Please note: This resin's worktime is 30-45 minutes and full cure is 24 hours. Mass, and room temperature will affect curing. We ship item within 1 business day. We ship UPS ground and the item will arrive within 5 business days. Your item will arrive in a secured box. You should receive 1 bottle resin, 1 bottle hardener. Bottles are sealed with a foil insert to prevent leaks. bottles are sealed with a safety tape and bagged in zip lock bags. We do our best to avoid spills and damages. In the event that you receive a damaged item, Please reach out to our customer support and we will take care of your concern within 24 hours. we appreciate the opportunity to serve you
- CURES CLEAR
- FAST CURE 24 HOURS
- HIGH GLOSSY FINISH
- NON TOXIC
- EXCELLENT QUALITY
User questions & answers
| Question: | I do a lot of resin casting in molds for my online business. Will this work for decorative mold crafts? The price is amazing if it does |
| Answer: | Yes, it will work on decorative mold crafts. |
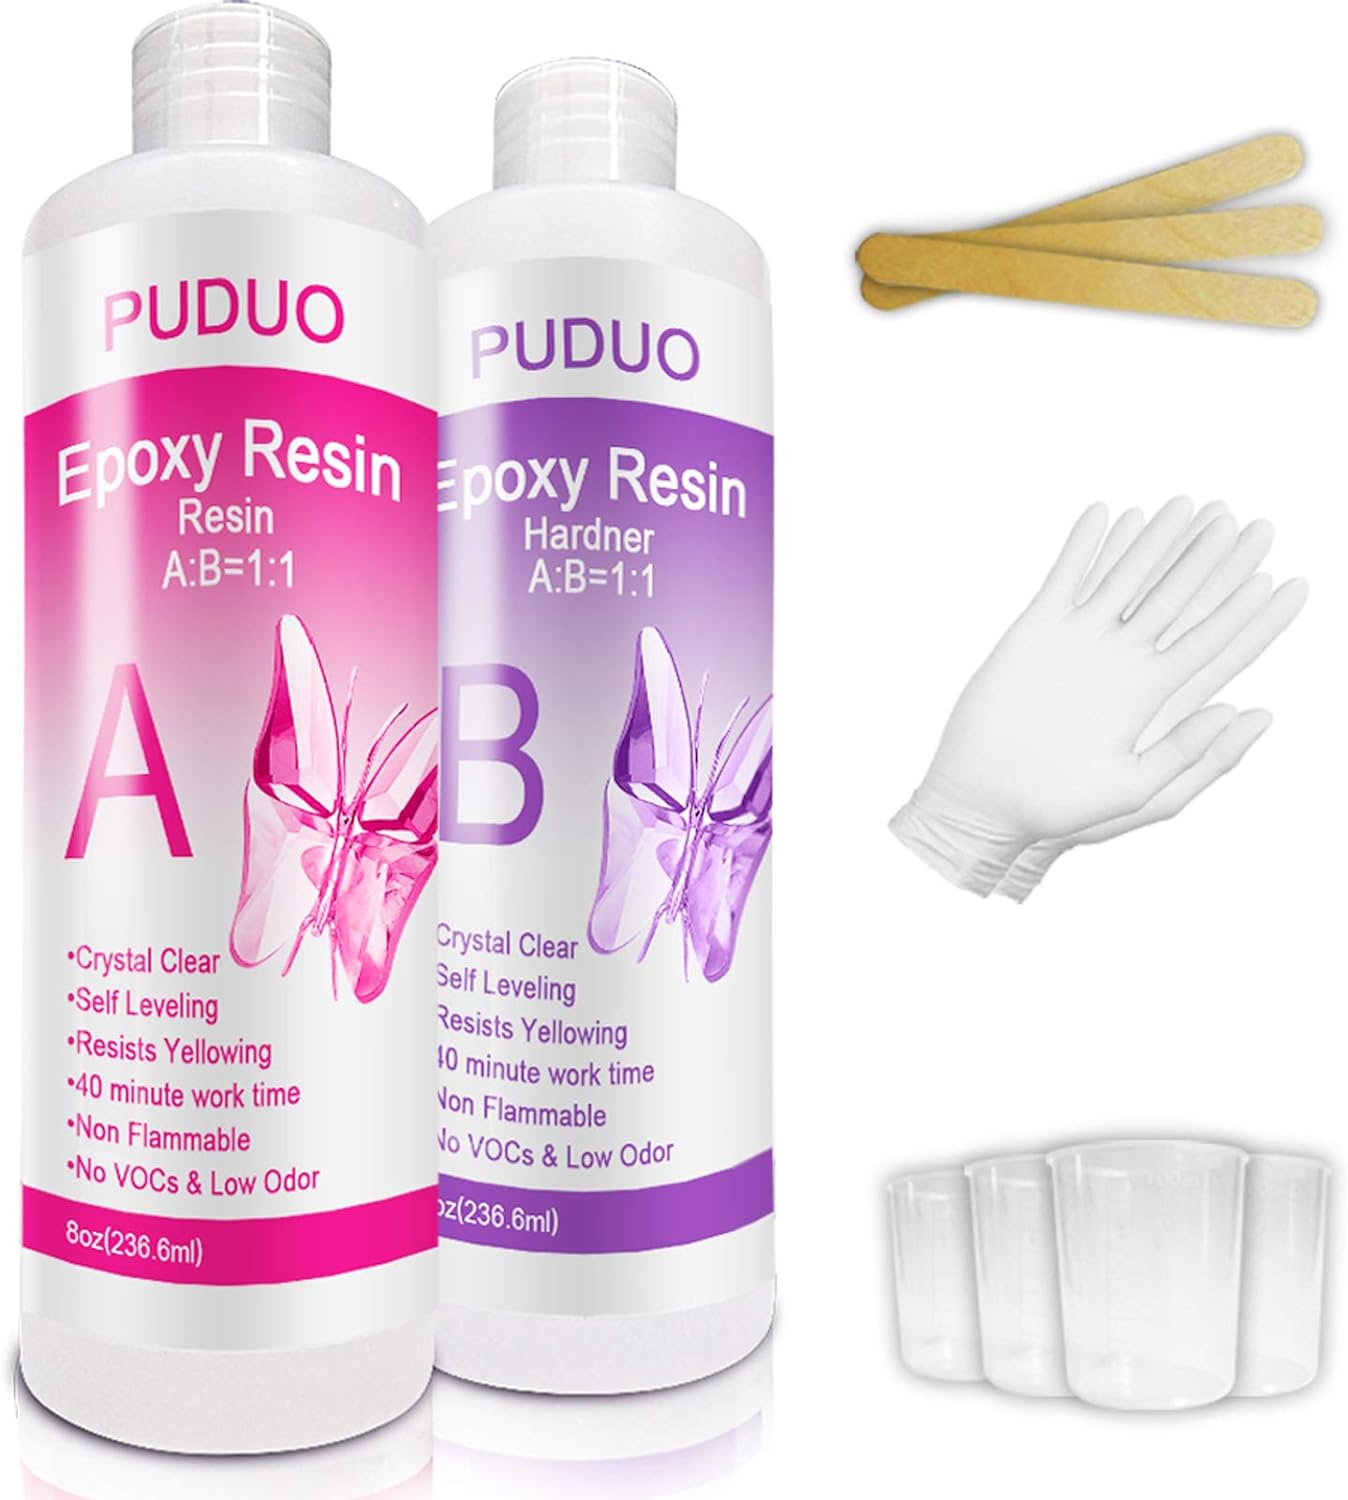
Epoxy-Resin-Crystal-Clear-Kit for Art, Jewelry, Crafts,Coating- 16 OZ Including 8OZ Resin and 8OZ Hardener | Bonus 4 pcs Graduated Cups, 3pcs Sticks, 1 Pair Rubber Gloves by Puduo
Product description
★ Casting and Coating Epoxy Resin by PuDuo
Do you want the appearance of 50 coats of varnish with just one pour? If so, look no further than our Table Top Epoxy. Our 1:1 epoxy system provides you with a protective glass-like finish on any surface. Our epoxy goes on in thick pours that self-level. Everything about our epoxy makes it easy to get an alluring clear finish quickly and easily.
★ What will you create?
Click “ADD TO CART” today and be sure to share your projects with us when they're finished!
★ Specifications
✔ Uses: Can be used as either a coating for tables, bars, wood, canvas paintings, etc. or cast in a suitable mold (max casting size is 6 fluid oz, no limit for coating applications)
✔ Size: Two 8 oz bottles (16 oz total)
✔ Material: Epoxy Resin
✔ Coverage: 16 oz will cover about 3.2 sq. feet at a thickness of 1/16 of an inch
✔ Longevity: Resists yellowing due to UV exposure but should not be left permanently outdoors as all epoxy resins will eventually yellow from sunexposure
✔ Safety: Keep out of reach of children. Use only in a well ventilated area.
♥ What’s included:
- One 8 oz bottle of resin and one 8 oz bottle of hardener
- 4pcs Graduated cups
- 3pcs Sticks
- 1 Pair Rubber Gloves
- Detailed instructions
- ▶ Use our clear epoxy resin starter kit for all of your casting and coating applications. Cures crystal clear and hard as a rock.You will get 8OZ resin and 8OZ Hardener
- ▶ Rigorous testing was done to ensure that our resin is a perfect match for all of glow in the dark and other craft pigments
- ▶Unique FAST Curing Resin that finished casting can be remove from mold after 8 HOURS ,One to one mix ratio is fool proof and has a forgiving 40 minute work time
- ▶Our resin is self leveling, self degassing, odor free, resistant to yellowing from UV exposure
- ▶Come with Bonus Tools-4pcs Graduated cups, 3pcs Sticks, 1 Pair Rubber Gloves
User questions & answers
| Question: | I've seen some mixed answers. What are the depth restrictions for this resin, per the resins instructions |
| Answer: | it doesn't say for castings, but does specify for tabletop coatings shouldn't go more than 1/4" layers at a time. |
| Question: | What safety precautions do you take while using this epoxy product? What kind of a mask do you need |
| Answer: | This epoxy has very little noticeable off-gassing, so I mix it in a well ventilated area and I personally do not wear a mask. If you do want to wear a mask - the only one that will do any good will state that it is good for filtering VOLITILE ORGANIC COMPOUNDS (This type of paint respirator will protect against organic vapors (VOCs) found in paint and other chemicals. Typically - these masks are good for 8 hours of heavy filtering or 40 hours of light filtering. If you can start to smell vapors, it's time for a new mask. |
| Question: | Is it fda approved |
| Answer: | All resin is technically food safe if it has been mixed and cured properly. If it has cured completely hard it no longer emits fumes. Meaning it’s then inert. So basically it turns into plastic. So be careful of your mixing process and any finishes you use on your resin pieces. if it’s still sticky or tacky something happened in the mixing process. I say check out professional carpenters or craftsmen on your tube that work with resin. They give great advice on the product and the finishes they use to stay food safe. Good luck! |
| Question: | is it FDA compliant |
| Answer: | Dont eat it |

Crystal Clear Bar Table Top Epoxy Resin Coating for Wood Tabletop - 1 Gallon Kit
Pro Marine Supplies Inc.
User questions & answers
| Question: | will sealing bare wood surface prevent bubbles forming |
| Answer: | The product should be applied in two stages. The first stage is referred to as the seal coat. The seal coat is a small batch of epoxy that is brushed on in a thin layer to seal any pores in the surface and prevent air bubbles from forming in the following flood coat. Our epoxy is used for both your seal coat and your flood coat. |
| Question: | Is this FDA compliant |
| Answer: | Yes, here is the response from promarine supplies "Although we do not have FDA approval certificate, our epoxy does comply with FDA Compliant Coating for Direct and Indirect Food Contact. Our Epoxy is VOC-Free and user-friendly. Once the epoxy is cured, it is an inert plastic that is non-harmful or hazardous." I have also shared some information from our websites in the link below. https://promarinesupplies.zendesk.com/hc/en-us/articles/115001444873-Is-Pro-Marine-Clear-Table-Top-Epoxy-FDA-Compliant-or-Food-Safe- https://www.promarinesupplies.com/www.promarinesupplies.com/blogis-pro-marine-supplies-epoxy-food-safe/ |
| Question: | Will this work over Minwax polyurethane (oil based). i see it wont react well with oil based stain so i applied poly over the stain. thoughts |
| Answer: | epoxy can go over them in about 24 hours. OIL BASED paints take a LONG time to fully dry. If an oil-based paint is used, you must apply 3 coats of oil-based polyurethane to seal the surface before applying a seal coat of our UltraClear epoxy. If you go directly over the oil-based paint and it is not completely dry, you run the risk of the epoxy not sticking to the surface and peeling off months later. |
| Question: | how many square feet does it cover |
| Answer: | it depends on how thick you put it. First time I used it, 1 gallon for 80 square feet. second time I used 5 oz thinner to 1/2 gallon and covered 80 square feet.it all depends how thick you spread it. |
Product features
High Gloss & Durable
High performance and Crystal clear! Produces a tough, high gloss, water and scratch resistant coating.
Versatile
Can be used for a wide variety of applications, art, and home projects.
Food Safe
Food Safe formula for artistic items used around food, such as trays, tumblers, and glassware.
Easy 1:1 Self Leveling Formula
Use our product with ease, featuring an easy 1:1 self-leveling formula!
Beautiful and Versatile, Crystal Clear Finish...Every Single Time!
Step 1: Measure
Pour equal parts of resin and hardener into a clean mixing container or graduated mixing tubs, using a 1:1 ratio (by volume) It is crucial that the product is measured accurately and mixed thoroughly. Measure 1 part RESIN to 1 part HARDENER by volume. Do NOT vary this ratio. Our Epoxy is formulated to cure at a specific mixing proportion, and any variances can cause the product never fully to cure. We recommend always pouring the HARDENER into your mixing container first, followed by the RESIN. This will help the two components mix thoroughly.
Step 2: Mix
First Mix: Mix with a flat bottom stir stick or spatula being sure to scrape the sides and bottom of the container as you go. Your mixture will appear hazy at first, and then become more transparent as the resin and hardener molecules begin to blend within three to five minutes.
Second Mix: Pour the Resin and Hardener from your first container into a second container scraping all the mixture out from the sides and bottom of the cup. Thoroughly mix for an additional three minutes.
Step 3: Seal Coat Stage
The best way to apply a seal coat is to start on one end of the table and pour the resin all the length of the surface, zigzagging as you go. Then use a foam brush to drag the resin across the entire surface to achieve an even coat. The epoxy cures rather quickly in the container, so it is necessary to paint the seal coat on quickly or mix up a smaller amount so that it does not cure in the container while you are still working on it. The seal coat does not need to be smooth as the flood coat will fill in the brush strokes and irregularities making it crystal clear. Once the entire surface is sealed, wait 4-6 hours to pour the flood coat. Do not exceed 10 hours or you run the risk of the flood coat not blending into the seal coat flawlessly.
Step 4: Flood Coat Stage
Each flood coat self-levels at approximately 1/8” thick. If depths thicker than 1/8” are desired multiple coats are necessary. You must wait at least 4 to 10 hours between flood coats. The epoxy will still be tacky so the next pour will stick to it.
The best way to apply the flood coat is to start on one end and pour the resin the entire length of the surface, zigzagging as you go. After you are finished pouring, set the container down. Do NOT try to scrape anything else out of the bucket. Because you are pouring about three times the amount of product you did with the seal coat, the material will immediately start to flow out.
Step 5: Remove Air Bubbles
Once you have sufficiently covered the entire surface with your flood coat, you will begin the process of popping air bubbles. The best tool for removing bubbles is a small propane torch. Hold the flame approximately 6 to 10 inches away from the table top and quickly sweep across the entire surface using an ironing motion. You will immediately see the bubbles start to pop. Do this until all the bubbles are gone from the surface of your table.
* After pouring your epoxy, it is common for air bubbles to form. Bubbles can continue to develop for up to 60 minutes after the curing process has begun. The most efficient way to get rid of them is to run a blowtorch over the surface sporadically 10 - 15 min at a time.
Step 6: Curing Process
After applying your final coat, the product should be kept in a clean, dust-free environment at a minimum of 75-80° F degrees. The product takes approximately 12-14 hours to dry to the touch. However, the product should not be put into any use for at least three days which will allow it to achieve sufficient hardness to resist scratching. At temperatures below 75 F, the product will take longer to cure and might not cure to complete hardness.

Crystal Clear Bar Table Top Epoxy Resin Coating For Wood Tabletop - 2 Quart Kit
Pro Marine Supplies
- Designed for Table Tops, Bars, Wood finishes, See-Through Encapsulations, Art work, and other applications
- Self Leveling and High Gloss U.V. Resistant Formula
- Produces a Tough, High Gloss, Water Resistant Coating
- Eliminates Craters, Crawling and Fish Eyes
- Blush Resistant. A total of 2 quarts combined.
User questions & answers
| Question: | how do you apply this product to an outdoor table |
| Answer: | I assume you are talking about a table located outside and it cannot be brought inside for coating. In theory the system will work outside just like inside providing the temperature is sufficiently high. The instructions say 75F minimum. I have success at 65F in my garage here in South Carolina during winter months. If I were doing this outside I would follow a process something like this. 1. Make sure the table is dry. No rain or precipitation for several days. 2. Temperature planned to be above 65F for 3 to 4 days/nights. Higher temperature is better. 3. I would cover the ground under the table with plastic and weight the plastic down so it seals the moisture in the soil so it does not rise when applying the coating. 4. Level the table as best you can. The epoxy will run to the low side if it is not level. 5. I would build a frame to hold plastic sheet that will completely cover the table without touching the table. This should be open at the bottom by 1 to 1.5 feet so the air circulates and moisture does not accumulate. End vents in the plastic would be useful also. 6. The day I plan to apply the coating I would wash the table with denatured alcohol and let it dry. This wipe again with the alcohol. Follow this with heating of the surface with a heat gun. 7. Mix and apply the epoxy per the directions. Use the heat gun to remove "air" bubbles from the surface as described in the instructions. 8. Once heating is no longer being performed cover the table with the plastic frame. 9. Come back in 6 to 8 hours and evaluate the coating. If bugs are present remove them before applying next coating. 10. When ready to apply the 2nd coating wipe clean with denatured alcohol and dry with heat gun. then mix epoxy and apply per instructions. Repeat air bubble removal and cover with the frame. 11. Repeat for any additional layers. To get good leveling the epoxy needs to be at a high enough temperature for the mixed viscosity to be low enough to flow. But if the temperature is too high it will start to cure too quickly, this is why the instructions say to pour out the epoxy once it is mixed so the temperature will not rise in the container. (The curing reactions is exothermic.) I hope this helps. |
| Question: | Could i use this to cover a wallpapered desk top |
| Answer: | Yes but you must seal the paper on all side top and bottom before pouring. I used multiple layers of modge podge. But I'm sure there is other products that would work too. |
| Question: | can this be poured in silicone moulds, like for making coasters |
| Answer: | Yes, it can be poured in molds, makes lovely coasters! |
| Question: | Whats the work time |
| Answer: | Including mixing and initial pour the approximate total work time is 25 minutes. |
Product features
Beautiful and Versatile, Crystal Clear Finish...Every Single Time!
High Gloss & Durable
High performance and Crystal clear! Produces a tough, high gloss, water and scratch resistant coating.
Versatile
Can be used for a wide variety of applications, art, and home projects.
Food Safe
Food Safe formula for artistic items used around food, such as trays, tumblers, and glassware.
Easy 1:1 Self Leveling Formula
Use our product with ease, featuring an easy 1:1 self-leveling formula!
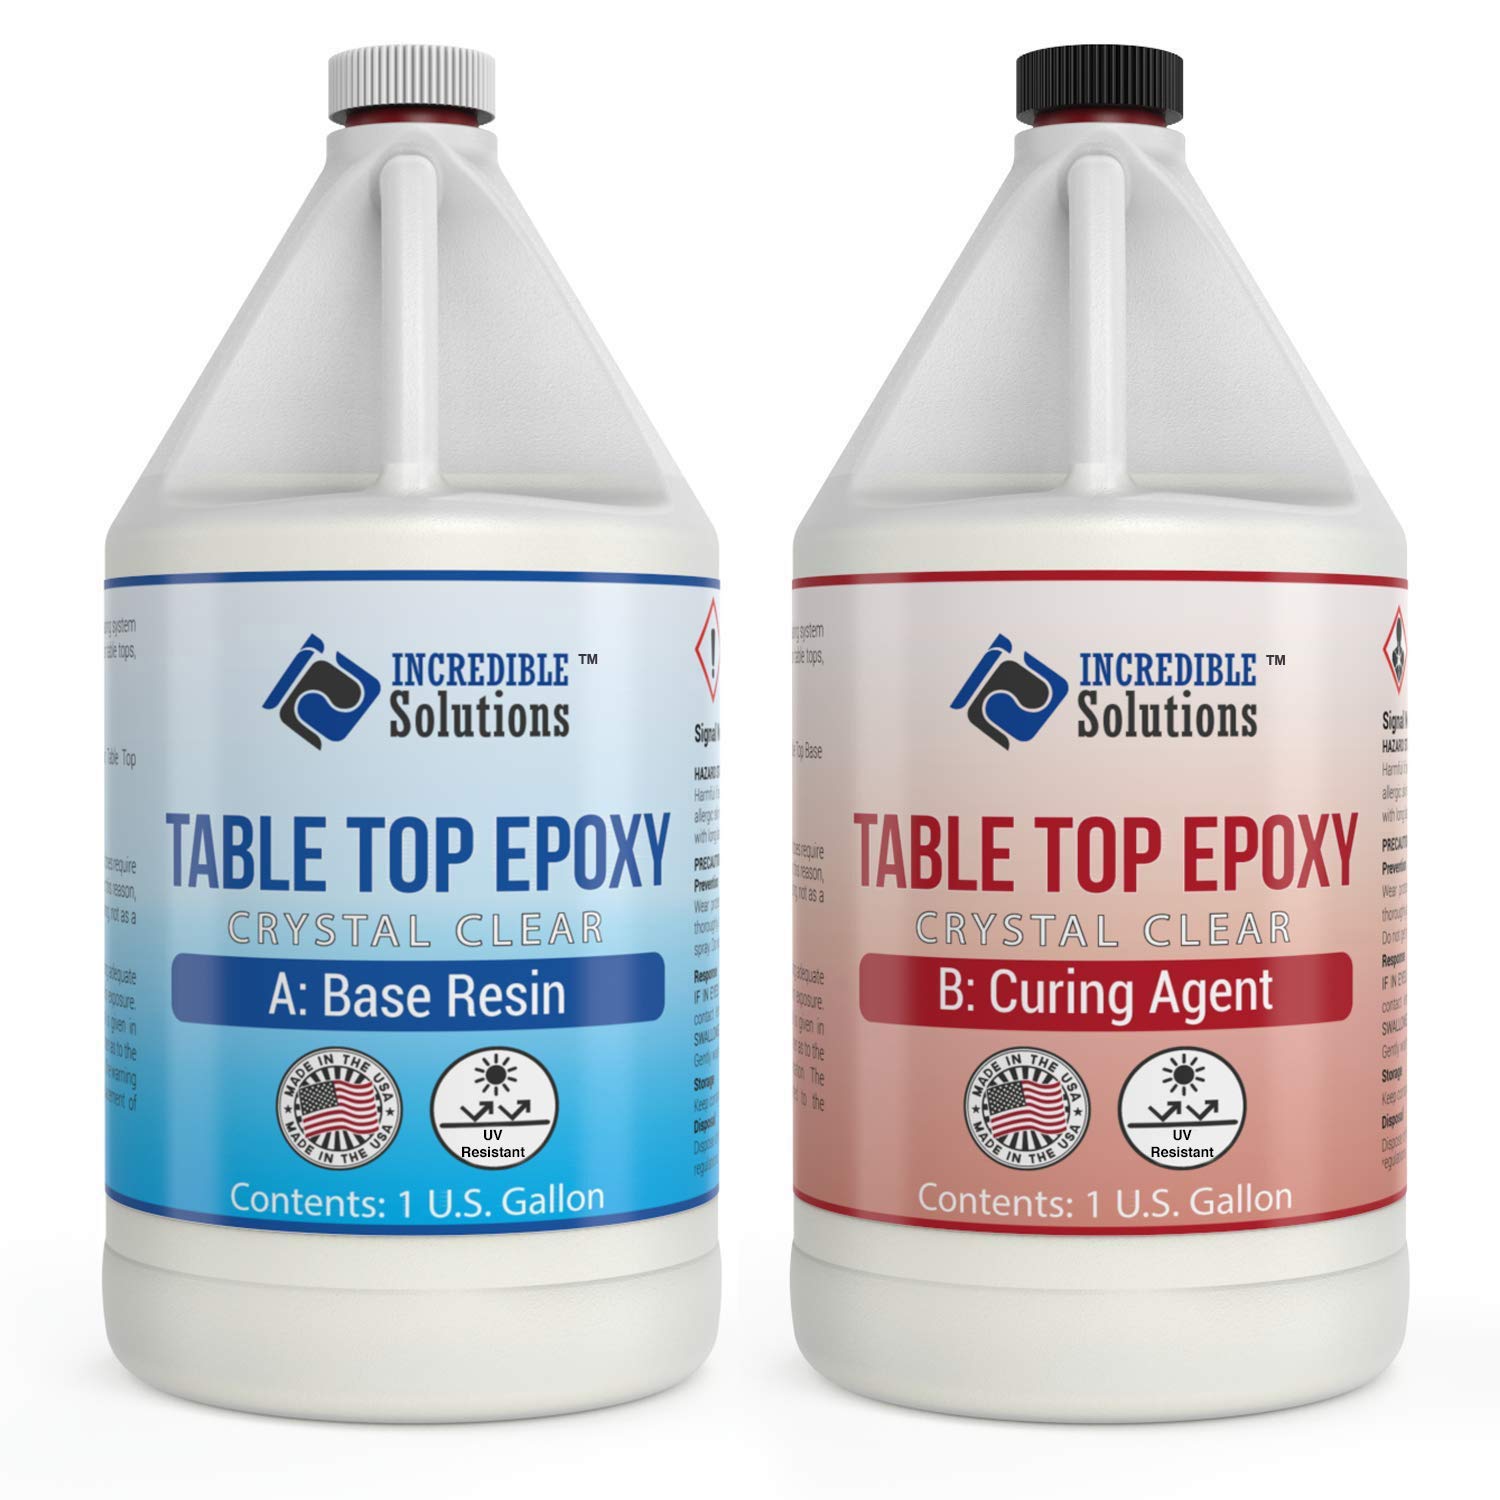
2 Gallon Table Top & Bar Top Epoxy Resin, Ultra Clear Finish, Self Leveling, Perfect for DIY Epoxy Counter Tops, Tabletops & Bars
Incredible Solutions
- ✔ CRYSTAL CLEAR - Our Table Top Epoxy cures ultra clear making it perfect for table tops, bar tops, and countertops
- ✔ UV RESISTANT - Unlike many other epoxies, our epoxy resist yellowing caused from exposure to Ultra Violet Light Sources
- ✔ SELF LEVELING - Bar Top Epoxy self levels on application including corners, over bar rails and live edges.
- ✔ HIGH GLOSS DURABLE FINISH - Epoxy resin leaves durable, blemish resistant, water resistant and impact resistant coating
- ✔ 100% SOLIDS - Low Odor, ZERO VOC, consistent thickness, quick curing 1 to 1 mixture, 2 Gallon Kit
User questions & answers
| Question: | What is the maximum thickness of this epoxy |
| Answer: | This epoxy requires thin pours of no more than 1/4" per application. However, multiple layers can be poured. We recommend waiting until the prior layer is tacky to the touch (usually 4-6 hours) to pour an additional layer. |
| Question: | at a half inch depth how many sq feet does the 2 gallon kit cover |
| Answer: | We have a coverage calculator on our site. Do you need a seal coat? Will you build a dam? Our general rule of thumb is 12 sq ft. per mixed gallon at 1/8 inch. Do not mix more than 1 gallon at a time and do not pour more than 1/4 inch per application. In your case, a 2 Gallon kit would cover approximately 6 sqft at 0.5 inch. However, do NOT pour more than 1/4 inch per application or you risk an accelerated reaction. Wait until the previous layer is tacky to the touch (usually 4-6 hours depending on temperature) to pour the next layer. Please let us know if you have any other questions. |
| Question: | May i used this for a countertops that have the heat coming from the stove ? Will it hold up |
| Answer: | This is not a high heat epoxy. We recommend using hot pads/coasters for coffee mugs, hot pans, pots, etc. High heat epoxies are quite a bit more expensive. |
| Question: | Can't find indication of coverage anywhere. Help. I don't know how much to buy |
| Answer: | at 1/8 thick it is like 26 gallons for 350 square feet, realy allot more than I would have thought, I learned the hard way too |
Product features
Crystal Clear Finish
High gloss, ultra clear finish makes our epoxy perfect for Table Tops, Bars Tops, Coffee Tables, Live Edge Tables and other coating applications. However, epoxy is not flexible. River tables must be supported to prevent flexing which could cause cracking.
*Do not pour over oil-based paint or stain.
Common Question: My project is painted or stained with an oil based product, what can I do?
A: You can apply a water based clear coat (must be water based). Once the water based clear coat has fully cured, you can apply the epoxy. If the clear coat leaves a shine/gloss you may want to scuff the surface to ensure the epoxy properly sticks. We recommend using 320 grit sandpaper. If you do sand, be sure to thoroughly clean the surface prior to applying the epoxy. We recommend using Isopropyl Alcohol 99% (be sure it is 99%) to clean.
UV Resistant
Although most epoxies will yellow over time, some resist yellowing caused by exposure to ultraviolet light better than others. Our epoxy contains UV Inhibitors which helps to resist yellowing. *Although our epoxy is UV resistant, which resists yellowing, we do not recommend leaving finished projects in direct sunlight or for permanent outdoor applications.
Common Question: Can I use this on a table that will be outside on a covered patio?
A: It is possible to leave the epoxy outdoors if not exposed to direct UV exposure. If the epoxy is exposed to direct UV, the epoxy can yellow. This will be more noticeable on white or lightly colored substrates/surface. We recommend exercising caution when considering use over white or light-colored surfaces.
It is also important to consider temperature fluctuations. Materials such as metal and glass can expand and contract at a different rate from the epoxy. This could cause glass to crack or the epoxy to peel away from a metal surface.
Food Safe Epoxy
Properly cured epoxy is possible to be food safe. However, because the customer is mixing/pouring we cannot say this is food safe approved. Each mixture/application would have to be assessed individually. This is not a high heat epoxy. We recommend using hot pads/coasters for coffee mugs, hot pans, pots, etc.
Common Question: Can I use this epoxy to make tumblers?
A: We have many customers using our epoxy for custom tumbler designs. However, this epoxy self levels. Therefore, many customers utilize a "cuptisserie" which is a rotating device that keeps the tumbler rotating while the epoxy is curing so that the finish is even.
Again, keep in mind: Properly cured epoxy is possible to be food safe. However, because the customer is mixing/pouring we cannot say this is food safe approved. Each mixture/application would have to be assessed individually.
Colored Epoxy Compatible
How To Color Epoxy: Our epoxy mixes well with mica pigment powders for colored epoxy applications. River tables, resin art canvas and more may require tinted epoxy. Epoxy is not meant to be mixed with or poured over oil-based products. Do not pour over oil-based paint or stain.
Common Question: What type of pigment or dye should I use with this epoxy.
A: We do not recommend mixing epoxy with paint or anything oil based. Many of our customers use mica pigment powders. Mica pigment powders come in many different colors, glitters, metallics, and even glow in the dark.
Q: How Much Pigment Powder Should I Use?
A: This is a subjective answer as it depends on the certain hue and level of opacity desired. We suggest starting with a very small amount and adding more until the desired color is achieved. We also always suggest testing a small scrap piece of material to understand how the epoxy will flow and how the color will cure in the epoxy.
Easy To Use 1:1 By Volume Mixture
Self Leveling, Impact Resistant, Superior Air Release
Popular uses include wooden bar tops, river tables, embedding pictures or embedding solid objects into a desired surface. Because our epoxy cures crystal clear, multiple layers will not compromise color/transparency. Each poured layer should not exceed 1/4" at a time. Working Time: 25 (+/-5 Minutes)
How Much Epoxy Do I Need?
Our rule of thumb regarding coverage is 12 sqft per mixed gallon at 1/8 inch.
Family Owned Business, Made In USA
VARIETY OF APPLICATIONS
For Uses On
- Wood
- Concrete
- Bottle Caps
- Artwork
- Canvas
Common Question: Can I apply epoxy over paper products like photographs, cigar wrappers, playing cards, and more?
A: If you wish to apply paper decals, bottle caps, or other objects under the Table Top surface, those objects need to be bonded to the surface with craft glue or a thin layer of Table Top Epoxy. Paper products must be sealed prior to applying any epoxy as the epoxy could soak in and ruin the paper product.
You can use something like mod podge or a similar water based clear coat/glue. Allow this seal coat to dry thoroughly before applying epoxy. For figurines, shells, and other large more three-dimensional items, using a thin epoxy seal coat is best, prior to encapsulating.
HIGH GLOSS FINISH
Epoxy resin leaves durable, blemish resistant, water resistant and impact resistant coating.
The beauty of epoxy is the ability to recoat a surface after years of use to regain a smooth, high gloss finish.
Common Question: I see that your epoxy requires thin pours of no more than 1/4" per application. How long do I need to wait between pouring a new layer?
You can apply the second coat when the prior coat is tacky to the touch (usually 4-6 hours depending on temperature). If you wait longer than 12 hours between coats, we recommend a light sanding. You can use 320 grit to scuff the surface. This will help the next coat to properly stick. If you do sand, be sure to thoroughly clean the surface prior to pouring the flood coat. We recommend using Isopropyl Alcohol 99% (make sure it is 99%) to clean.
TOP QUALITY
Incredible Solutions Table Top Epoxy is proudly MADE IN THE USA.
Competent Knowledge Base helps plan and troubleshoot even the most complicated projects.
Common Question: Does your epoxy require specific temperature environment to mix/pour epoxy?
A: The ideal working temperature is around 77°F. Best results can be obtained at temperatures between 75°F and 85°F, in a clean, dry, dust-free environment. Avoid working in high humidity. It is important you keep your project in this environment throughout the entire curing process. We recommend using this product on a leveled and flat work surface so that it can flow and self-level properly.
Clear Casting and Coating Epoxy Resin - 1 Gallon Kit
Art 'N Glow
- Use our clear epoxy resin for all of your casting AND coating applications. Hardens crystal clear and hard as a rock
- Rigorous testing was done to ensure that our resin is a perfect match for all of our glow in the dark and other craft pigments
- Our resin is self leveling, self degassing, odor free, resistant to yellowing from sun exposure, and is made in the U.S.A.
- One to one mix ratio is fool proof and has a forgiving 40 minute work time
- Use to coat tables and bars, encapsulate objects, cast figurines and jewelry, make resin paintings and more
User questions & answers
| Question: | Can you mix this with acrylic craft. Paints |
| Answer: | We’ve done plenty of resin art and that’s what we use to mix the resin with. It works fine like any other acrylics. |
| Question: | Will this prodict work on laminated counyer tops to make look like stone or granite by mixing the counter top paint in the diy videos |
| Answer: | Our resin is non-toxic, however it is not certified as food-safe. Many of our customer have used our resin to craft counter tops and tables, however we do not recommend any direct food contact over prolonged periods of time. We recommend mixing it with a pigment powder rather than paint. Please keep in mind when pouring this resin that the maximum recommended amount to pour at once is 1/8" layer, waiting 3-5 hrs between each layer. Since our resin is thermo-setting, when mixing large amounts of resin, we recommend separating the mixture into several different containers to prevent the containers from becoming too hot. |
| Question: | Can this be used on a wine cork project |
| Answer: | Our resin is very versatile and can be used in most projects that require a hard, clear finish when cured (assuming you don't want to add pigments or dyes) and where you want a longer working time of about 40 minutes. |
| Question: | I am using this to fill a 1 inch deep void between two pieces of walnut...a colored river.Do i have to do small pours, or can i use all in one pour |
| Answer: | When filling a void, the maximum pour amount is 6 inches, or a 1/8" when coating. |
Product features
Artist Approved Epoxy Resin Designed For Your Imagination
Our epoxy resin can be used on canvas, wood, concrete, granite, ceramics, precious stones, rocks, paper, and more to give a durable, glass-like, and crystal clear finish. Our customized epoxy resin formula can also be used for casting objects using any suitable mold available. Whatever your creative idea, art project, or material, bring it to life and make it shine with our specially formulated art resin.
Product Specifications
- Material: Epoxy Resin and Hardener
- Longevity: Resists yellowing due to UV exposure but should not be left permanently outdoors as all epoxy resins will eventually yellow from sun exposure
- Safety: Keep out of reach of children. Use only in a well ventilated area.
Casting
Our proprietary epoxy resin blend is ideal for casting jewelry, including earrings, pendants, rings, figurines, coasters, paperweights, DIY crafts, and custom molds. (Max casting size is 6 fluid ounces.)
Clear Coating
Art ‘N Glow resin is ideal for clear coating and sealing artwork, photography, paintings, paper collages, tabletops, bartops, counters, and more. Our resin cures crystal clear and as hard as a rock.
Fluid Art Pours
Mix our resin with pearl powder, resin tint, and alcohol ink to create one-of-a-kind fluid pour creations. Choose from 19 pearl pigment colors. All pigments are designed to work flawlessly with our resin.
Glow in the Dark Crafts
Blend our resin with Art 'N Glow glow in the dark pigment powder to create artwork that glows for up to 12 hours. We have 14 glow in the dark colors to choose from. Just charge with a UV light or the sun for a bright and long lasting glow.

DR CRAFTY Clear Epoxy Resin Crystal Clear Art Resin Epoxy Clear 2 Part Epoxy Casting Resin Kit 1 Gallon Countertop Epoxy Wood Epoxy Resin Kit with Bonus Measuring Cups, Plastic Spreader and Sticks
Dongguan LiShun Compound Material Co.,LTD
- Perfect for any application - the Dr Crafty epoxy resin kit is ideal for wood finishes, crystal clear coating plus many more applications. It is strong, transparent and fully UV resistant ensuring long lasting results.
- Everything you need included - our art resin kit comes with bonus items so you can get started right away: 2 x 16.9 ounce measuring cups with spouts, 2 x large sticks for mixing and 2 x plastic spreader to ensure an even finish.
- Easy to use - straightforward and no confusion, just mix one part resin to one part hardener and then you'll have 45 minutes of work time at room temperature to produce your finest work!
- Great quality - unlike cheap alternatives this epoxy resin will remain crystal clear all the time, our resin is fully resistant to yellowing as well as being non-toxic.
- Read the manual carefully - Please read the instruction manual provided with the DR.CRAFTY epoxy resin kit closely before use. If you have any questions or issues regarding the kit please do not hesitate to send the seller a message through Amazon and we will respond within 24 hours.
User questions & answers
| Question: | Would mixing by hand (paint stick) in small cups be okay? 2 cups max |
| Answer: | I’m knew to this as well but according to the instructions you mix at a 1:1 ratio and I do so on a bigger cup then distribute to smaller cups. This is much easier to do since curing time varies on several factors. |
| Question: | Can i buy just the hardener? i was accidentally sent two 1-gallon bottles of dr. crafty resin instead of one bottle each of resin and hardner |
| Answer: | Hi there, unfortunately we do not currently sell the hardener separately at this time. |
| Question: | How hot does the resin get while curing |
| Answer: | In a 6" x 6" x 1/2" thick covered mold I recorded a max temp of 165 degree Fahrenheit for the resin. |
| Question: | do I have to weigh it on scale or just use the measuring cup for the same volume |
| Answer: | I see answers that you can use 1:1 for both weight and volume. When measuring 1:1 for weight, I end up with a lot of left over resin. Is this correct? Seems if it were truly a 1:1 either way, the bottles would be empty at the same time. |
Product features
Perfect for any application
the Dr Crafty epoxy resin kit is ideal for wood finishes, crystal clear coating plus many more applications. It is strong, transparent and fully UV resistant ensuring long lasting results.
Everything you need included
our art resin kit comes with BONUS items so you can get started right away: 2 x 16.9 ounce measuring cups with spouts, 2 large sticks for mixing and 2 plastic spreader to ensure an even finish.
Great quality
unlike cheap alternatives this epoxy resin will remain crystal clear all the time, our resin is fully resistant to yellowing as well as being non-toxic
Latest Reviews
View all
Ikea Shoe Trees
- Updated: 27.01.2023
- Read reviews

Stacking Of Baskets
- Updated: 16.02.2023
- Read reviews

Discount Ramps Power Wheelchair
- Updated: 12.05.2023
- Read reviews
Broom For Pet Hairs
- Updated: 16.02.2023
- Read reviews

Moving Shoes
- Updated: 10.05.2023
- Read reviews