6 best furniture of america furniture couches
Furniture of America is a well-known furniture manufacturer and retailer that offers a wide range of home furnishings, including sofas and couches. They are recognized for their commitment to providing stylish and functional furniture pieces for various living spaces, including the living room.Here are some key points related to Furniture of America furniture couches:
Variety of Styles: Furniture of America offers a diverse range of couch styles to cater to different tastes and preferences. You can find everything from traditional and classic designs to modern and contemporary styles.
Quality Materials: They typically use high-quality materials in the construction of their couches. This can include sturdy wood frames, durable upholstery fabrics, and comfortable cushioning.
Comfort: Comfort is a priority for Furniture of America couches. They often incorporate features like plush cushions, ergonomic designs, and ample seating space to ensure a comfortable sitting experience.
Design Options: Customers can choose from various design options, such as sectional sofas, sleeper sofas, reclining sofas, and loveseats. This allows for flexibility in arranging the furniture to suit the layout of your living room.
Color and Finish Variety: These couches are available in a wide array of colors and finishes, making it easier to coordinate with your existing home decor.
Affordability: Furniture of America aims to offer quality furniture at competitive prices, making their couches accessible to a broad range of consumers.
Durability: Many customers appreciate the durability of Furniture of America couches. They are designed to withstand daily use and maintain their quality over time.
Customer Reviews: To get a better idea of specific models and their performance, it's a good idea to read customer reviews and ratings for individual Furniture of America couches.
Warranty: Check the warranty information provided by Furniture of America for their couches. This can vary depending on the specific product and may provide peace of mind regarding potential issues.
Availability: Furniture of America products are often available through various retailers, both online and in physical stores. It's a good idea to explore different retailers to find the best deals and options.
Remember that when purchasing a couch or any piece of furniture, it's important to consider your personal preferences, the dimensions of your living space, and your budget to ensure you choose the right piece for your needs.
Below you can find our editor's choice of the best furniture of america furniture couches on the market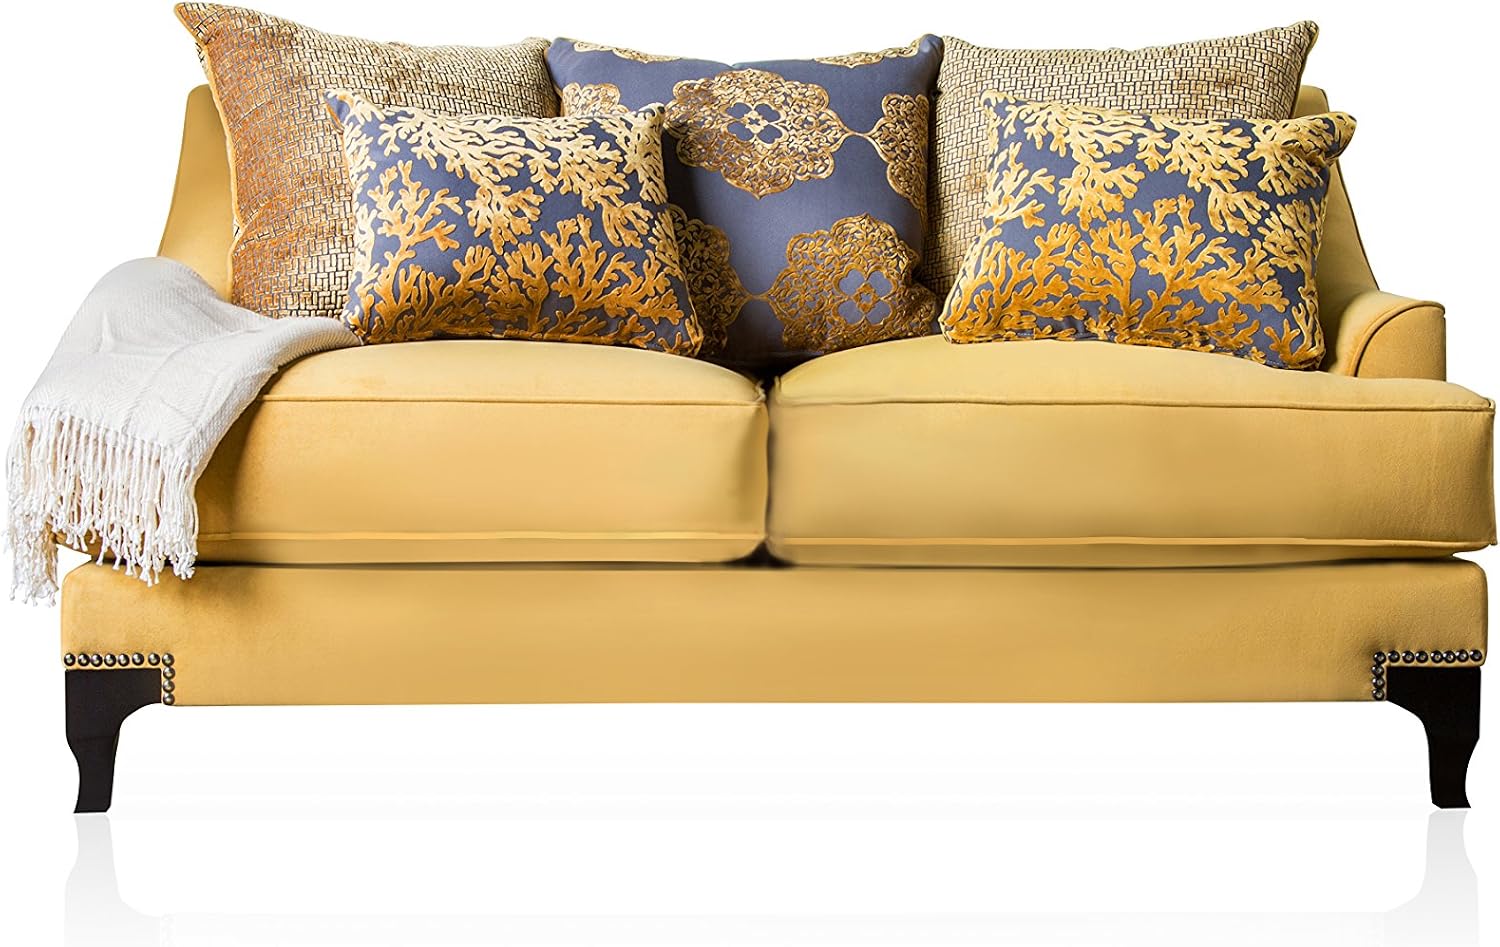
Furniture of America Argenie Fabric Upholstered Love Seat, Gold
Product description
Lend an elegant touch to your decor with this gorgeous love seat. Generously padded seats and cushions offer comfortable seating, and expert upholstery in premium gold fabric adds a stylish touch. Embellished with wooden espresso feet and nail head details. Decorative accent pillows are included. Made in U.S.A., light assembly required. Overall dimensions: 71"L X 40"W X 38"H. All decor items are not included in this offer unless specified.
- Vintage mix contemporary style love seat
- Hardwood internal frame, High-density Dacron wrapped foam with sinuous wire no sag spring suspension seat cushions
- Reversible seat cushions and loose back pillows, plush fabric upholstery
- Espresso feet and nail head accents; Made in USA
- Overall dimensions: 71"L X 40"W X 38"H
User questions & answers
| Question: | What color are the nail heads, gold or silver |
| Answer: | More of a gold tone. FYI, I've had it for more than a yr now, & the center sags, significantly. We've had to put a board underneath the cushions. :( |
| Question: | Does this product come in other colors? If so, what are they |
| Answer: | It comes in five colors....Gold, Vintage Taupe, Light Cocoa Brown, Slate Blue, Peacock blue.We have the gold color on super sale right now. http://www.foagroup.com/media/catalog/product/cache/1/image/700x700/17f82f742ffe127f42dca9de82fb58b1/s/m/sm2205-sf.jpghttp://www.foagroup.com/media/catalog/product/cache/1/image/040ec09b1e35df139433887a97daa66f/s/m/sm2203-sf.jpghttp://www.foagroup.com/media/catalog/product/cache/1/image/040ec09b1e35df139433887a97daa66f/s/m/sm2204-sf.jpg |

Furniture of America Argenie Fabric Upholstered Sofa, Gold
Furniture of America
Product description
Lend an elegant touch to your decor with this gorgeous sofa. Generously padded seats and cushions offer comfortable seating, and expert upholstery in premium gold fabric adds a stylish touch. Embellished with wooden espresso feet and nail head details. Decorative accent pillows are included. Made in U.S.A., light assembly required. Overall dimensions: 91"L X 40"W X 38"H. All decor items are not included in this offer unless specified.
- 100% Polyester
- Made in US
- Vintage mix contemporary style sofa
- Hardwood internal frame, High-density Dacron wrapped foam with sinuous wire no sag spring suspension seat cushions
- Reversible seat cushions and loose back pillows, plush fabric upholstery
- Espresso feet and nail head accents; Made in USA
- Overall dimensions: 91"L X 40"W X 38"H
User questions & answers
| Question: | is it possible to get a swatch of the fabric |
| Answer: | Hi, Thank you for your question. Unfortunately, we don't have a swatch of the fabric. We hope this helps. Have a great day! |
| Question: | Is the back of the sofa cushioned/padded? Is it just upholstery over the frame?Or do you have to use the pillows for that |
| Answer: | It's a frame and you have to use the pillows |
| Question: | Is it possible to get just the pillows from this listing |
| Answer: | I believe this is sold as a set. I did find pillows online last year but the price was ridiculously high. I also found and ordered the fabric online and covered my dining chairs and it is absolutely beautiful. Its an economical way to get the pillows you want if you are up to making pillow cases! That's an easy task. |
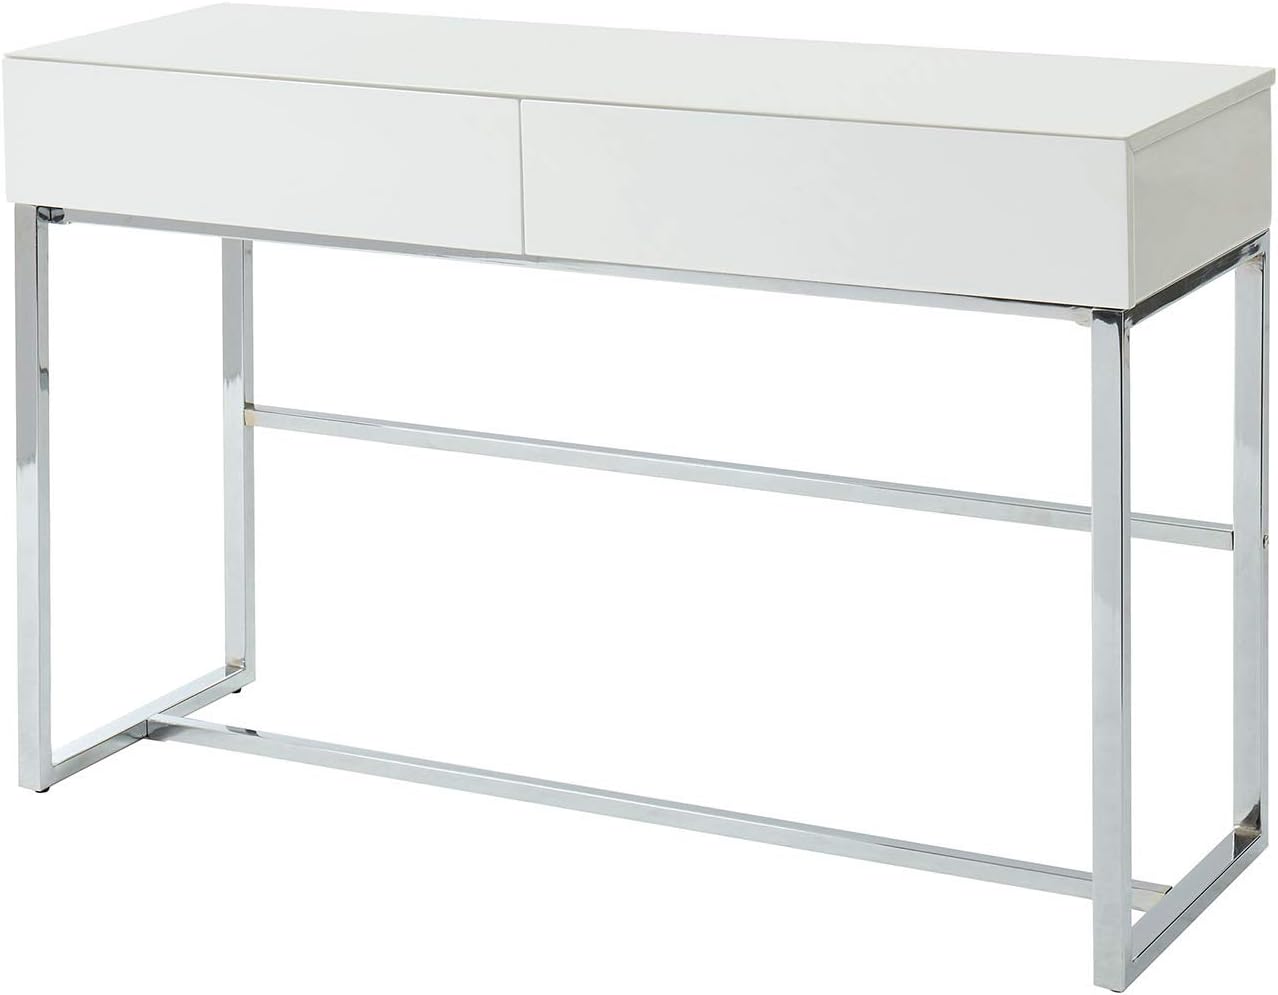
Furniture of America Juni Sofa Table, White
Product description
Create a warm and welcoming look for your guests with this contemporary style end table. It has minimalist design By using wooden top and metal feet in rich chrome finish. This sofa table is a perfect addition to any decor. The table can be place in the living room or in the hallway and use for placing vases, photo frames, small decorative items, books etc. It also consists two drawer compartment for you to stash away small things easily. Its metal base gives sturdiness to the frame. Bring this sofa table home to create a serene retreat and to turn your home interior into classic finish.
- It features rectangular table with two spacious drawers
- Minimalist Design
- Contemporary Style
- Low Profile Drawers
User questions & answers
| Question: | Can the top be taken off when it is a sofa bed? it looks very soft |
| Answer: | No |
| Question: | Matching chair to furniture of america preston leather tufted sleeper sofa bed in white |
| Answer: | We like this sofa....but do not know if leather colors match other pieces, |
| Question: | Will this sofa fit thru a 29" bedroom door opening |
| Answer: | Yes it will, it comes in a flat box and you can unwrap it inside the room |
| Question: | What does the back of sofa look like |
| Answer: | It's a black liner. |
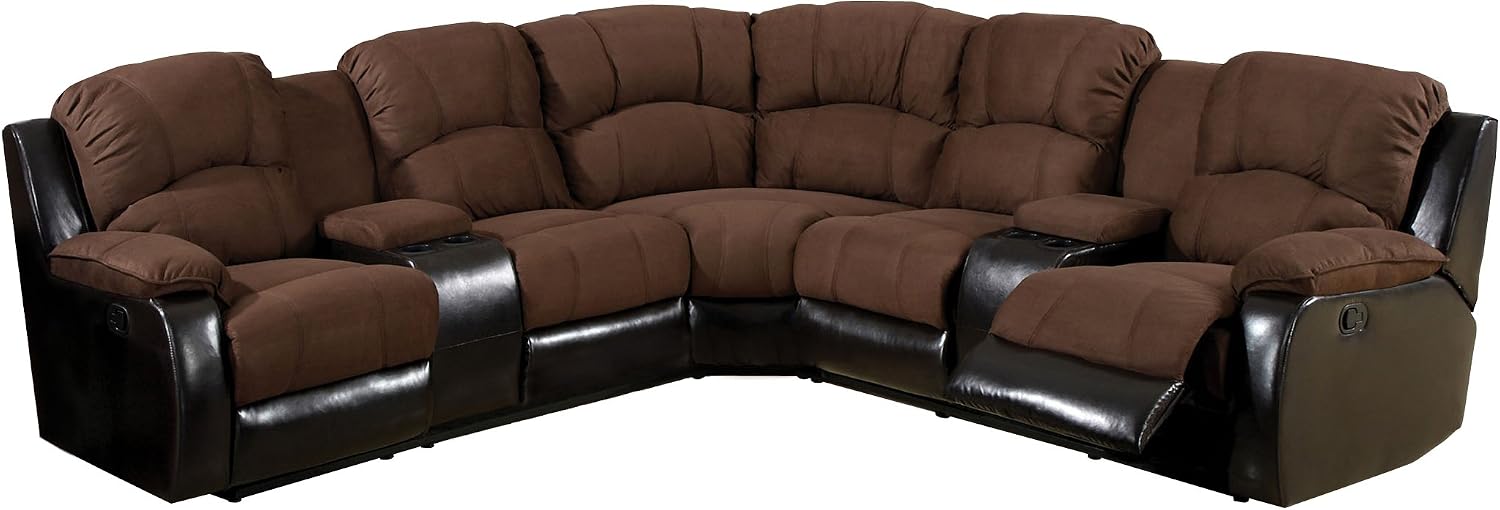
Furniture of America Conan Bonded Leather Match Sectional Sofa with 2 Recliners, Brown
Product description
Enjoy family movie nights relaxing on this comfortable and durable brown sectional. The elephant skin microfiber exterior is soft and cushioned while the brown leatherette base keeps the overall piece looking sleek and modern. Two recliners, one on each end, provide the perfect amount of comfort and functionality for tired feet. A wedge on either side also offers added storage and built-in cup holders so you don't have to keep getting up for your drinks. Enjoy the relaxation and comfort offered by this sectional with the whole family! We recommend spot cleaning with water and a non-abrasive towel or cloth when needed. It is best to avoid cleaning agents that contain harsh chemicals that may damage the finish. Manufactured in China, some assembly required. Overall dimensions: 117"W x 117"D x 40"H.
- Two recliners that recline smoothly and easily
- Two wedges that have handy, built-in drink holders
- Elephant skin microfiber is smooth and comfortable while leatherette base is durable and easy to maintain
- Padded fire retardant cushions provide comfort and relaxation
- Overall dimensions: 117"W x 117"D x 40"H
User questions & answers
| Question: | How many peices is it? Can it be rearranged |
| Answer: | The furniture comes in three pieces and cannot be rearranged. But it is a wonderful piece. |
| Question: | because of space restriction can the sofa be assemble differently, is that possible |
| Answer: | Hello! The sectional is designed to be assembled in a fixed configuration so all parts line up correctly. If any modifications are made to the sectional the warranty will be voided so we don't recommend any changes be made. If you have any other questions please let us know. Thank you! |
Product features
Dual Recliners
Each side of the sectional features convenient latch activated recliners for seamless usability.
Storage Consoles
Without lifting a finger, two center consoles make it easy to store remotes, reading materials and drinks.
Soothing Microfiber
Unique elephant skin microfiber is soft and cozy, enhancing the touch and feel of the sectional.

Furniture of America Rhiannon Acrylic Panel Sofa Table Contemporary Style - White
Furniture of America
Product description
Contemporary Style.Clear acrylic side panels.Single drawer with bar pull handle.Rectangle table top with open bottom shelf.Two finish options available to choose from
Overall Product Dimensions (in inches): 47"L X 15 3/4"W X 30"H
- Contemporary Style. Clear acrylic side panels
- Single drawer with bar pull handle
- Rectangle table top with open bottom shelf
- Two finish options available to choose from
- Product Materials - Wood, glass. Overall Product Dimensions (in inches): 47"L X 15 3/4"W X 30"H
User questions & answers
| Question: | How tempered glass is attached to the circular base? How much weight can be placed on glass? Is floor base wood or metal |
| Answer: | It's a black liner. |
| Question: | Can the top be taken off when it is a sofa bed? it looks very soft |
| Answer: | White, but difficult to work as I do not recommend this product |
| Question: | Matching chair to furniture of america preston leather tufted sleeper sofa bed in white |
| Answer: | Yes |
| Question: | Will this sofa fit thru a 29" bedroom door opening |
| Answer: | Yes. Works great. We sealed several joints this year and around input valves and it worked perfect. |
| Question: | What does the back of sofa look like |
| Answer: | White |
| Question: | What color is it? I'm looking to fill a vertical crack in the concrete corner wall |
| Answer: | No, not if you use good swimming pool paint. |
| Question: | Can this be used underwater |
| Answer: | no it would be toxic |
| Question: | can this be used for joints that are underwater in a chlorine water swimming pool |
| Answer: | I don't know,used it on an inground cement pool and it was fine |
| Question: | What color is this product |
| Answer: | Yes. You can repair the crack without draining the pool. But you only have 30 minute to complete once you activate the product. Worked excellent! |
| Question: | should I prime concrete pool that has never been painted |
| Answer: | There is a fiberglass repair kit we used on our spa that worked great |
| Question: | is this safe to use on fish ponds |
| Answer: | Yes it does |
| Question: | Can this be used for a Jacuzzi with plaster finish |
| Answer: | Yes it does |
| Question: | Need to repair a 8-10inch by 1 inch deep hole in white coat without draining the pool. Is this an appropriate application for this product |
| Answer: | Yes you can use it. |
| Question: | Can this product be used on a "Fiberglass" Pool / Spa |
| Answer: | Yes clean the areas well and sand the surface to get a good bond |
| Question: | Is the hardener included since it is two part |
| Answer: | They don't come together and you don't need both. If pool is porous you need gunite. If smooth just primer. |
| Question: | does the "Epoxy Patch" come with the hardener, or do I have to buy it separately? I don't see it anywhere |
| Answer: | If you did repairs to the pool yes coat those areas also if it’s a ew pool you need to do the entire surfaces. If you have any bare spots coat those Follow the instructions and mix both parts very well |
| Question: | Do I need the primer for new, virgin concrete |
| Answer: | It is just ‘okay.’ Requires a lot to cover and after less than one year, some blemishes that seemed covered are showing through. I would probably go to a reputable paint store and get advice before doing it again. |
| Question: | Can you use the gunite primer to paint over old left over epoxy paint? Or do you need to remove all the old Epoxy paint for it to adhere |
| Answer: | My deck was painted concrete and I applied over it after patching cracks. I hadn't had any peeling paint so I didn't have any problems. |
| Question: | I purchased the gunite primer do I need to purchase the water base epoxy primer or do they come together? Do you need both of these to prime properly |
| Answer: | Not sure. I used it on my pool deck. |
| Question: | Do I need this after epoxy patch |
| Answer: | My deck hadn’t been done in 15 years. This is a good looking product. Goes on easy and covers well. Took seven gallons to do two coats. No additives needed. Just make sure area is clean first. We pressure washed; waited 24 hours; and the swept. Would buy again. |
| Question: | Can you use this over dyco pool paint |
| Answer: | Yes, easy clean up latex |
| Question: | Can you apply it over old paint |
| Answer: | To the best of my knowledge, No it does not. It is very good paint that needs to be thinned but is meant for concrete pools. |
| Question: | Can this be used over Kool Deck pool patios |
| Answer: | Yes |
| Question: | what coverage area are you seeing for re-coating a deck surface. (15 year old deck |
| Answer: | I haven’t used primer, also make sure to apply paint during the right temp, to hot and paint will bubble. Also make sure to let it cure |
| Question: | Is this acrylic based pait |
| Answer: | 6 inch |
| Question: | Does it say if you can use this on metal pools |
| Answer: | Yes they sell the tracker tags separate you can buy them on their website. Ensure you have a v3 not g3 watch though as g3 doesn't allow for stat tracking. |
| Question: | Can this be used on fiberglass pools |
| Answer: | They are planning to make bands available in Spring 2021. The bands are also the near field communication antenna that detects club usage, so they can only be replaced by Shot Scope bands. |
| Question: | do you have to use primer first |
| Answer: | Yes. You contact ShotScope support and they map the course within a week. |
Product features
In The Swim Aqua Coat Water-Base Swimming Pool Paint
In The Swim Aqua Coat Water-Base Swimming Pool Paint is a water-based acrylic pool paint. Aqua Coat can be applied to damp surfaces. This water-based acrylic pool paint can be applied to previous acrylic coating or over rubber base paint. Versatile water-based acrylic pool paint yields a short down time of only 3 days in most cases. Requires a minimum of 2 coats on initial application. Coverage: Approximately 250 - 300 sq ft per gallon. Should be applied with a 9” roller equipped with a ⅜” nap. Apply second coat at least 4 hours after the first coat. Pot Life: Indefinite as long as it is properly sealed. Allow to cure for 2 days before filling.
Determine Area Size
Determining the square foot of the area you are going to paint is important. This will help you figure out how many gallons of paint are needed to complete the job. It’s important to take the surface porosity and smoothness into account. When looking at how much paint you should purchase. Start by measuring the length and width of the area. Once you have those measurements plug them into the formulas below. Divide that number by the coverage square foot of the paint you are wanting to use. That will give you the number of gallons that you should purchase. Remember to look and see if the paint requires single or multiple coats and if it needs a primer.
Drain Water
Now that you have selected the paint type and know the square footage of the interior, it’s time to drain the pool. Rent or purchase a submersible pump. As soon as the outside ambient air temperature drops below 85° F. Check the local code for where pool water can be drained and start pumping. If the outside ambient air temperature is above 85° F stop draining the pool. At these elevated temperatures, the interior surface can crack and lose its structural integrity. While the pool is draining, remember that you can start to prepare the pool for paint.
Prepare for Paint
Now that the pool has been drained, you can start to prep the interior for paint. Start by removing the perimeter return jets, pool/spa light, main drain covers, aerator fittings and any other item you don’t want painted. Using painters tape, carefully tape off all the tile line, step/bench tiles, return lines, and skimmer mouth. Once you have everything taped off it’s time to prime.
Primer Coat
Now that the pool has been drained and taped, it’s time to prime. Remember not all types of paint use a primer. So if you have paint that doesn’t use a primer, skip to the painting step. Roll the primer onto the interior surface of the pool using a 9” roller with a ½” nap, starting with the walls and ending with the floor. Once you’ve completed priming allow the prime to cure for 24 - 48 hours. Then it’s time to paint.
Painting Interior
The pool has now been drained, taped, and primed. It’s time for paint. The type of paint you choose will determine the number of coats. Start painting the walls first and finish with the floor. If the paint you are using requires a time period in between coats, make sure you take that time. It will allow the paint to cure and harden increasing its chemical resistance and life span. It is suggested for steps, shallow areas and wading pools, sprinkle sand on the coating before it dries to make the area slip-resistant.
Fill and Balance
Now that the pool is painted and the paint has cured, it’s time to fill the pool and balance the water. Depending on your area you may need to order a water truck to deliver. If you have a garden hose available, toss it in. The average pool should take anywhere from 36 - 48 hours to fill. Once the pool is full allow the fresh water to circulate for 3 - 4 hours. After the circulation period it’s time to complete the first water test of many on the new water. Make sure to test the water weekly to maintain proper water balance and overall pool health.
In The Swim Patio and Deck Paint
In The Swim Patio and Deck Paint is a water-based acrylic non-slip concrete deck coating. Patio and Deck Paint can be applied to damp surfaces, cutting the time between site preparation and roller painting. First time applications will require a minimum two coats depending on surface porosity. Patio and Deck Paint should be applied with a 1/2" nap roller on smooth surfaces. Use a 3/4" nap roller cover on rougher surfaces. Coverage: 90 - 125 sq ft per gallon on average. If the outside ambient air temperature if above 80°F, wait 4 hours between coats. Curing time: Before foot traffic is 24 - 48 hours depending on the outside ambient air temperature.
Determine Area Size
Determining the square foot of the area you are coating is important. This will help you figure out how many gallons of paint are needed to complete the job. It’s important to take the surface porosity and smoothness into account when deciding how much paint to purchase. Start by measuring the length and width of the area. Once you have those measurements plug them into the formulas below. Divide that number by the coverage square foot of the coating you are wanting to use. That will give you the number of gallons that you should purchase. Remember to look and see if the paint requires a single or multiple coats and if it needs a primer.
Prepare the Surface
When preparing a surface for a coating of any kind it is important to clean the area. Start by sweeping, scraping, and scrubbing the area removing any loose debris. Then hose and scrub the surface with tri-sodium phosphate 10% solution. The solution will degrease and rid the surface of any unwanted contaminants. We suggest on smooth surfaces to do a light acid wash to etch the surface. The etching will allow the paint to adhere to the surface firmly. Hose and scrub the area again with the tri-sodium phosphate 10% solution. Hose completely clean. This will remove additional debris and neutralize the acid. Allow the surface to dry with no puddles or standing water.
First and Second Coats
In The Swim Patio and Deck Paint should be applied to a damp surface with no standing water. Use a 1/2" nap roller on smooth surfaces. Use a 3/4" nap roller on rough surfaces. Roll on the first coat of paint allow a minimum of 4 hours before starting the second coat. After the 4 hour wait you are clear to roll the second coat. Wait 24 - 48 hour before the area can take heavy traffic. Coverage: 90 - 125 sq ft per gallon on average.
In The Swim Gunite Primer for Epoxy-Base Swimming Pool Paints
In The Swim Gunite Primer is a two-part epoxy primer typically used on fiberglass gel-coat, rough plaster, rough concrete, or sandblasted surfaces. Gunite Primer's heavy viscosity fills imperfections on the interior surface give a more uniform look. Gunite Primer should be rolled on with a paint roller. Coverage: Approximately 100-150 square feet per gallon. Should be applied liberally using a 1/2" nap roller cover. Pot Life: 4 hours at 85° F. Curing Time before rolling Super Poxy Shield 24 - 48 hours.
Determine Area Size
Determining the square foot of the area you are going to paint is important. This will help you figure out how many gallons of paint are needed to complete the job. It’s important to take the surface porosity and smoothness into account. When looking at how much paint you should purchase. Start by measuring the length and width of the area. Once you have those measurements plug them into the formulas below. Divide that number by the coverage square foot of the paint you are wanting to use. That will give you the number of gallons that you should purchase. Remember to look and see if the paint requires single or multiple coats and if it needs a primer.
Drain Water
Now that you have selected the paint type and know the square footage of the interior, it’s time to drain the pool. Rent or purchase a submersible pump. As soon as the outside ambient air temperature drops below 85° F. Check the local code for where pool water can be drained and start pumping. If the outside ambient air temperature is above 85° F stop draining the pool. At these elevated temperatures, the interior surface can crack and lose its structural integrity. While the pool is draining, remember that you can start to prepare the pool for paint.
Prepare for Paint
Now that the pool has been drained, you can start to prep the interior for paint. Start by removing the perimeter return jets, pool/spa light, main drain covers, aerator fittings and any other item you don’t want painted. Using painters tape, carefully tape off all the tile line, step/bench tiles, return lines, and skimmer mouth. Once you have everything taped off it’s time to prime.
Primer Coat
Now that the pool has been drained and taped, it’s time to prime. Remember not all types of paint use a primer. So if you have paint that doesn’t use a primer, skip to the painting step. Roll the primer onto the interior surface of the pool using a 9” roller with a ½” nap, starting with the walls and ending with the floor. Once you’ve completed priming allow the prime to cure for 24 - 48 hours. Then it’s time to paint.
Painting Interior
The pool has now been drained, taped, and primed. It’s time for paint. The type of paint you choose will determine the number of coats. Start painting the walls first and finish with the floor. If the paint you are using requires a time period in between coats, make sure you take that time. It will allow the paint to cure and harden increasing its chemical resistance and life span. It is suggested for steps, shallow areas and wading pools, sprinkle sand on the coating before it dries to make the area slip-resistant.
Fill and Balance
Now that the pool is painted and the paint has cured, it’s time to fill the pool and balance the water. Depending on your area you may need to order a water truck to deliver. If you have a garden hose available, toss it in. The average pool should take anywhere from 36 - 48 hours to fill. Once the pool is full allow the fresh water to circulate for 3 - 4 hours. After the circulation period it’s time to complete the first water test of many on the new water. Make sure to test the water weekly to maintain proper water balance and overall pool health.
In The Swim Poxy Patch High Strength Epoxy Pool Repair Compound
In The Swim Poxy Patch High Strength Epoxy Pool Repair Compound is ideal for repairing large structural cracks in concrete pools. Poxy Patch can also be used as an anchoring compound for diving boards and ladders. Poxy Patch can be applied above or below water. Dry times: to touch - 4 hours at 80F degrees, thoroughly dry - 24 hours. Pot life: 30 minutes at 77° F.
In The Swim Poxy Patch High Strength Epoxy Pool Repair Compound is a two-component material. The Base and Catalyst should be well mixed. In The Swim recommends using an electric drill with mixing attachment. While mixing, Poxy Patch will start to get thicker and more viscous. It can then be applied with a putty knife, molded by hand, or troweled on.
Determine Area Size
Determining the square foot of the area you are going to paint is important. This will help you figure out how many gallons of paint are needed to complete the job. It’s important to take the surface porosity and smoothness into account. When looking at how much paint you should purchase. Start by measuring the length and width of the area. Once you have those measurements plug them into the formulas below. Divide that number by the coverage square foot of the paint you are wanting to use. That will give you the number of gallons that you should purchase. Remember to look and see if the paint requires single or multiple coats and if it needs a primer.
Drain Water
Now that you have selected the paint type and know the square footage of the interior, it’s time to drain the pool. Rent or purchase a submersible pump. As soon as the outside ambient air temperature drops below 85° F. Check the local code for where pool water can be drained and start pumping. If the outside ambient air temperature is above 85° F stop draining the pool. At these elevated temperatures, the interior surface can crack and lose its structural integrity. While the pool is draining, remember that you can start to prepare the pool for paint.
Prepare for Paint
Now that the pool has been drained, you can start to prep the interior for paint. Start by removing the perimeter return jets, pool/spa light, main drain covers, aerator fittings and any other item you don’t want painted. Using painters tape, carefully tape off all the tile line, step/bench tiles, return lines, and skimmer mouth. Once you have everything taped off it’s time to prime.
Primer Coat
Now that the pool has been drained and taped, it’s time to prime. Remember not all types of paint use a primer. So if you have paint that doesn’t use a primer, skip to the painting step. Roll the primer onto the interior surface of the pool using a 9” roller with a ½” nap, starting with the walls and ending with the floor. Once you’ve completed priming allow the prime to cure for 24 - 48 hours. Then it’s time to paint.
Painting Interior
The pool has now been drained, taped, and primed. It’s time for paint. The type of paint you choose will determine the number of coats. Start painting the walls first and finish with the floor. If the paint you are using requires a time period in between coats, make sure you take that time. It will allow the paint to cure and harden increasing its chemical resistance and life span. It is suggested for steps, shallow areas and wading pools, sprinkle sand on the coating before it dries to make the area slip-resistant.
Fill and Balance
Now that the pool is painted and the paint has cured, it’s time to fill the pool and balance the water. Depending on your area you may need to order a water truck to deliver. If you have a garden hose available, toss it in. The average pool should take anywhere from 36 - 48 hours to fill. Once the pool is full allow the fresh water to circulate for 3 - 4 hours. After the circulation period it’s time to complete the first water test of many on the new water. Make sure to test the water weekly to maintain proper water balance and overall pool health.
In The Swim Envirolon Rubber-Base Pool Paint
In The Swim Envirolon rubber-base paint is a synthetic rubber formula. Envirolon rubber-base is ideally used for gunite, plaster, and concrete surfaces. It can also be used to recoat an existing rubber-base/chlorinated rubber finish. Two coats will last up to 3 years. A third coat may be needed depending on the surface porosity. Coverage: Approximately 250 - 300 square feet per gallon. Should be applied with a 9” roller equipped with a ⅜” nap. Apply second coat at least 4 hours after the first coat. Pot Life: Indefinite as long as it is properly sealed. Allow to cure for 3 days at 70° F before filling.
Determine Area Size
Determining the square foot of the area you are going to paint is important. This will help you figure out how many gallons of paint are needed to complete the job. It’s important to take the surface porosity and smoothness into account. When looking at how much paint you should purchase. Start by measuring the length and width of the area. Once you have those measurements plug them into the formulas below. Divide that number by the coverage square foot of the paint you are wanting to use. That will give you the number of gallons that you should purchase. Remember to look and see if the paint requires single or multiple coats and if it needs a primer.
Drain Water
Now that you have selected the paint type and know the square footage of the interior, it’s time to drain the pool. Rent or purchase a submersible pump. As soon as the outside ambient air temperature drops below 85° F. Check the local code for where pool water can be drained and start pumping. If the outside ambient air temperature is above 85° F stop draining the pool. At these elevated temperatures, the interior surface can crack and lose its structural integrity. While the pool is draining, remember that you can start to prepare the pool for paint.
Prepare for Paint
Now that the pool has been drained, you can start to prep the interior for paint. Start by removing the perimeter return jets, pool/spa light, main drain covers, aerator fittings and any other item you don’t want painted. Using painters tape, carefully tape off all the tile line, step/bench tiles, return lines, and skimmer mouth. Once you have everything taped off it’s time to prime.
Primer Coat
Now that the pool has been drained and taped, it’s time to prime. Remember not all types of paint use a primer. So if you have paint that doesn’t use a primer, skip to the painting step. Roll the primer onto the interior surface of the pool using a 9” roller with a ½” nap, starting with the walls and ending with the floor. Once you’ve completed priming allow the prime to cure for 24 - 48 hours. Then it’s time to paint.
Painting Interior
The pool has now been drained, taped, and primed. It’s time for paint. The type of paint you choose will determine the number of coats. Start painting the walls first and finish with the floor. If the paint you are using requires a time period in between coats, make sure you take that time. It will allow the paint to cure and harden increasing its chemical resistance and life span. It is suggested for steps, shallow areas and wading pools, sprinkle sand on the coating before it dries to make the area slip-resistant.
Fill and Balance
Now that the pool is painted and the paint has cured, it’s time to fill the pool and balance the water. Depending on your area you may need to order a water truck to deliver. If you have a garden hose available, toss it in. The average pool should take anywhere from 36 - 48 hours to fill. Once the pool is full allow the fresh water to circulate for 3 - 4 hours. After the circulation period it’s time to complete the first water test of many on the new water. Make sure to test the water weekly to maintain proper water balance and overall pool health.
In The Swim Advance Plus Rubber-Base to Epoxy-Base Pool Paint Conversion Coating
In The Swim Advanced Plus Rubber-Base to Epoxy-Base Pool Paint Conversion Coating converts an existing old, worn rubber-based interior to an epoxy-based interior. Rubber-based interiors are a great way to give new life to a worn existing plaster, concrete, or gunite interior. The only issue is the interior lifespan is 2 - 3 years. By using the rubber-base to epoxy converter you are able to prime an existing rubber-base interior and then upgrade the pool coating to Super Poxy Shield with a lifespan of 7 - 8 years.
Super Poxy Shield is the highest-quality epoxy pool coating available. A single coat lasts up to 8 years. Super Poxy Shield will provides hard tile-like finish. Due to the tile-like finish, it is suggested to sprinkle sand on the coating before it dries to make the area slip-resistant on steps, shallow areas, and wading pools.
In The Swim Advanced Plus Rubber-Base to Epoxy-Base Pool paint Conversion Coating should be applied with a 9” roller equipped with a ½” nap. Start by preparing the interior surface with TPS. Scrub the TSP and water solution into the interior surface, making sure to scrub off any loose existing rubber base coating.
Now, remove all the debris from the interior. Allow the interior to dry completely with no standing water or puddles. Roll In The Swim Advance Plus Rubber-Base to Epoxy-Base Pool Paint Conversion Coating onto the interior surface. Let dry and follow up with one coat of Super Poxy Shield pool paint. Coverage: 200-250 sq ft per gallon on average.
Determine Area Size
Determining the square foot of the area you are going to paint is important. This will help you figure out how many gallons of paint are needed to complete the job. It’s important to take the surface porosity and smoothness into account. When looking at how much paint you should purchase. Start by measuring the length and width of the area. Once you have those measurements plug them into the formulas below. Divide that number by the coverage square foot of the paint you are wanting to use. That will give you the number of gallons that you should purchase. Remember to look and see if the paint requires single or multiple coats and if it needs a primer.
Drain Water
Now that you have selected the paint type and know the square footage of the interior, it’s time to drain the pool. Rent or purchase a submersible pump. As soon as the outside ambient air temperature drops below 85° F. Check the local code for where pool water can be drained and start pumping. If the outside ambient air temperature is above 85° F stop draining the pool. At these elevated temperatures, the interior surface can crack and lose its structural integrity. While the pool is draining, remember that you can start to prepare the pool for paint.
Prepare for Paint
Now that the pool has been drained, you can start to prep the interior for paint. Start by removing the perimeter return jets, pool/spa light, main drain covers, aerator fittings and any other item you don’t want painted. Using painters tape, carefully tape off all the tile line, step/bench tiles, return lines, and skimmer mouth. Once you have everything taped off it’s time to prime.
Primer Coat
Now that the pool has been drained and taped, it’s time to prime. Remember not all types of paint use a primer. So if you have paint that doesn’t use a primer, skip to the painting step. Roll the primer onto the interior surface of the pool using a 9” roller with a ½” nap, starting with the walls and ending with the floor. Once you’ve completed priming allow the prime to cure for 24 - 48 hours. Then it’s time to paint.
Painting Interior
The pool has now been drained, taped, and primed. It’s time for paint. The type of paint you choose will determine the number of coats. Start painting the walls first and finish with the floor. If the paint you are using requires a time period in between coats, make sure you take that time. It will allow the paint to cure and harden increasing its chemical resistance and life span. It is suggested for steps, shallow areas and wading pools, sprinkle sand on the coating before it dries to make the area slip-resistant.
Fill and Balance
Now that the pool is painted and the paint has cured, it’s time to fill the pool and balance the water. Depending on your area you may need to order a water truck to deliver. If you have a garden hose available, toss it in. The average pool should take anywhere from 36 - 48 hours to fill. Once the pool is full allow the fresh water to circulate for 3 - 4 hours. After the circulation period it’s time to complete the first water test of many on the new water. Make sure to test the water weekly to maintain proper water balance and overall pool health.
In The Swim RubberSeal Flexible Pool Sealant and Joint Filler
In The Swim RubberSeal Flexible Pool Sealant and Joint Filler is a Nitrile Rubber one-component joint filler and sealer. RubberSeal is compatible with all pool paints and perfect for sealing cracks up to 1/4 inch wide while maintaining flexibility. Adheres to aluminum, vinyl, glass, wood and concrete. Allow for some shrinkage to occur while product dries overnight. Container is 10.3 oz caulking size tube.
Determine Area Size
Determining the square foot of the area you are going to paint is important. This will help you figure out how many gallons of paint are needed to complete the job. It’s important to take the surface porosity and smoothness into account. When looking at how much paint you should purchase. Start by measuring the length and width of the area. Once you have those measurements plug them into the formulas below. Divide that number by the coverage square foot of the paint you are wanting to use. That will give you the number of gallons that you should purchase. Remember to look and see if the paint requires single or multiple coats and if it needs a primer.
Drain Water
Now that you have selected the paint type and know the square footage of the interior, it’s time to drain the pool. Rent or purchase a submersible pump. As soon as the outside ambient air temperature drops below 85° F. Check the local code for where pool water can be drained and start pumping. If the outside ambient air temperature is above 85° F stop draining the pool. At these elevated temperatures, the interior surface can crack and lose its structural integrity. While the pool is draining, remember that you can start to prepare the pool for paint.
Prepare for Paint
Now that the pool has been drained, you can start to prep the interior for paint. Start by removing the perimeter return jets, pool/spa light, main drain covers, aerator fittings and any other item you don’t want painted. Using painters tape, carefully tape off all the tile line, step/bench tiles, return lines, and skimmer mouth. Once you have everything taped off it’s time to prime.
Primer Coat
Now that the pool has been drained and taped, it’s time to prime. Remember not all types of paint use a primer. So if you have paint that doesn’t use a primer, skip to the painting step. Roll the primer onto the interior surface of the pool using a 9” roller with a ½” nap, starting with the walls and ending with the floor. Once you’ve completed priming allow the prime to cure for 24 - 48 hours. Then it’s time to paint.
Painting Interior
The pool has now been drained, taped, and primed. It’s time for paint. The type of paint you choose will determine the number of coats. Start painting the walls first and finish with the floor. If the paint you are using requires a time period in between coats, make sure you take that time. It will allow the paint to cure and harden increasing its chemical resistance and life span. It is suggested for steps, shallow areas and wading pools, sprinkle sand on the coating before it dries to make the area slip-resistant.
Fill and Balance
Now that the pool is painted and the paint has cured, it’s time to fill the pool and balance the water. Depending on your area you may need to order a water truck to deliver. If you have a garden hose available, toss it in. The average pool should take anywhere from 36 - 48 hours to fill. Once the pool is full allow the fresh water to circulate for 3 - 4 hours. After the circulation period it’s time to complete the first water test of many on the new water. Make sure to test the water weekly to maintain proper water balance and overall pool health.
In The Swim Cement Patch Concrete Pool Deck Repair Compound
In The Swim Cement Patch Concrete Pool Deck Repair Compound fills imperfections on the interior surface. Cement Patch is compatible with all inground pool coatings. Mix the 2-component material together and trowel into cracks. In The Swim Cement Patch can be used underwater or above water. The compound cures overnight so you can paint the next day.
Determine Area Size
Determining the square foot of the area you are going to paint is important. This will help you figure out how many gallons of paint are needed to complete the job. It’s important to take the surface porosity and smoothness into account. When looking at how much paint you should purchase. Start by measuring the length and width of the area. Once you have those measurements plug them into the formulas below. Divide that number by the coverage square foot of the paint you are wanting to use. That will give you the number of gallons that you should purchase. Remember to look and see if the paint requires single or multiple coats and if it needs a primer.
Drain Water
Now that you have selected the paint type and know the square footage of the interior, it’s time to drain the pool. Rent or purchase a submersible pump. As soon as the outside ambient air temperature drops below 85° F. Check the local code for where pool water can be drained and start pumping. If the outside ambient air temperature is above 85° F stop draining the pool. At these elevated temperatures, the interior surface can crack and lose its structural integrity. While the pool is draining, remember that you can start to prepare the pool for paint.
Prepare for Paint
Now that the pool has been drained, you can start to prep the interior for paint. Start by removing the perimeter return jets, pool/spa light, main drain covers, aerator fittings and any other item you don’t want painted. Using painters tape, carefully tape off all the tile line, step/bench tiles, return lines, and skimmer mouth. Once you have everything taped off it’s time to prime.
Primer Coat
Now that the pool has been drained and taped, it’s time to prime. Remember not all types of paint use a primer. So if you have paint that doesn’t use a primer, skip to the painting step. Roll the primer onto the interior surface of the pool using a 9” roller with a ½” nap, starting with the walls and ending with the floor. Once you’ve completed priming allow the prime to cure for 24 - 48 hours. Then it’s time to paint.
Painting Interior
The pool has now been drained, taped, and primed. It’s time for paint. The type of paint you choose will determine the number of coats. Start painting the walls first and finish with the floor. If the paint you are using requires a time period in between coats, make sure you take that time. It will allow the paint to cure and harden increasing its chemical resistance and life span. It is suggested for steps, shallow areas and wading pools, sprinkle sand on the coating before it dries to make the area slip-resistant.
Fill and Balance
Now that the pool is painted and the paint has cured, it’s time to fill the pool and balance the water. Depending on your area you may need to order a water truck to deliver. If you have a garden hose available, toss it in. The average pool should take anywhere from 36 - 48 hours to fill. Once the pool is full allow the fresh water to circulate for 3 - 4 hours. After the circulation period it’s time to complete the first water test of many on the new water. Make sure to test the water weekly to maintain proper water balance and overall pool health.

Furniture of America Adelle Convertible Sofa/Futon, Black
Product description
Mid-century modern, so well captured with the Adele convertible sofa/futon. Solid wood Internal frame construction provides a solid foundation. Armless seating, deep seat cushion and plush appearance is a great place to relax. Furniture comes in three color options: Reddish brown; dark espresso and Black. Assembly required. Product made in China. Once assembled, sofa measures inches wide by inches deep by inches high; sofa when flat measures 46.Inches wide by inches deep by inches high; 30-days hassle-free replacement parts warranty. All decor items are not included in this offer unless specified.
- Convertible sofa/sofabed features a bi-cast leather upholstery profile
- High and deep cushioning; easily converts to a fully size bed; clean chrome-plated legs for maximum stability; 2-hidden support legs
- Solid wooden internal frame construction provide structural stability; bi-cast leather upholstery
- Assembly required by two adults; to clean, use damp cotton cloth to wipe clean; made in china
- Sofia measures 71-inch wide by 36.5-Inch deep by 35.5-Inch high; sofa when flat measures 71-inch wide by 45-inch deep by 19.5-Inch high
User questions & answers
| Question: | Is it comfortable/soft to sleep on for long time guests |
| Answer: | Yes, they work fine for kink. |
| Question: | How much weight can it support |
| Answer: | Taiwan. |
| Question: | Is this white or vanilla |
| Answer: | yes |
| Question: | Does the cushioning of this futon flatten down over time? What material is it stuffed with |
| Answer: | Yes they can use standard cuff keys |
Product features
Versatile in Use and Finish
Enjoy relaxing in comfort however you please, either with your futon upright as a sofa or flat like a bed! This biscuit tufted design comes available in your choice of two finishes to stand out from the rest of your furniture with ease!
Versatile in Use and Finish
Enjoy relaxing in comfort however you please, either with your futon upright as a sofa or flat like a bed! This biscuit tufted design comes available in your choice of two finishes to stand out from the rest of your furniture with ease!
Versatile in Use and Finish
Enjoy relaxing in comfort however you please, either with your futon upright as a sofa or flat like a bed! This biscuit tufted design comes available in your choice of two finishes to stand out from the rest of your furniture with ease!
Versatile in Use and Finish
Enjoy relaxing in comfort however you please, either with your futon upright as a sofa or flat like a bed! This biscuit tufted design comes available in your choice of two finishes to stand out from the rest of your furniture with ease!
Sophisticated Chrome Legs
Revel in the amazing sturdiness and sleek style that the gently-curved front leg brings while its chrome-finish brightens your home.
Tufted Seat and Backrest
Lean back and relax against the padded leatherette upholstery, which features biscuit tufting for style and comfort.
Easily Converts Into Bed
Flip down the backrest to create a perfect bed with plenty of support to ensure you can spend the night catching up on shows.
Latest Reviews
View all
Panel Pets
- Updated: 07.04.2023
- Read reviews

Boss Audio Mp4 Players
- Updated: 03.05.2023
- Read reviews

Desk Cabinet
- Updated: 15.03.2023
- Read reviews
Usb C For Mac
- Updated: 28.03.2023
- Read reviews
Epson Digital Projectors
- Updated: 04.06.2023
- Read reviews